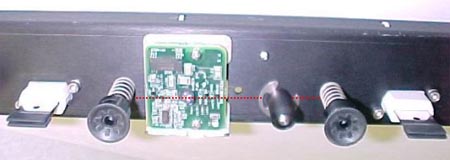
Procedure |
|
Note: The latest version of the paper metal detector is already
installed on the improved XY bar (500-00951A) for the MCU small (6 suction
cups). This latest version of the paper metal detector cannot be installed
on the 5-suction cup bar.
- Move the XY bar to position X=600,Y=50.
- Open the upper door.
- Shut down the application and the Lotem machine.
Removing the XY bar
- Remove the three screws from the XY vacuum system cover, and then
remove the cover.
- Disconnect the blue air pipes:
- MCU small—mark the locations of the three blue air pipes
and then disconnect them.
- MCU non-small—mark the locations of the two blue air
pipes and then disconnect them.
- Disconnect the chain belt by removing the two screws on the XY bar.
- Disconnect the XY harness from the paper/metal detector and the barflag
detector.
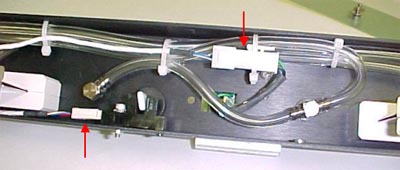
- Remove the two screws on each side of the XY bar support flange, and
then remove the XY bar.
Installing the XY bar
Note: Use Loctite® adhesive on all screws.
- Insert the XY bar in the machine. Secure it to the support flanges
on each side with the two screws that you removed in step 5 above.
- Connect the XY harness to the paper/metal detector and to the barflag
detector. Secure the harness with ties.
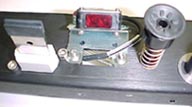 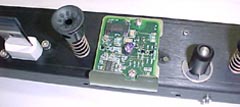
|
5 suction cups
|
6 suction cups
|
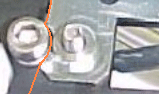
Note: For the 5-suction cup bar, the earlier type of paper/metal
detector may or may not have a groove in the metal to accomodate the
screw. If you are replacing the paper/metal detector, make sure that
the new one has this groove, shown following.
- Connect the chain belt to the barflag with the two screws that you
removed earlier.
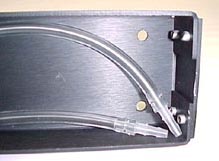
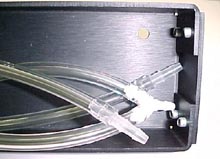
- Reconnect the air pipes.
|
5 suction cups
|
6 suction cups
|
- Install the XY vacuum system cover and secure it with the three screws
that you removed in step 1 above.
Testing the operation of the XY bar
- Turn on the platesetter and start the Lotem Controller application.
- Move the XY bar upward and verify that the detector status remains
ON the whole time.
- Put a piece of paper in the tray and verify that the detector status
is OFF when the XY bar is all the way down.
- Move the XY bar upward and verify that it stays OFF most of
the way up.
- Select Hardware > Loading System > Loading
Plate to Drum Valve > XY Vacuum Pump.
- Click the Start button and verify that the vacuum generator
works. (You should hear air coming from the vacuum geneartor.) Do not
close the pump.
- Check if there is vacuum in the suction cups:
- MCU small
- Select XY Suction Valve, and click Start to check
if there is vacuum in the extreme outer suction cups.
- Select Small Plate Suction Valve and click Start
to check if there is vacuum in the inner suction cups.
- MCU non-small
- Select XY Suction Valve, and click Start to check
if there is vacuum in the extreme outer suction cups.
- Select Small Plate Suction Valve and click Start
to check if there is vacuum in the inner suction cups.
- Select Large Plate Suction Valve and click Start
to check if there is vacuum in the middle suction cups.
- Select Close the XY Vacuum Pump.
- Select Hardware > Loading System > Loading
Plate to Drum > Y System and select Bar flag 1 detector.
- Move the XY bar down to the tray and then up, and verify a change
in the detector status.
- Load several plates, including paper removal, to ensure good operation
of the platesetter.
Important: If the vacuum did not grab plate error
message appears, it indicates that the bar flag is not supported by the
thin plates (0.15 mm) due to the location of the bar flag on the
loading bar.
in the registry, reduce the value of the -X Backward Relative for 0.15
parameter for the loading bar during plate pick-up. (The default of 16,
is too high.)
|