Procedure
|
|
- Move the XY bar to position X=600,Y=50.
- Open the upper door.
- Shut down the application and the Lotem machine.
Removing the XY bar
- Remove the three screws from the XY vacuum system cover, and then
remove the cover.
- Disconnect the blue air pipes:
- MCU small—mark the locations of the three blue air pipes
and then disconnect them.
- MCU non-small—mark the locations of the two blue air
pipes and then disconnect them.
- Disconnect the chain belt by removing the two screws on the XY bar.
- Disconnect the XY harness from the paper/metal detector and the barflag
detector.
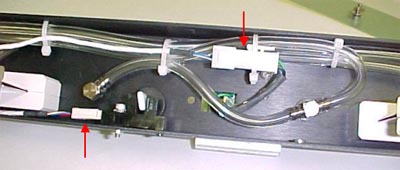
- Remove the two screws on each side of the XY bar support flange, and
then remove the XY bar.
Installing the XY bar
Note: Use Loctite® adhesive on all screws.
- Insert the XY bar into the machine and secure it to the support flanges
on each side with the two screws that you removed in step 5 earlier.
- Connect the XY harness to the paper/metal detector and to the barflag
detector and secure the harness with ties.
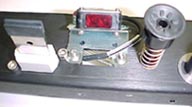 |
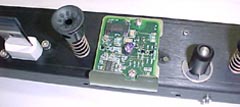 |
|
5 suction cups
|
6 suction cups
|
Note: For the 5-suction cup bar, the earlier type of paper/metal
detector may or may not have a groove in the metal to accomodate the
screw. If you are replacing the paper/metal detector, make sure that
the new one has this groove, shown following.
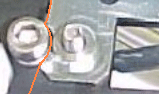
- Connect the chain belt to the barflag with the two screws that you
removed earlier.
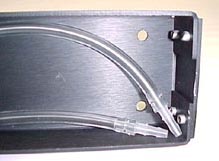
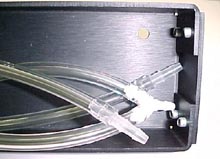
- Reconnect the air pipes.
 |
 |
|
5 suction cups
|
6 suction cups
|
- Install the XY vacuum system cover and secure it with the three screws
that you removed in step 1 above.
Testing the operation of the XY bar
- Turn on the platesetter and start the Lotem Controller application.
- Move the XY bar upward and verify that the detector status remains
ON the whole time.
- Put a piece of paper in the tray and verify that the detector status
is OFF when the XY bar is all the way down.
- Move the XY bar upward and verify that it stays OFF most of
the way up.
- Select Hardware > Loading System > Loading
Plate to Drum Valve > XY Vacuum Pump.
- Click the Start button and verify that the vacuum generator
works. (You should hear air coming from the vacuum geneartor.) Do not
close the pump.
- Check if there is vacuum in the suction cups:
- MCU small
- Select XY Suction Valve, and click Start to check
if there is vacuum in the extreme outer suction cups.
- Select Small Plate Suction Valve and click Start
to check if there is vacuum in the inner suction cups.
- MCU non-small
- Select XY Suction Valve, and click Start to check
if there is vacuum in the extreme outer suction cups.
- Select Small Plate Suction Valve and click Start
to check if there is vacuum in the inner suction cups.
- Select Large Plate Suction Valve and click Start
to check if there is vacuum in the middle suction cups.
- Select Close the XY Vacuum Pump.
- Select Hardware > Loading System > Loading
Plate to Drum > Y System and select the Bar flag 1 detector.
Move the XY bar down to the tray and then up, and verify a change in
the detector status.
- Load several plates, including paper removal, to ensure good operation
of the platesetter.
|

