Procedure |
|
Removing
the cooling fan unit
- From the Controller application, open the front and rear doors.
- Exit the Controller application and shut down the device.
- Open the front and back panels.
- From the back of the device, disconnect the grounding and fans cables.
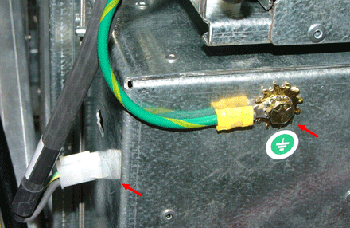
- Remove the following hex screws from the cooling fan unit:
- Back side—remove two hex screws
- Back top—loosen two hex screws
- Front top—loosen two hex screws
- Front side—remove two hex screws
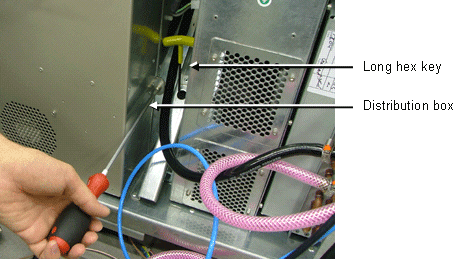
- Open the distribution box door to enable access to the three hex screws
that secure the cooling fan unit to the mainframe base, and remove the
three hex screws.
Note: You need a long hex key to remove one of the
screws.
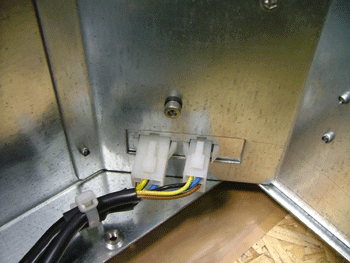
- From the outside of the cooling fan unit, disconnect the molexes.
- Pull out the cooling fan unit.
Removing the fan
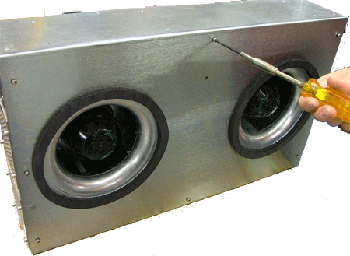
- Remove the eight hex screws from the cooling fan unit and remove the
cover.
- Remove the four nuts that secure the defective fan.
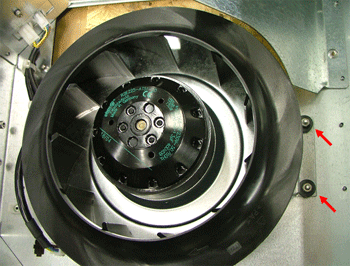
- Disconnect the connector from the fan motor.
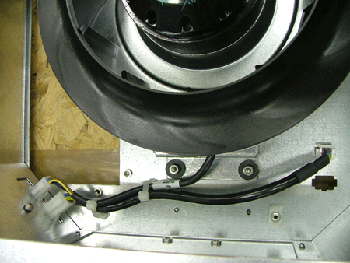
- Remove the fan.
Installing the new cooling fan
- Insert the new fan.
- Reconnect the fan motor connector.
- To secure the new fan, insert and tighten the four nuts that you removed
earlier.
- Reinstall the cover on the cooling fan unit and secure it with the
eight hex screws that you removed earlier.
Installing the cooling fan unit
- Place the cooling fan unit in its correct position inside the platesetter.
- From the outside of the cooling fan unit, connect the molexes that
you disconnected earlier.
- Secure the cooling fan unit to the mainframe base with the three hex
screws that you removed in step 8.
- Close the distribution box door.
- Secure the cooling fan unit with the following hex screws:
- Front side—insert and tighten two hex screws
- Front top—tighten two hex screws
- Back top—tighten two hex screws
- Back side—insert and tighten two hex screws
- Reconnect the grounding and fans cables.
- Close all panels and doors.
|

