

Home | Contact Us | Submit Troubleshooting Info | Search | Help
Output | Software Solutions | Proofing | Color, Screening and Calibration | Scanning | Digital Photography | Consumables | POS
Home | Contact Us | Submit Troubleshooting Info | Search | Help
Output | Software Solutions | Proofing | Color, Screening and Calibration | Scanning | Digital Photography | Consumables | POS
| Type of Change: | Conditional |
| Machine S/N: | Lower than 9826xxxx |
Problem in separating paper from plate (Horsell or Fuji) when plate is already out of cassette-due to static electricity.
Need to insert 2 compressed air injectors and connect to air hoses from manifold. This procedure can only be performed if there is a manifold with 8 outlets already installed. If the manifold contains only 7 outlets replace the manifold to one with 8 outlets that is included in this FCO.
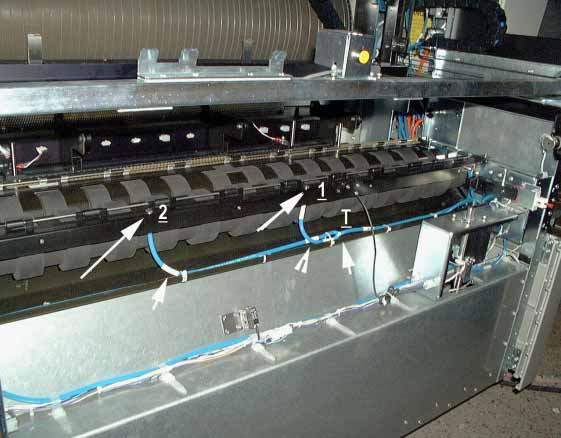
The hole size should be 12 mm or .5 inch. The first hole should be at distance of 70 mm from the paper detector. See picture arrow 1. The second hole should be at distance of 270 mm from the first hole. See arrow 2
Note: Before you drill the 12 mm hole start with smaller driller.
To install the connector for the Paper air please perform the following:
Two connectors are already in use and connected to the Manifold .
The third connector is for the paper air that needs to be connected.
Activate the "Cassette outside air valve" and see that it is working
None
None