

Home | Contact Us | Submit Troubleshooting Info | Search | Help
Output | Software Solutions | Proofing | Color, Screening and Calibration | Scanning | Digital Photography | Consumables | POS
Home | Contact Us | Submit Troubleshooting Info | Search | Help
Output | Software Solutions | Proofing | Color, Screening and Calibration | Scanning | Digital Photography | Consumables | POS
Description :
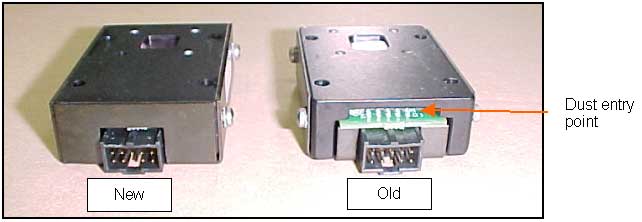
The purpose of this FCO is to eliminate damage to the Light Detector, and its
malfunction, by preventing dust from entering the Light Detector.
|
Prepared By: Itai Peperovich |
FCO Kit No: 510F28131 |
|
Comp. Level: N/A |
Machine S/N: N/A |
|
Catalog No: 509A3E780 |
S/W Affected: N/A |
|
Type of Change:Conditional |
Estimated time to implement: 1 hour |
|
Product Mgr: Nir Halup |
Approval Date: |
|
Product Support: Itai Peperovitch |
Approval Date: 7-3-2002 |
|
Customer Support Mgr: Yaron Soffer |
Approval Date: |
Required Tools:
Performing Shutdown
- From the application, move the Carriage Motor to 800.
- From the application, open the rear door.
- Remove the upper back cover.
- Exit the application.
- Turn off the machine.
Replacing the Light Detector
- Disconnect the Light Detector Connector wiring from the Light Detector.
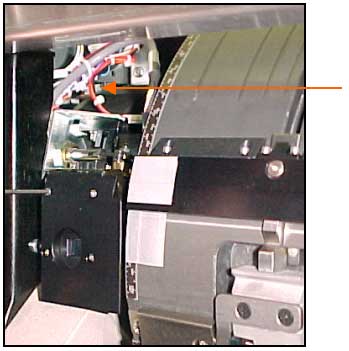
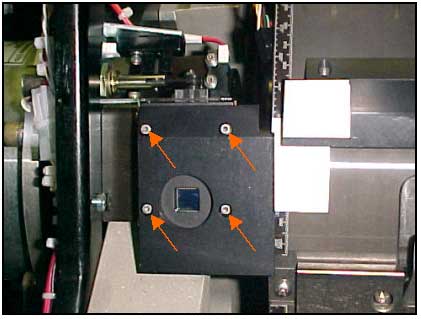
- Open the 4 screws on the Light Detector with a 3/32" Allen key.
- Remove the Laser Protective Cover from the Light Detector.
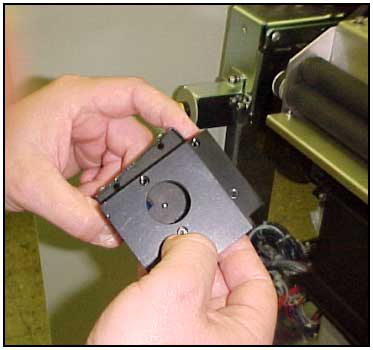
- Before installing the new Light Detector, record its LDT Factor. You will enter this number in the registry later.
- Check the lens to make sure that there are no fingerprints on it. If there are, clean it with alcohol and acetone.
- Put Loctite 242 on the ends of each Allen screw.
- Re-Install the Light Detector with its Laser Protective Cover by tightening the 4 screws.
- Check that the Light Detector does not touch the Tail Gripper bar.
- Re-connect the Light Detector Connector.
Starting Up
- Turn on the machine.
- Close the upper back cover.
- Close the rear door.
- Log on to the application. The Carriage automatically returns to HP.
- Check the application to make sure that the machine is in ready state.
Recording the LDT Factor
Important: You must register the LDT factor.
- Access the Light Detector Properties dialog box.
Expose System>Laser System>Light Detector
- Register the LDT factor that you recorded in the Value column for the following parameters:
- High Dac Factor
- Low Dac Factor
- Click Apply.
- Close the dialog.
| PART | QTY | DESCRIPTION |
| 509A3E780 | 1 | Light Detector Assy III |
| !FCO-DOC | 1 |
| CAM | : | 50 |
| CEU | : | 50 |
| CAP | : | 20 |
| CJP | : | 20 |
| CMA | : | 20 |
| Other | : | |
| No Limit |
| D.U | Month | QTY | Month | QTY | Month | QTY | |
| CMA | : | July | 50 | ||||
| CEU | : | July | 50 | ||||
| CAP | : | July | 20 | ||||
| CJP | : | July | 20 | ||||
| CMA | : | July | 20 | ||||
| Other | : |