Home | Contact Us | Submit Troubleshooting Info | Search | Help
Output | Software Solutions | Proofing | Color, Screening and Calibration | Scanning | Digital Photography | Consumables | POS
Home | Contact Us | Submit Troubleshooting Info | Search | Help
Output | Software Solutions | Proofing | Color, Screening and Calibration | Scanning | Digital Photography | Consumables | POS
The following paragraphs describe the planned maintenance procedures.
Enclosed you will find a complete list of the procedures and how often it should be carried out. It is the duty of the service engineer to instruct the operator on how to perform the customer procedures and to make sure that they are being carried out.
A well-performed P.M., on a regular basis, can save quite a few of the problems that you have during the service calls.
Maintenance -The silicon oil that is used can be ordered for preventive maintenance separately.
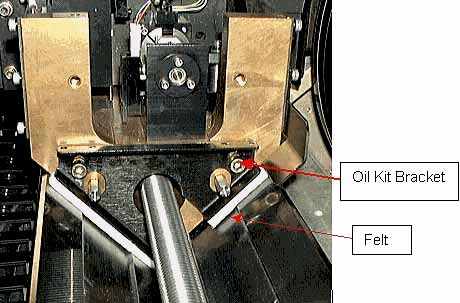
Apply oil to the felt
| Replace the oil brackets every six months. |
Note: Due to safety reasons the oil is not shipped with each machine and must be ordered separately.
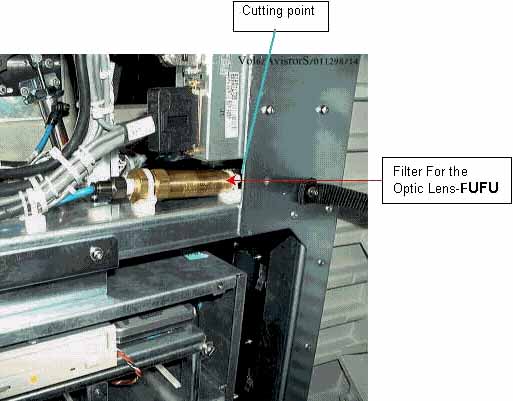
| The filter for the optic lens (FUFU) needs to be replaced every year. |
Filter P/N - 342A10305.
Maintenance
Maintain your vacuum pump regularly to achieve the best operating results. Before
commencing maintenance, remove mains plug from socket to avoid unintentional restarting.
Dirty inlet filter or blocked air degrease elements will reduce air intake capacity. To
avoid over heating clean the fan cover, fan grill, and surfaces of the pump.
Oil exchange
The oil level must not be lower than the middle of the oil indicator [4] and should reach
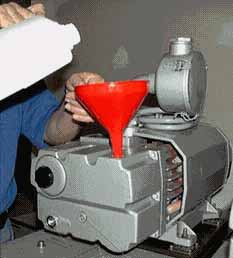
up to 2/3 of this indicator. See Figure 2. Filling Oil Vacuum Pump
| Oil exchange at least once every 6 months |
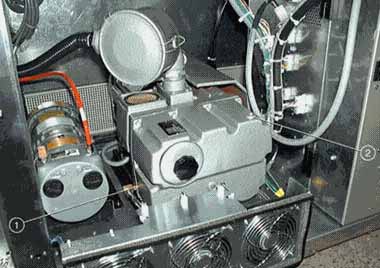
Drain - The old oil is drained at the draining outlet [1] while the pump is switched off You will find the draining tube already connected to the draining outlet.
Figure 2. Filling Oil Vacuum Pump
Changing oil separation cartridge
| This cartridge must be replaced every six months. |
Scitex P/N - 342D10000.
Figure 3. Oil Cartridge Replacement
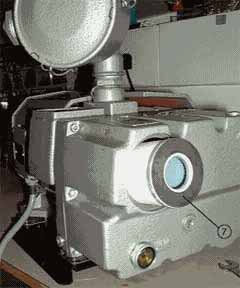
Note: The pressure disc is cone shaped and the cone must be opposite the filter.
| The Air filter should be clean every six months and replaced every 12 months. See below the location of the air filter that needs to be replaced. |
Figure 4. Air filter Replacement

| Fill - Swivel Deublin rotation union lubrication Quantity: 4-5 drops per 3 month. |
Type: High quality SAE 30 motor oil.
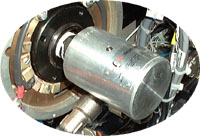
| This procedure should maintain more often on customer site that using Kodak Plates. |
Note: Do NOT remove the lens protector for cleaning, you may affect the focus.
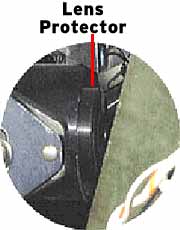
As you may notice on machines in the field (especially users of Kodak plates) there are particles remaining from plate ablation on the drum and the V block.
These particles on the drum can cause on exposed plates, spots in a variety of places and also there may be as a result attachment problems.
| You must instruct operators to clean both the Drum and the V Block with a damp cloth. |
This should be maintained according to the particles remaining on the Drum. The cleaning process should be performed at least once a week.
Enable Detector
| Clean the "ENABLE load gripper detector" from the green dust that came from Kodak plate. The detector is on the RIGHT side of the machine, under the drum. If the detector will be covered with dust the pins that activate the pins will be vibrate few times due to on/off signal from the enable detector |