The Following is a procedure for upgrading Lotem 800 in the
field from 24 beams to 48 beams.
Prior to the installation
In order to upgrade the Lotem 800 you must have the following:
FCO version 2.2 . This FCO includes the new DDB –1-N and the latest
Lotem S/W 2.2.08.
The new TSP Kit which includes the new TSP board and all the accessories
relevant to the Lotem and The Brisque. Refer to the Lotem content/TSP upgrade
procedure.
Tools required for implementing the procedure:
Assembling jig for the Lead Screw (threaded pin for insertion of the lead
screw coupling into the carriage).
Pallet jack or alike for assembling, disassembling and moving the E-box
conveniently is recommended.
Upgrade Procedure
Exit Software and shot machine main power off, open the left door and turn
the L-box power switch off.
Disassemble Lead Screw. (You must take off the right Local box in order to
access the Lead Screw bearing housing bolts).
There are 3 cables connected to the carriage you need to
release, in order to take the carriage with the L–box out of the machine;
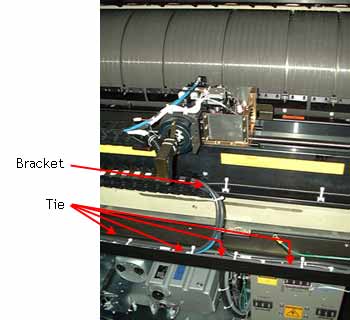
Cut tie-wraps and release (Figure # 1):
Focus cable from carriage to left Local.
Resolution cable from carriage to right Local.
FUFU hose from carriage to main air manifold.
Unscrew the bracket at the end of the black plastic chain guide (Figure
# 1).
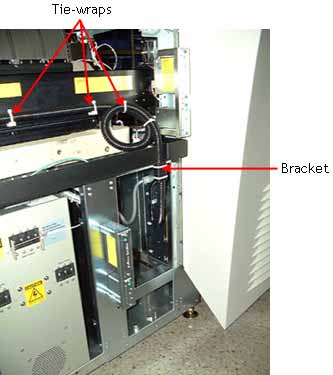
Unscrew the bracket and release the black flexible hose of the optic
fibers (Figure # 2)
Unhook the power cable from the Distribution box to the L-box.
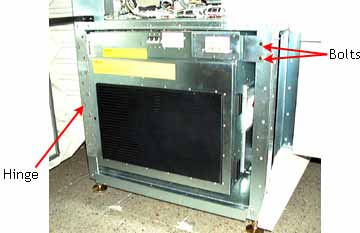
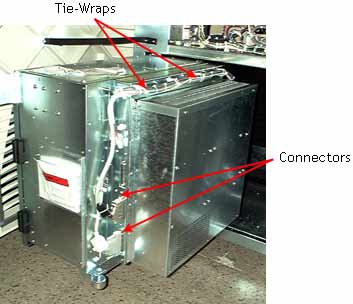
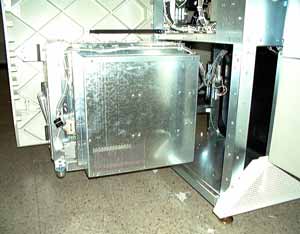
Unscrew 2 bolts on left side of the L-box ,pull the L-box out ,disconnect
connectors and Release cables after cutting tie-wraps (Figure
# 3).
Pull the L-box about 60 degrees out and support it underneath ( keep
enough access to the screws attaching the L-box hinge on the right to the
main frame ). It’s recommended to have an adjustable rolling support that
will let you pull the heavy L-box away from the main frame and then install
the new one conveniently.
Pull the L-box away from the main frame and then have someone hand you
over the Carriage through the frame (see Figure # 2).
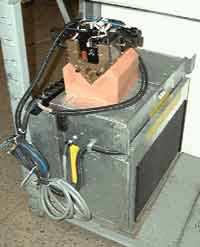
Attach the carriage on top of the L-box and carry it away with someone to
help you (See Figure # 5).
Install the new 48 beams L-box in reversed order.
Define 48 beams in the registry:
Right click ‘Laser Group’ under Utilities/Hardware/Expose System and
change the parameters “Last Expose Laser Active” and “Last Laser
Active” to 47.
Change the parameter “Default Last Laser Number” to 47.
Restart the PC.
Verify the following optic adjustments: Focus, Elevation, Resolution,
Intensity, Delay.