In order to upgrade to dual loading cassette you must have the following:
A For machines with Local 2 board:
501R49081 - Lotem 800 Dual Cass and Trolley
B For machines with Local 3 Board:
501R49395 - Lotem 800 Dual Cass and Trolley
Note: Some primary machines that were produced during July 2000 with
Local 3 board do not have the special loading panel.
In these cases you also have to order:
510P1P283 - Loading Panel +Pack
C Application version 3.0 or higher
D Brisque Ver. 3+ Upd 1.35 or higher
E Tilted Paper/Metal Detector
Installation procedure for local 2 machines which are not DLC-ready
Most Local2 machines (until mid 1999) are not ready for DLC at all- in these
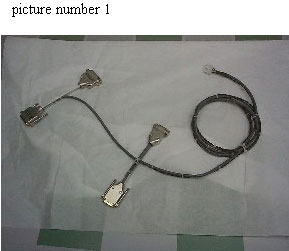
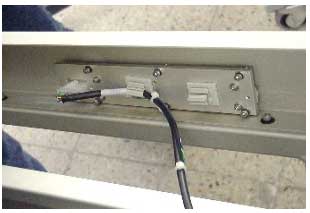
machines you have to install adaptor harness (P/N 504N3E177- picture #1) between
the left Local box and the female connector on the loading panel.
Release the single cassette and disassemble old loading panel from machine.
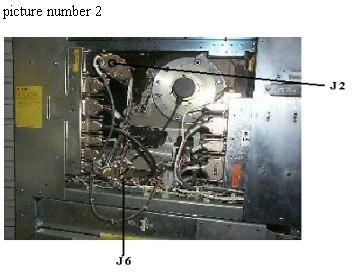
Install adaptor harness 504N3E177 (see picture #1); Branch J2 connects between
left Local J2 and Local box J2, branch J6 connects to left Local harness J6
and Local box J6 (see picture # 2).
picture number 1- Adaptor Harness for Local2 Machines which are DLC-Ready
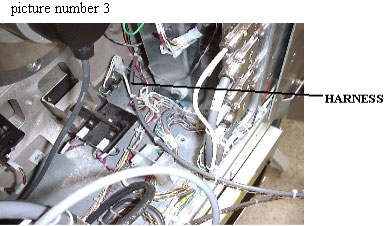
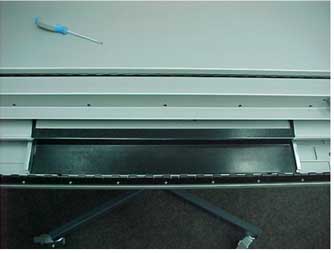
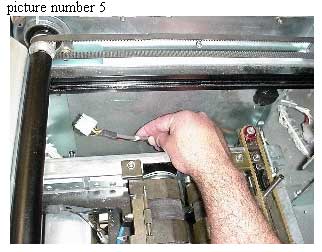
Insert the cable with the connector inside the machine undernea the centering
system (see pictures # 3,4), upon completion pass the connector through the
paper bin to the cassette panel (see picture # 5).
Assemble
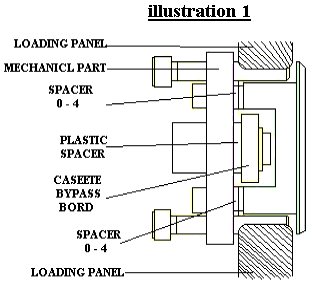
the Dual cassette board on the new panel with 6 screws (see illustration
1) and use 0-4 spacers to position the panel as required. Secure the board
with 6 extra screws (tension screws), pay attention to the connector direction
facing the inside of the machine (See picture # 7).
Install the new cassette panel on the machine and route the harness around
the cassette opening (see picture # 6).
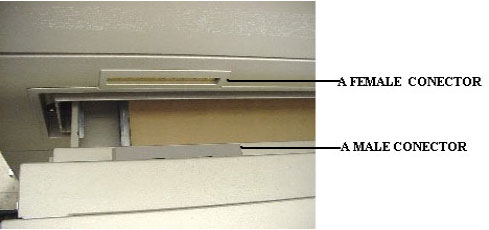
picture number 6 -Female Connector and Harness
Readjust the machine height if necessary so the female connector aligns
with male connector in the cassette (see picture #7). It's very important to keep the machine leveled during and After this process.
picture number 7
Note: 5V short circuit can occur if cassette pins touch the cassette
panel surface, therefore it is highly important not to readjust machine height
when the power is switched on.
Install tilted paper detector (if not already installed).
Adjust centering mechanisms of main compartment to align with machine center
(There are slotted holes for the screws attaching the centering guides to
the centering belt). Center the upper tray centering mechanism relative to
main compartment centering using the centering jig (see picture #8).
Adjust the black flags that activate the bypass inside/outside detectors
if necessary (flags have slotted holes and are accessible from upper Compartment).
Readjust other customers' cassette height according to new machine height
if necessary (use washers supplied).
Picture 8- Centering Jig
Installation for local 2, Dual cassette ready machines
Last Local 2 machines (from mid 1999 to mid 2000) were produced with the
adapter harness (adaptor harness 504N3E177 - picture #1) already installed;
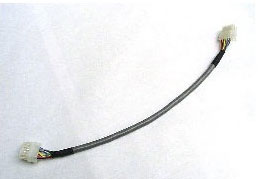
For these machines you need another adaptor (P/N 504L3E035 -see picture#9)
supplied with the new loading panel.
Release the single cassette from the machine and disassemble old loading
panel.
There is a 10 pin male connector labeled New Cass. at the right side of
the paper bin - it has to be transferred to the left side of the machine;
Release the harness (cut securing tie-wraps as necessary) and route the harness
to the left side.
Connect adaptor harness (P/N 504L3E035- bypass cass adaptor local2- see
picture #9) between harness and connector on loading panel.
picture number 9 - Adaptor for Local2,DLC-ready machines
Assemble the Dual cassette female connector on the loading panel with 6
screws (see illustration 1) and use 0-4 spacers if required. Secure the board
with 6 larger screws (tension screws), pay attention to the connector direction
- picture # 6 views the connector from the inside of the machine.
Assemble the new cassette panel, route the harness and adaptor around the
cassette opening and secure them with tie-wraps. (See picture #6).
Readjust the machine height if necessary so the female connector aligns
with male connector in the cassette (see picture #7). It's very important to keep the machine leveled during
and after this process.
Note: 5V short circuit can occur if cassette pins touch the cassette
panel surface, therefore it is highly important not to readjust machine height
when the power is switched on.
Install tilted paper detector (if not already installed).
Adjust centering mechanism of main compartment to align with machine center
(There are slotted holes for the screws attaching the centering guides to
the centering belt). Center upper tray centering mechanism relative to main
compartment centering, using the centering jig (see picture #8).
Adjust the black flags that activate the bypass inside/outside detectors
if necessary (flags have slotted holes and are accessible from upper Compartment).
Readjust other customers' cassette height according to new machine height
if necessary (use washers supplied).
Installation for machines with Local 3 board
Release the single cassette and remove the small cover from the loading
panel.
Assemble the dual cassette female connector on the loading panel with 6
screws (see illustration 1) and use 0-4 spacers if required. Secure the board
with 6 larger screws (tension screws), pay attention to the connector direction
- picture # 6 views the connector from the inside of the machine.
Route the harness around the cassette opening, (see pictures # 6) and secure
with tie-wraps.
Readjust the machine height if necessary so the female connector aligns
with male connector in the cassette (see picture #7). It's very important
to keep the machine level during and after this process.
Note: 5V short circuit can occur if cassette pins touch the cassette
panel surface, therefore it is highly important not to readjust machine height
when the power is switched on.
Install titled paper detector ( if not already installed).
Adjust centering mechanisms of main compartment to align with machine center
(There are slotted holes for the screws attaching the centering guides to the centering belt). Center upper tray centering mechanism
relative to main compartment centering using the centering jig (see picture
#8).
Adjust the black flags that activate the bypass inside/outside detectors
if necessary (flags have slotted holes and are accessible from upper compartment).
Readjust other customers' cassette height according to new machine height
if necessary (use washers supplied).
Configuring the DLC in the software
Confirm that the definition in the Registry is as follows:
Hardware/Others/Lotem 800/machine/loading system type =2
Lotem800/Io OBJECTS/Touch Memory/open = 0
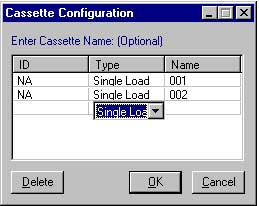
Open the "Cassette Config" window, click on the TYPE column at
a new line once; A drop-down menu will appear with options for single, dual
or multi cassettes (See picture below). Choose the option for 'Dual Loading'
.Type in the NAME you have chosen for the DLC.
Press OK; Two 'Current Cassette' windows will appear, one for
" (NAME)_Upper" and one for "(NAME)_Main".
Type in media name and quantity of plates installed in each
Compartment, press "Apply" and "Close".
Press 'Release Cassette' and attach the cassette to the machine.
Choose 'NAME_ Main' or 'NAME_upper'.
The cassette illustration on the main GUI screen should show now the DLC. Verify your media definition for each compartment of the DLC by right-
clicking on the cassette illustration in the GUI;
A window shall pop up with your media definitions, plate count and current
engaged compartment checked-out.
Test your DLC performance: Load couple of plates from each media size the
customer is using. Switch from Upper to Main and back few times and verify
you get the correct prompts on the GUI.
Expose jobs from a que which requires switching from one compartment to
another, check that all prompts and machine responses are adequate.
For more details about operating the DLC please refer to the "Using
the DLC with L800" user manual (P/N 399Z1R080A) (Attached to the DLC
pack and also can be found in the TIC under "Application Issues")