Home | Contact Us | Submit Troubleshooting Info | Search | Help


    Output | Software Solutions | Proofing | Color, Screening and Calibration | Scanning | Digital Photography | Consumables | POS


Reducing scratches on plates caused by spring spoilers


Product

 
  • Lotem® 800
  • Lotem 800 II
  • Lotem 800 Quantum
  • Lotem 850

Component


Spring spoilers


Symptoms


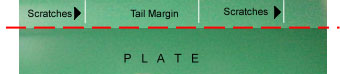
When a plate has been unloaded, tiny scratches appear on the head gripper edge (tail margin) of the plate:


Cause


When a plate is unloaded from the platesetter it is forcibly pulled from the head gripper and spring spoilers. During this process the friction between the spring spoilers and the plate may cause tiny scratches to appear on the edge of the plate. This problem is more prevalent with newer platesetters because the spring spoilers are sharper and therefore they are more liable to cause scratches.


Solution


If the sharp edges of spring rollers are filed down with an oilstone, the amount of scratches on the plates will be greatly reduced, if not eliminated altogether
To file down the spring rollers, do the following:

  1. Open the platesetter's rear door via the Lotem Controller.
  2. Shut down the platesetter via the Lotem Controller.
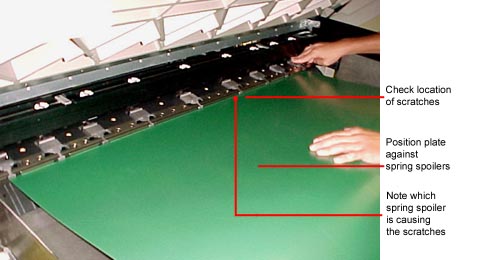
  3. Check which spring spoilers are causing the scratches. To do this, position the edge of the plate (with the scratches) against the head gripper so that the scratches are aligned with their corresponding spring spoilers:


    Note: If the problematic spring spoiler contains an align pin, mark on the drum the exact location of the pin.

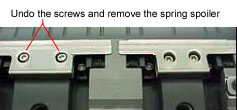
  4. Undo the screws of the problematic spoiler using a hex key #8 and remove the spring spoiler:


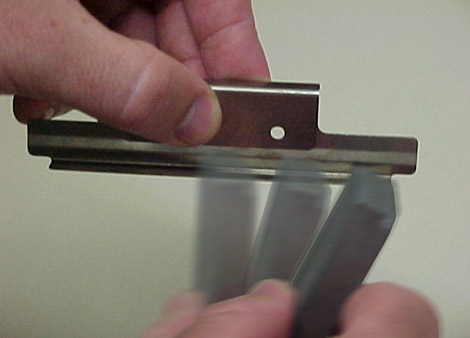
  5. File the sharp edge of the spoiler with an oilstone—part number 481A42100. (Order if necessary.)


  6. Clean the filed edge of the spring spoiler with a cloth soaked in alcohol.
  7. Replace the spring spoiler by replacing the screws you removed in step 4. Dip the screws in Loctite 242 (p/n 480C10192) and tighten them with a torque meter 20 (in/lb).
  8. Close the rear door and start up the platesetter.

Test

 
  1. Check that the plates are correctly loading and unloading.
  2. Check that the plates are correctly attached to the head gripper.
  3. Expose a test plate and examine the plate for scratches.

Technical contact
 

Yaron Shifman

Date submitted
 

23 Jul 2003


    Copyright © 2005 Creo Inc. All rights reserved. Confidential. Back to top.