Home | Contact Us | Submit Troubleshooting Info | Search | Help
Output | Software Solutions | Proofing | Color, Screening and Calibration | Scanning | Digital Photography | Consumables | POS
Home | Contact Us | Submit Troubleshooting Info | Search | Help
Output | Software Solutions | Proofing | Color, Screening and Calibration | Scanning | Digital Photography | Consumables | POS
The CIL Outlook Escalation Form should be used for either opening
a new escalation, editing an existing escalation, or
when closing an open esclation.
Note: A new escalation may only
be opened by the following personnel: CSC-PSMs & CSC-PSSs.
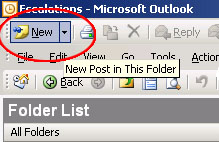
To open a new CIL Outlook Escalation Form (only applicable for CSC-PSMs & CSC-PSSs):
|
Tab
|
Field Name
|
Description
|
| Main Page | Click the Main Page tab to enter details about the problem. | |
| CSC (mandatory) | Enter CSC region. | |
| CSC reference # | Enter CSC reference number. | |
| Problem Description (mandatory) | Enter a brief description of the problem. Note: It is not necessary to enter the customer’s name in this field. |
|
| Priority (mandatory) | Select the priority level. Level 1 denotes that the machine is unusable, whereas level 4 denotes a low priority problem. | |
| Machine Type |
Enter the type of machine experiencing the problem. When selecting a machine type, the names of the people who are responsible
for the machine’s escalation process will be displayed in the
Responsible field. In addition, these people will receive an email
describing the problem. |
|
| CC... | Enter the names of any additional people who may wish to view the problem. The names entered in this field will receive an email describing the problem. | |
| Problem History tab | Enter a brief description outlining the problem. Click the Date/Time/User
Stamp button to insert your name, the current date and current time. Note: When adding text to an existing comment, make sure to enter the new text below the previous entry (at the bottom of the field, not the top). |
|
| Solution tab | Enter a solution to the problem, and click the Date/Time/User Stamp button to insert your name, the current date and current time. | |
| Attachment tab | Attach any files that may help to resolve the problem. | |
| Machine Info | Click the Machine Info tab to enter information about the machine. | |
| Install Date (mandatory) | Enter the date that the machine was installed. | |
| Machine Serial No: (mandatory) | Enter the machine’s serial number. | |
| Machine Software | Click the Machine Software tab to enter information about the machine’s software. | |
| Software Version (mandatory) | Either select a software version number from the drop-down menu, or manually enter a version number in the sapce provided. | |
| FCO | Click the FCO tab to check the FCOs that are installed on the machine and are relevant to this escalation. | |
| Customer Info | Click the Customer Info tab to enter information about the site where the machine is located. | |
| Customer Name (mandatory) | Enter the customer’s name. |
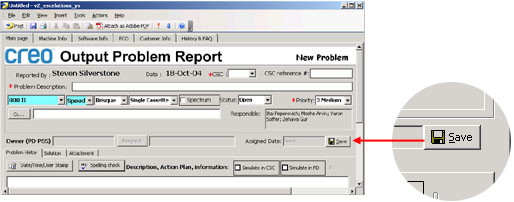
To edit a CIL Outlook Escalation Form:
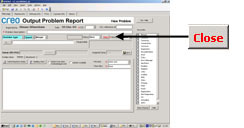
To close an escalation:
Important: Escalations may only
be closed by the person who originally reported the escalation.