Home | Contact Us | Submit Troubleshooting Info | Search | Help
Output | Software Solutions | Proofing | Color, Screening and Calibration | Scanning | Digital Photography | Consumables | POS
Home | Contact Us | Submit Troubleshooting Info | Search | Help
Output | Software Solutions | Proofing | Color, Screening and Calibration | Scanning | Digital Photography | Consumables | POS
The kit should includes the following:
|
Cat Number |
Quantity |
Part name |
| 293A2M083A | 2 | REAR G.S DOOR ADAPT. FLE |
| 347K11104 | 2 | GAS SP. L=225.5-375.5 350N |
| 381A58000 | 4 | HEX.NUT M8 H=6.5 ZINK.PL. |
| 382D20010 | 4 | SPRING L/W STST 5/16" |
| 382D10000 | 12 | SPRING L/W ST ST #8 |
| 380A05041 | 12 | SOC HD CAP STST 8-32*3/8" |
| 290A2S086 | 2 | REAR G.S ADAPTOR LEFT |
| 480C10192 | 1 | ADH.RET.10CC LOCTITE 242 |
Note: You may need to use a metal stick to hold the door during the procedure.
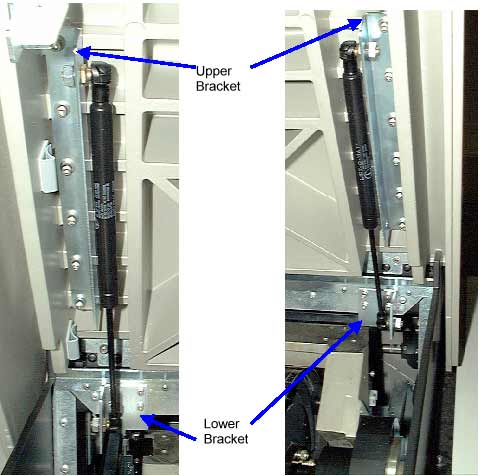
Note: pay attention to the direction of the gas spring as in the figure bellow.
Note: No need to return the old parts.