Procedure |
|
To accessing the clutch and the slow motor full assembly:
- Open the left side door.
- Remove the 3 screws on the left inner panel and remove the panel.
- Exit Controller, turn off the platesetter, and disconnect the power.
To replace the clutch motor:
- Disconnect the clutch wiring connector.
- With a 6-mm hex key, remove the three hex screws on the motor bracket.
- Remove the gear belt.
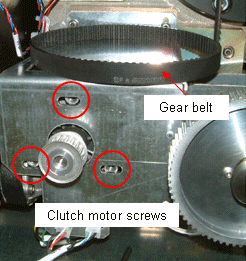
- Remove the clutch motor.
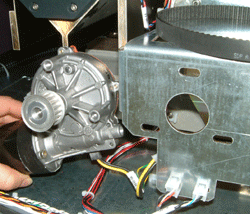
- Install the new clutch motor.
- Fit the gear belt around the gears.
To ensure correct tension, you should not be able to pinch the belt
more than a total of 5 mm.

- Tighten the three 6-mm hex screws that you loosened in step 1.
To replace the clutch and clutch plate:
Note: When replacing the clutch, you must also replace the clutch plate.
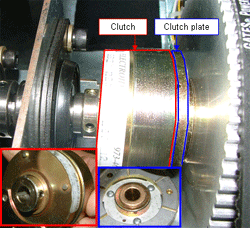
- With a 6-mm hex key, loosen (but do not remove) the three hex screws
on the motor bracket.
- Remove the belt from the gears.
- Remove the two set screws from the gear locker, remove the gear locker,
and then remove the gear.
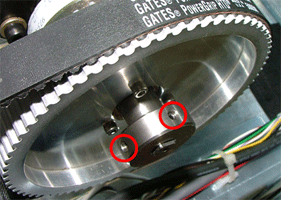
- Remove the three hex screws from the gear and remove the clutch plate.
- Remove the two setscrews from the clutch and disconnect the clutch
wires molex.
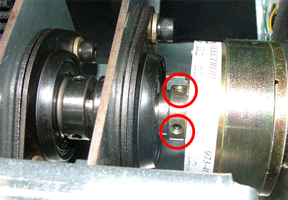
Note: Do not touch the part of the clutch that touches the clutch
plate, as oil from your fingers could reduce the friction.
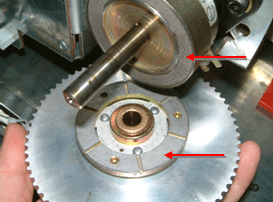
- Remove the clutch.
- Rotate the drum manually to position the axis for the new clutch,
and install the new clutch. Make sure that the pin is in the guide,
and the flat part of the axis is adjacent to the location of the set
screws on the clutch.
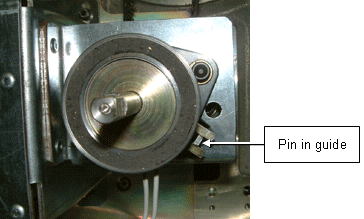
- Connect the clutch wires molex, and insert the two set screws into
the gear and tighten the set screws.
- Install the new clutch plate on the gear and insert and tighten the
three hex screws that you removed in step 4.
- Insert the gear on the clutch shaft.
- Insert the gear locker. Verify that the gear sits firmly on the assembly,
and that there is no play (slack), and then insert and tighten the two
setscrews that secure the gear locker.
- Fit the gear belt around the gears.
- Position the motor assembly so that the gear belt tension is adjusted
properly, and then insert and tighten the three hex screws on the motor
assembly.
To ensure correct tension, you should not be able to pinch the belt
more than a total of 5 mm.
To replace the entire clutch assembly:
- Remove the screw from the bottom of the assembly. In addition to holding
the assembly in place, this screw controls belt tension.
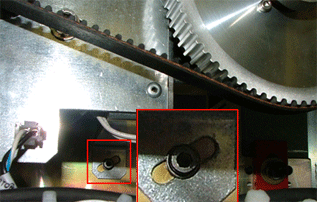
- Remove the two screws on top of the assembly, and remove the assembly.
Note: Keep your hand underneath the assembly to catch it.
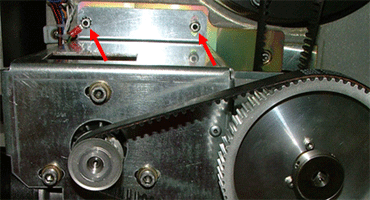
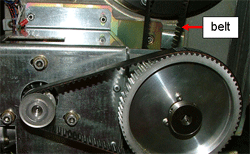
- Remove the clutch assembly.
Note: Make sure that the belt in back is released.
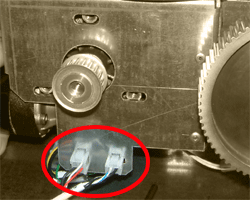
- With the needle-nose pliers, squeeze the two clutch wiring connectors
so that you can release them from the assembly.
- Insert the new clutch assembly.
- Assemble the belt on the gear.
- Insert the bottom screw on the clutch assembly, and tighten this screw
to adjust the belt tension.
To ensure correct tension, you should not be able to pinch the belt
more than a total of 5 mm.
- Insert and tighten the two upper screws in the clutch assembly.
- Connect the two clutch wiring connectors.
|

