Home | Contact Us | Submit Troubleshooting Info | Search | Help
Output | Software Solutions | Proofing | Color, Screening and Calibration | Scanning | Digital Photography | Consumables | POS
Home | Contact Us | Submit Troubleshooting Info | Search | Help
Output | Software Solutions | Proofing | Color, Screening and Calibration | Scanning | Digital Photography | Consumables | POS
Product |
Kodak® Magnus™ 400 |
||
Background |
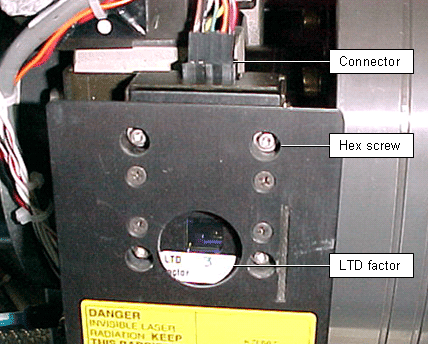
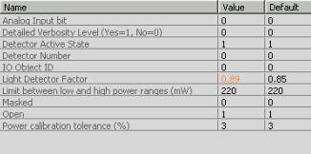
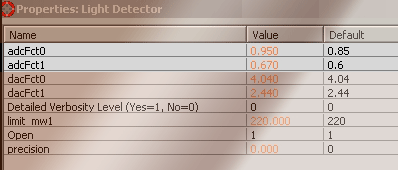
This procedure describes how to replace the light detector and update the LTD factor in the software. |
||
Procedure |
Replacing the light detector
Updating the software For Magnus 400 Controller 1.02.392 and later
For Magnus 400 Controller 1.01.391
|
||
Technical contact(s) |
Content owner: Mario Amir |
||
Date submitted |
20 Oct 2005 |
||