Home | Contact Us | Submit Troubleshooting Info | Search | Help


    Output | Software Solutions | Proofing | Color, Screening and Calibration | Scanning | Digital Photography | Consumables | POS


Calibrating the plate length detector on Magnus 400 version 1.01.391.003 and later


Product


Kodak Magnus 400 platesetter


Background


This procedure describes how to calibrate the plate length detector on the Magnus 400 platesetter.


Procedure


To calibrate the plate length detector:

  1. Before loading a plate, in the Registry Editor, change the Plate Length Tolerance (mm) parameter from 5 (default) to 50.
    HKEY_LOCAL_MACHINE\SOFTWARE\Scitex\Projects\LOTEM400V\IO OBJECTS\Loading System\Load Plate\From Drum entry to Drum Stage
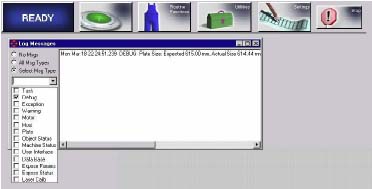
  2. Open the Log dialog box and select Debug.


  3. In the Loading System dialog box, select the plate size to load, and then load a plate.
    The message Expect plate size [mm], Actual Plate size [mm], and the differences between them [error on measurement] appears in the log, indicating the next numbers.
  4. Copy the differences value and add it to the Length from Head Gripper to Right PresetDet (mm) parameter (default = 135).
    HKEY_LOCAL_MACHINE\SOFTWARE\Scitex\Projects\LOTEM400V\IO OBJECTS\Loading System\Load Plate\From Drum entry to Drum Stage
  5. Return the Plate Length Tolerance (mm) parameter to the default value (5).
  6. Test the accuracy of the plate measurement by loading each plate size several times.

To test and adjust plate measurement accuracy after calibrating the plate length detector:

  1. Load each plate size several times.
  2. Check the image quality and change the registry parameters, if required.
    • Load Plate Extra to Drum (default = 17)
    • Load Plate to Drum Position (default = 96.5)


See also


Invalid Key


Technical contact(s)
 

Content owner: Mario Amir
See the Escalation page for escalation contacts.

Date submitted
 

24 Apr 2006


    Copyright © 2005 Creo Inc. All rights reserved. Confidential. Back to top.