Background |
|
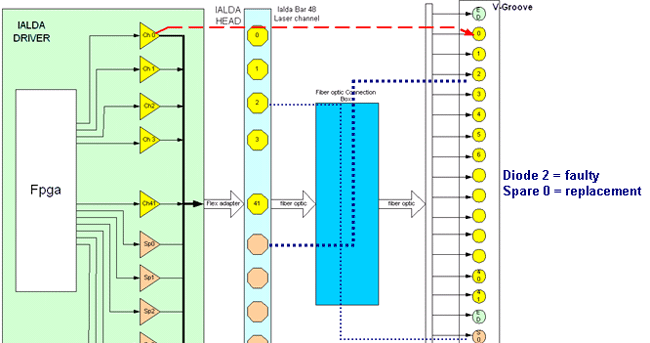
The LDA head has 48 diodes: 42 are used
to expose, and six are spares. You can replace a faulty diode by cutting
the diode fiber in the middle and splicing it to the cut fiber of a spare
diode.
Important: In addition to splicing
together the fibers of the diode and the spare diode, it is absolutely
essential to splice together the two loose ends of the fibers that
are not in use, to prevent any residual laser light leakage.
|
Procedure |
|
To replace the faulty diode:
- Perform laser calibration to determine the following:
- Which diode is faulty
- Which spare diodes are not in use
- In Magnus Controller, open the top door.
- Quit Magnus Controller, turn off the platesetter, and disconnect the
platesetter from the power.
- Remove the two hex screws from the rear panel, and lift off the panel.
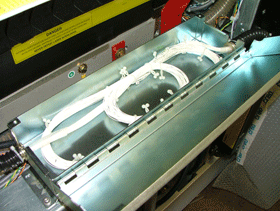
- Remove the screws from the fiber box and open the fiber box.
- Locate the fiber of the defective diode according to the labels on
the fibers, and cut the defective diode's fiber.
- Locate the fiber of an available spare fiber according to the labels
on the fibers, and cut the spare diode's fiber.
- Splice the end of the defective diode's fiber on the LDA box side
to the end of the spare diode's fiber on the imaging head side.
Warning: To prevent any residual laser light leakage,
you must also splice the two ends of the fibers not in use!
- Splice the end of the defective fiber on the imaging head side to
the end of the spare fiber on the LDA box side.
- Return the fibers to the fiber box and close the fiber box.
Important: Before you close the fiber box, make sure that no
fibers stick out of the box.
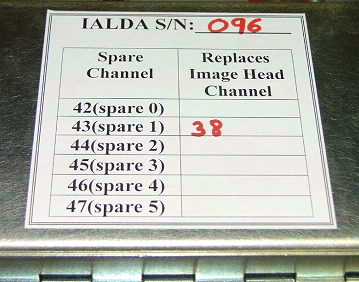
- On the label on the platesetter, write the number of the defective
diode next to the spare that replaces it.
- Reinstall the rear panel and secure it with the two screws that you
removed in step 6.
- Close the top door of the platesetter.
- Reconnect the power, turn on the platesetter, and start Magnus Controller.
To define the spare diode as a working diode in Magnus Controller:
- In the Utilities menu, double-click Users.
- In the Define User dialog box, do the following and then click OK:
- In the User Type box, select Service Engineer.
- In the Password box, type Creo.
- In the Hardware Tree, select Expose System>Laser System,
and double-click Laser Group.
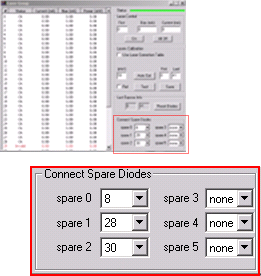
- In the Laser Group dialog box, in the Connect Spare Diodes
section, replace the number of the spare diode that you used with
the number of the faulty diode, and close the dialog box.
|