Removing and reinstalling the Magnus 800 upper rear panel
This procedure describes how to remove and reinstall
the Magnus® 800 upper rear panel
Removing the Magnus 800 upper rear panel
If required, manually remove the unloading conveyor leading from the Magnus
800 to the processor.
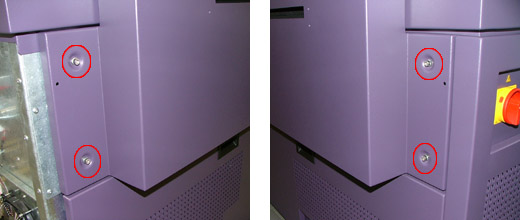
There are four M6 screws securing the upper rear panel to the platesetter.
Two washers are attached to each screw—a lock washer and a spring washer.
Use a 4-mm hex key to remove the four M6 screws and their washers:
Grip the upper rear panel from the top and remove it from the platesetter.
Reinstalling the Magnus 800 upper rear panel
Install the lower edge of the upper rear panel onto the platesetter.
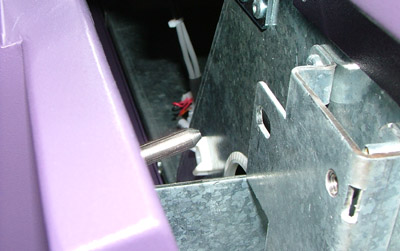
Align the two pins on either side of the upper rear panel to the two holes
on either side of the platesetter:
Close the upper rear panel.
Use a 4-mm hex key to insert and tighten the four M6 screws and washers,
securing the upper rear panel to the platesetter. (View
image)
If required, manually reinstall the unloading conveyor leading from the
Magnus 800 to the processor.