Home | Contact Us | Submit Troubleshooting Info | Search | Help


    Output | Software Solutions | Proofing | Color, Screening and Calibration | Scanning | Digital Photography | Consumables | POS


Carriage amplifier power supply cable upgrade procedure


Product


Trendsetter-based devices


Background


This procedure describes how to replace carriage drive board power supply cable 220-00061A with cable 220 00163B on TSC News output devices.

Cable 220-00061A provides +48 V power to the carriage drive board from the MCE board. The carriage drive board generates noise that is fed into the MCE board, causing CRC errors and possibly digital I/O errors. Routing the carriage drive board power directly from the +48 V power supply via replacement cable 220-00163B solves these problems.


Procedure

 
  1. Open the power box door and turn off power to the output device.
    DANGER: Potentially hazardous voltages are present in the power box.
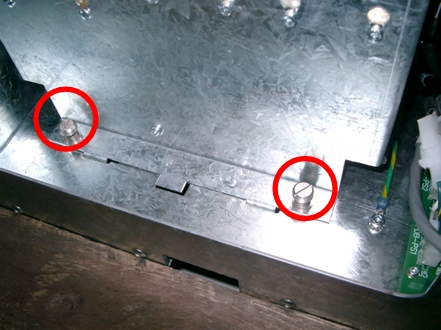
  2. Loosen the screws securing the power supply bracket and pull the tops of the power supplies towards you to gain access to the carriage drive board and the cable.
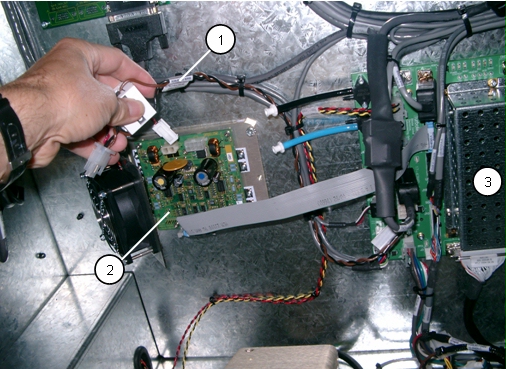
  3. Carefully cut the cable ties holding cable 220-00061A to the harness.
  4. Disconnect cable 220-00061A from the carriage drive board and from MCE board connector J13.


      Carriage drive board power supply cable 220-00061A
      Carriage drive board
      MCE board
     
  5. Connect replacement cable 220-00163B to the carriage drive board, and route the cable along the bundle of cables leading to the power supply bracket.
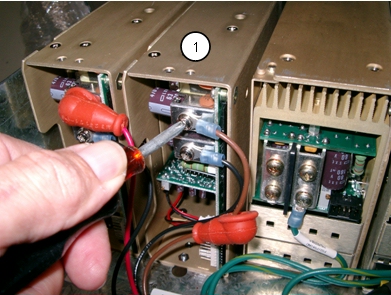
  6. Carefully remove the screws on the PS2 power supply, ensuring that the flat washers do not fall into the open frame of the power supply.


      PS2 (power supply 2)
     
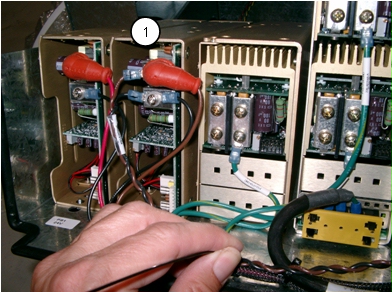
  7. Attach the terminal rings of cable 220-00163B to the PS2 power supply, on top of the terminal rings that were already attached. The brown wires connect to the top terminal and the black wires connect to the bottom terminal. It is not necessary to reinstall the flat washers you removed in step 6.


      PS2 (power supply 2)
     
  8. Use cable ties to secure the cable to the cable harness at the side of the power supply bracket.


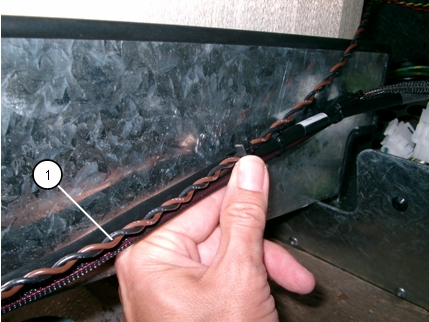
      Cable 220-00163B
     
  9. Return the power supply bracket to the upright position and secure the screws you loosened in step 2.
  10. Turn on power to the output device.
  11. Confirm that the carriage drive system is functioning correctly by issuing diagnostic commands in Service Shell such as
    carriage init
    carriage moveto 100

    and so on.

Date submitted
 

19 Dec 2005


    Copyright © 2005 Creo Inc. All rights reserved. Confidential. Back to top.