PS/2
Communication Configuration
NFS Configuration
The Network File System protocol
(NFS) provides a means for sharing files across a
network. NFS does not require the movement of the
required files. It allows users to access remote files as
if they were on the local host.
NFS is used as an interface to
allow a variety of machines and operating systems
The NFS enables the connection
between Scitex PS/2 station to the following types of
workstations: Silicon Graphics, Sun, RS6000 and Mac. It
enables performing any library function on files residing
on the remote station.
NFS operates on top of TCP/IP.
Because of that you must define all the host stations on
your network for TCP/IP before performing NFS network
definition. See TCP/IP Configuration.
To set the NFS trough the Sciutil
perform the following:
- Type sciutil at the login
prompt.
- Select Scinet Configuration
menu and press Enter.
- Select TCP/IP Configuration
and press Enter.
- Select NFS Definition and
press Enter.
The Following menu lists the host
stations defined for TCP/IP communication.
Up to 500 host stations may be
defined for TCP/IP communication. Of these, 64 may be
defined for NFS communication.
- Choose the host to which you
want to define a connection by selecting it and
pressing Enter.
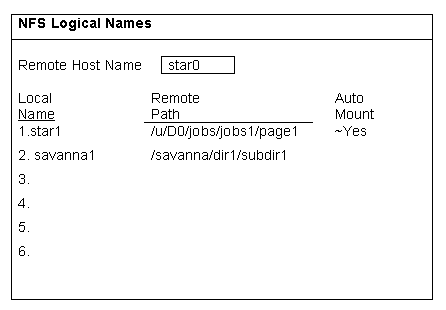
- Type in the Logical name of
server directory on the host in the Logical Name
column.
- Type in the path of the server
directory on the host in Remote path column.
For example:
For a PS/2 server you might type:
/u/D0/jobs/job_name/page_name.
For a RS6000 server you might type
:
/u/D0/directory_name/subdirectory_name
Define as many Logical names as you
require. They may be on the same or on different hosts.
- Press the F1 to Save &
Exit to the TCP/IP communication menu. The
computer will reboot.
- Type sciutil at the login
prompt.
- Select Scinet Configuration
menu and press Enter.
- Select TCP/IP Configuration
and press Enter.
- Select NFS view and press
Enter
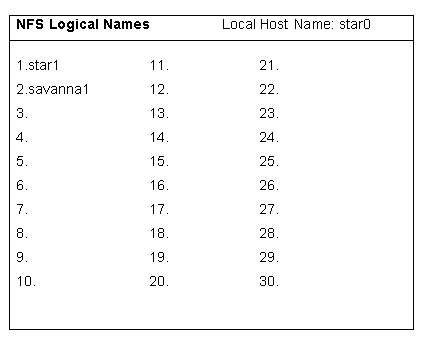
This form enables you to view the
complete list of all the defined Logical Names. If you
select a Logical Name in the List and press Enter the NFS
Logical form is re-displayed. It will show all the
Logical Names that belong to the same host as the Logical
Name that you selected.
- To Delete one ( press F5) or
all ( press F4) of the defined Logical Names.
- Type sciutil at the login
prompt.
- Select Scinet Configuration
menu and press Enter.
- Select TCP/IP Configuration
and press Enter.
- Select NFS exports and press
Enter.
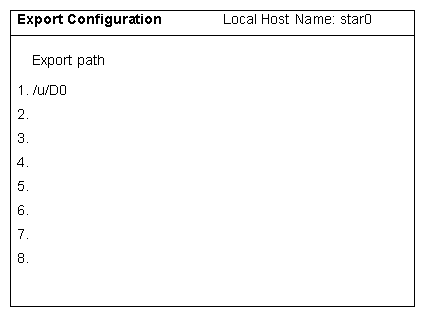
In this menu you define the file
servers which are available for NFS mount by the remote
stations.
- Use the Up/Down arrow keys to
move through the names listed under Export Path.
- Add names to file Servers, as
desired. Press F5 to delete a file from the list.
- Press F1 to save and exit.
Type sciutil at the login prompt.
- Select Scinet Configuration
menu and press Enter.
- Select TCP/IP Configuration
and press Enter.
- Select NFS exports and press
Enter.
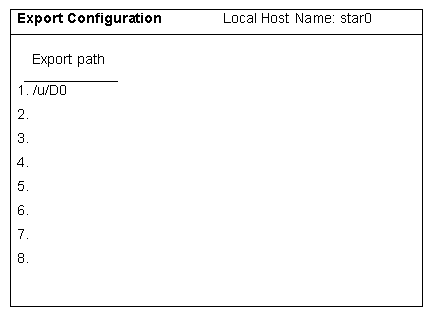
In this menu you define the file
servers which are available for NFS mount by the remote
stations.
- Use the Up/Down arrow keys to
select the file you wish to delete
- Press F5 to delete the
selected file.
- Press F1 to save and exit.
|

