Home | Contact Us | Submit Troubleshooting Info | Search | Help
Output | Software Solutions | Proofing | Color, Screening and Calibration | Scanning | Digital Photography | Consumables | POS
Home | Contact Us | Submit Troubleshooting Info | Search | Help
Output | Software Solutions | Proofing | Color, Screening and Calibration | Scanning | Digital Photography | Consumables | POS
|
|
|||
Question |
I am dealing with this new install and I am not sure RRAS is installed properly (if at all). How do I go about checking this? Is RRAS enabled in the first place? | ||
|
|
|||
Answer |
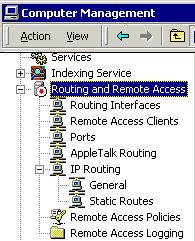
Most of the new installs are on W2K. By default, Routing and Remote Access (RRAS) is installed but not enabled. It should be configured only after the server has been renamed with the shipping name. The procedure is somewhat convoluted but there is no magic. Here’s what you should check and configure if it’s missing: Figure 1 - My Computer - Right Click Manage Routing & Remote Access To check if RRAS is enabled, go to Start -> Programs -> Administrative Tools. Once there, select Routing and Remote Access. Or, Right Click My Computer on the Desktop Choose Manage then navigate to Routing and Remote Access. By default, the local computer is listed in the console tree. Right-click the server and then select Configure and Enable Routing and Remote Access. A wizard is displayed. - Select Next. - Select Manually configured server, and then select Next. - Select Finish. The Routing and Remote Access dialog box is displayed. - Select Yes to start Remote Access. What’s going on with Remote Access Ports? A RAS port is a communication channel
that supports a single point-to-point conne
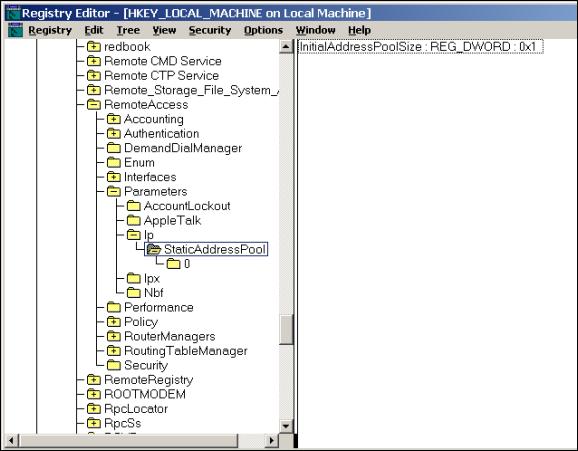
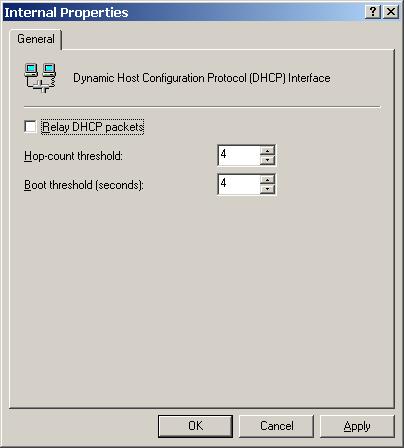
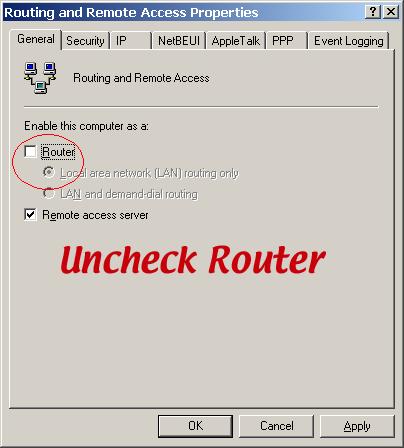
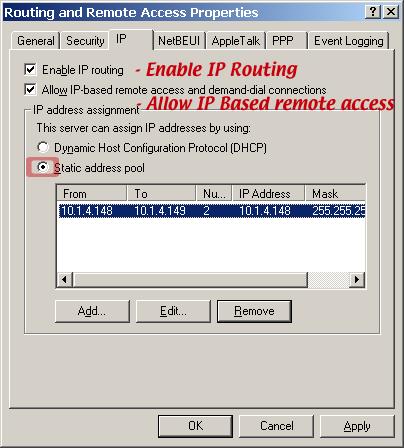
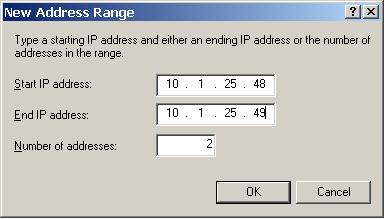
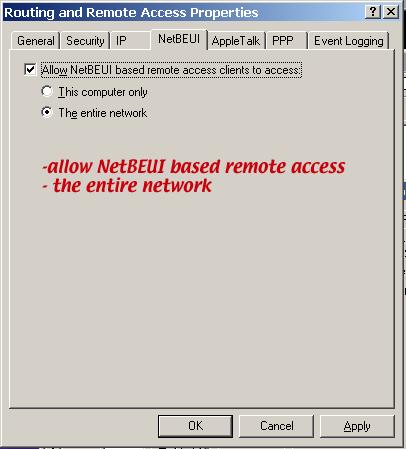
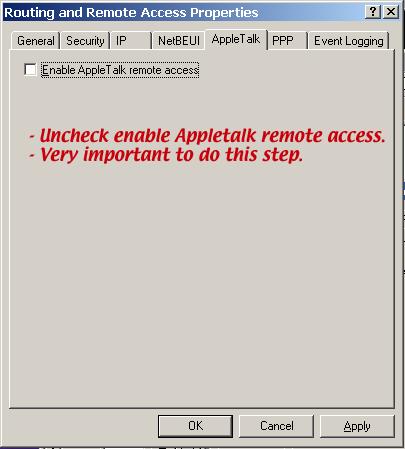
Figure 2 - Routing Ports Wan Miniport - In the Routing and Remote Access MMC, right click on Ports and select Properties. The Ports Properties window appears. - In the Devices window, double click on WAN Miniport (PPTP). The Configure Device – WAN Miniport (PPTP) window appears. - Uncheck the following: - Remote access connection (inbound only) - Demand-dial routing connection (inbound and outbound) - Select OK. - Repeat the steps 2 – 4 on the WAN Miniport (L2TP) device. - Repeat the steps 2 – 4 on the Direct Parallel device. - Select OK. What about the IP addresses, DHCP and all that stuff? By default the RAS server uses DHCP to lease IP addresses in blocks of 10 and stores them in the registry. The server leases additional addresses in blocks of 10 as needed. Since we will never use 10 addresses but only one, we modify the behavior by editing the registry. To do this: - Open the Registry Editor by, from the Start menu, selecting Run. The Run window appears. - In the Open box, type regedt32 and select OK. The Registry Editor window appears. - In the HKEY_LOCAL_MACHINE window browse to HKEY_LOCAL_MACHINE\SYSTEM\CurrentControlSet\Services\RemoteAccess\Para meters\IP. - In the Edit menu select Add Value. The Add Value window appears. - In the Value Name field, type InitialAddressPoolSize. - In the Data Type field, select REG_DWORD. - Select OK. The DWORD editor is appears. - In the Data field, type 1. - In the Radix section, select Decimal. - Select OK. Figure 3 - Edit Menu and ADD InitialAddressPoolSize Registry Key Is the DHCP relay agent disabled? The Dynamic Host Configuration Protocol (DHCP) relay agent relays DHCP messages between DHCP clients and DHCP servers on different IP networks. We will be using a static pool of addresses to assign to RAS clients and will not be using this feature. If this feature is enabled, RAS will automatically lease unnecessary addresses from the DHCP server. - In the Routing and Remote Access MMC, expand IP routing and select DHCP Relay Agent. - In the right window, in the Interface column, right click on Internal and select Properties. The Internal Properties window appears. - Uncheck Relay DHCP packets. - Select OK. Figure 4 - Uncheck Relay DHCP Packets Now that we got rid of the unwanted DHCP how do we assign the static IP addresses? What should they be? Figure 5 - Routing and Remote Access Uncheck Router - In the Routing and Remote Access MMC, right click on the server name (local) and select Properties. The server name (local) properties appear. - In the General tab, uncheck Router. Figure 6 - Enable IP Routing & Allow IP Based Remote Access - In the IP tab, check the following: - Enable IP forwarding - Allow IP-based remote access and demand dial connections. - In the IP address assignment, select Static address pool and then select Add. The New Address Range window appears. You could use a range of addresses but normally a range of two consecutive addresses will do. Try to select a couple of addresses that belong to the same network segment (subnet). So for example, if the Creo system is in the 10.1.1.X subnet - In the Start IP address field put in the lower address (i.e. 10.1.1.200) - In the End IP address field put in the higher address (i.e. 10.1.1.201) - Select OK. Figure 7 - Start and End IP Address Fields Figure 8 - Allow NetBEUI based remote access the entire network - In the NetBEUI tab, ensure Allow NetBEUI is enabled and that The entire network is selected. Figure 9 - Routing and Remote Access - Uncheck Enable Appletalk Remote Access - In the AppleTalk tab, uncheck Enable AppleTalk remote access. - Select OK and the Routing and Remote Access dialog box appears. - Select Yes and Remote access will be stopped and restarted. |
||
|
|
|||
Technical Contact(s) |
|||
Date Submitted |
08 Mar 2002 |
||
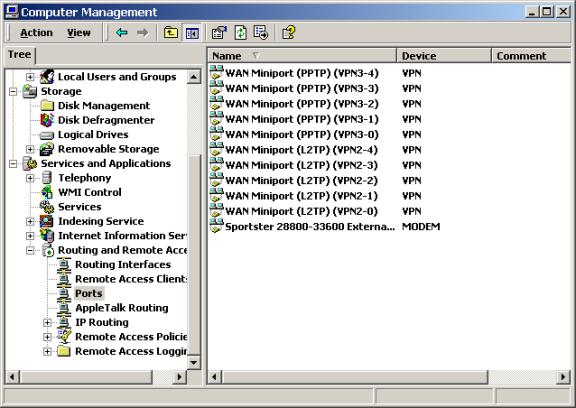 ction.
By default Windows 2000 configures 10 ports for VPN. Disable these
ports because they are unnecessary.