Installing an Improof
Connecting to
an Improof via a Parallel Port
This option requires a license.
Scitex
Improof Installation and User Guide (pdf format) .
Connecting
to an Improof via the Network (TCP/IP)
This option requires a license.
Before connecting an Improof to the Brisque
via the network, ensure that the following requirements are met:
TCP/IP is configured and running on the Brisque.
TCP/IP is configured and running on the Improof.
Software Version 3.x or higher.
Viewing the Improof
TCP/IP Parameters
To view the Improof TCP/IP parameters:
From the printer control panel message of Ready or Ready
to Plot , press Enter .
Press the up arrow key until I/O setup appears and
then press Enter .
Press the up arrow key until Modular appears and then
press Enter .
After the Cfg Network=No message appears
automatically, press Enter .
Press the up arrow key to select Yes and then press Enter .
Press the down arrow key until Cfg TCP/IP=No appears
and then press Enter .
Press the up arrow key to select Yes and then press Enter .
BootP=no appears (do not
press Enter ).
If this option
appears as BootP=yes , press the up arrow key to select BootP=no and then
press Enter .
Press the up arrow key until IP Byte1=xxx appears and
write down Byte 1 of the IP address (see the example below).
Example of how
to read the 4 bytes of an IP address (192.9.100.1):
Byte 1 = 192
Byte 2 = 9
Byte 3 = 100
Byte 4 = 1
Press the up arrow key three additional times and write down
Byte 2, Byte 3, and Byte 4 as they appear.
Continue to press the up arrow key and write down Bytes 1,
2, 3, and 4 for each of the following:
Subnet Mask (SM)
Log Server (LG)
Default Gateway (GW)
Press the Previous key three times until the Ready
status appears.
Configuring the
Improof on the Brisque
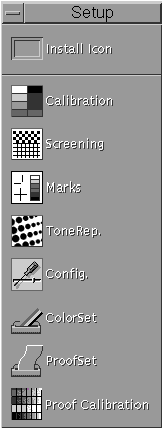
From the Launch Pad , open the Setup subpanel.
Double-click the Config icon to open the Config
dialog.
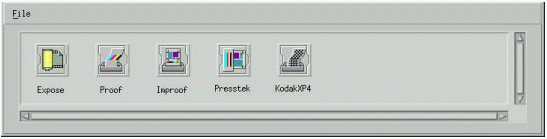
Double-click the Improof icon to open the Improof
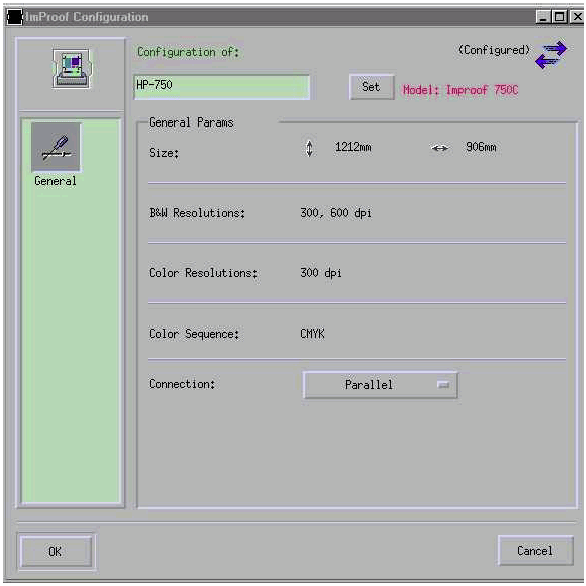
Configuration window.
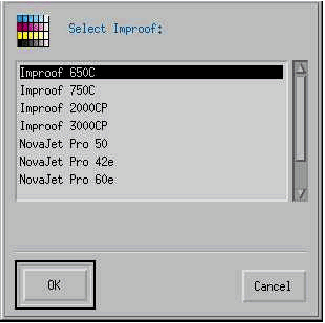
Click the Set button to open the Select Improof
dialog.
Select the Improof type from the list and then click OK .
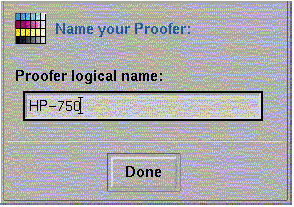
Name Your Proofer dialog
appears.
Done .
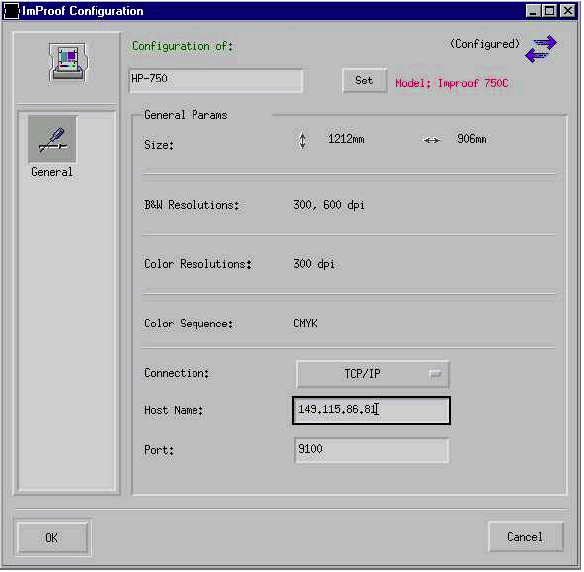
Select TCP/IP from the Connection list to
change the connection from Parallel to TCP/IP .
The Improof Configuration window now appears as
follows:
Host Name field, type in the Hostname
or TCP/IP address (the hostname) of the Improof.
In the Port field, type in the HP protocol port
number according to the Improof port number. (The default is 9100).
Click OK to complete the operation.