Home | Contact Us | Submit Troubleshooting Info | Search | Help
Output | Software Solutions | Proofing | Color, Screening and Calibration | Scanning | Digital Photography | Consumables | POS
Home | Contact Us | Submit Troubleshooting Info | Search | Help
Output | Software Solutions | Proofing | Color, Screening and Calibration | Scanning | Digital Photography | Consumables | POS
Question: |
How do I incorporate reader spreads into my workflow? |
Explanation: |
You may use reader spreads in your workflow, but you must define them first in Preps. |
The following workflow will explain how to define a Brisque job for reader spreads.
You create a Preps job using spreads basically in the same way that you will for any other Brisque job. The only difference is in how you add these pages to the run list.
Use the following job as an example:
A job that has A4 pages uses a double spread that was created on one A3 page that was saved and RIPped so that the resulting page is landscape. This A3 page, lets call it spread1.ps, will be left bound and contain pages 2 and 3 or our publication.
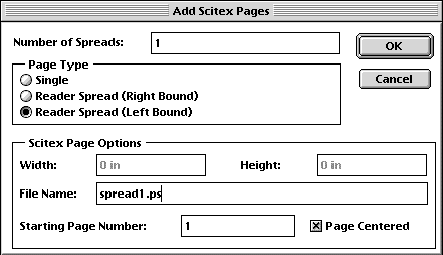
From the run list in Preps, Click the CreoScitex Page icon and drag and drop it after the first page in the run list. The Add CreoScitex Pages dialog will appear:
Chooses the number of spreads that you want to add to the run list.
Allows you to choose a Reader Spread that is Right Bound or Left Bound.
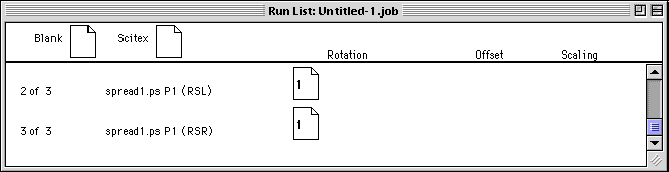
When you choose OK, the run list will be updated with the pages.
The run contains two separate page entries that both relate to different sides of the same A3 page. No other preparation is needed, and the Imposition Job on the Brisque will expose the "pages" as defined in the job.
Question: |
How do I incorporate reader spreads into my workflow when all of my pages are spreads (including first and last). |
Explanation: |
You may use these spreads in your workflow, but you must define them first in Preps. |
The following example is based on a 16 page document created in Quark Xpress. All the pages created are full spreads, there are no single pages in the workflow, and centering is used. The final job is left bound.
Make sure that you have selected the appropriate paper size and orientation.
A4 should be printed to A3 Extra Wide in Portrait Orientation.
Page after RIP
Original page in Document
1
2 & 3
2
4 & 5
3
6 & 7
4
8 & 9
5
10 & 11
6
12 & 13
7
14 & 15
8
1 & 16
Create a New Preps Job with the parameters that you need.
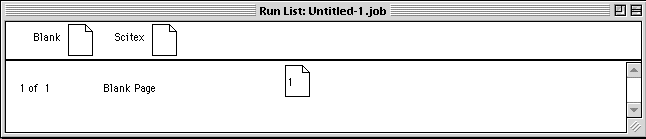
Drag and drop a Blank Page into the Run List.
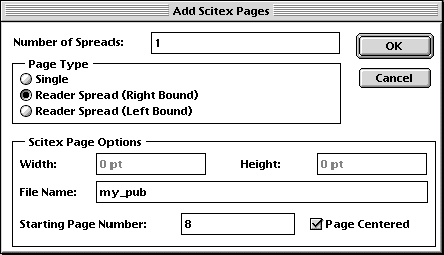
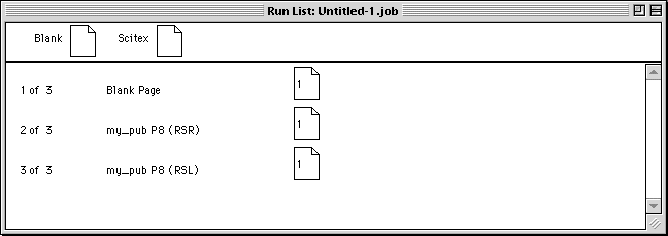
Drag and drop a CreoScitex Page that is single Reader Spread Right Bound with the Number Of Spreads = 1 and the Starting Page Number the last page from your RIPped job (see above chart). Make sure that the Page Centered is checked.
Your Run List will be as follows:
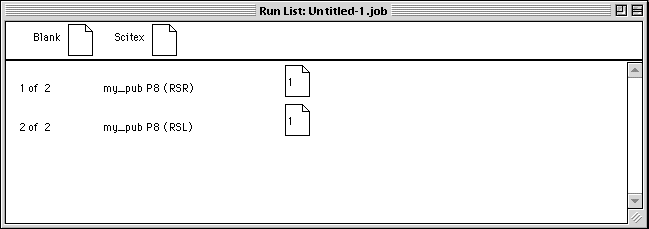
Delete the Blank Page from your Run List.
Add the remaining Spreads to your Run List.
Drag and Drop a CreoScitex Page between Page 1 and Page 2 of your Run List.
The Number of Spreads will be the total minus the one you already added 7.
The Page Type will be Reader Spread Left Bound.
The Starting Page Number will be 1.
When this is done your Run List pages will correctly reflect the pages in your publication.