Home | Contact Us | Submit Troubleshooting Info | Search | Help
Output | Software Solutions | Proofing | Color, Screening and Calibration | Scanning | Digital Photography | Consumables | POS
Home | Contact Us | Submit Troubleshooting Info | Search | Help
Output | Software Solutions | Proofing | Color, Screening and Calibration | Scanning | Digital Photography | Consumables | POS
Question: |
I just received my new version of Preps that contains a Browser, now what? |
Explanation: |
The new version of Preps that was sent with this Beta release of Brisque Impose contains a Browser. |
The following illustrates how to use the new Browser to increase workflow performance.
The Job Information dialog has been modified. When Brisque workflow is selected the Select button will appear, this allows you to browse for the default path. If you choose Brisque workflow, you will not be allowed to leave the dialog, without defining a default path.
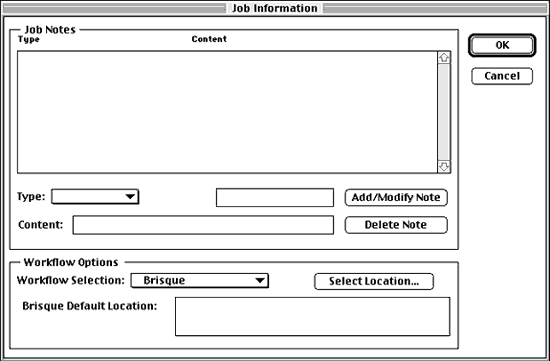
Mount the volume of the Brisque or Server that will serve as the default location for the CreoScitex Jobs (pages) of your IMPO job.
Click the Select button and the following dialog will appear:
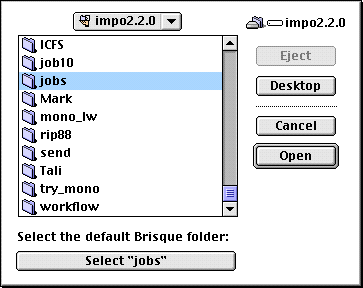
Use the Browser to locate the directory (appears as a folder on the Macintosh) where the CreoScitex pages (jobs) are (or will be). When the folder is highlighted, select it with the select button.
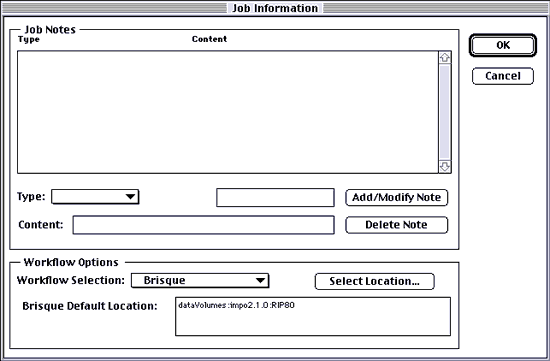
The Brisque default location will be updated with the path information that you have chosen, as well as the dataVolumes string that is necessary when using a Brisque or Ripro Server volumes.
Notes:
If you do not use the Browser, but enter in the default path manually, you will need to enter the "dataVolumes" string. If you are choosing a server that does not conform to the dataVolumes naming convention, you can delete the information from the string after having selected a location. Make sure that you choose the directory (folder) that contains the CreoScitex job, and not an actual job itself.
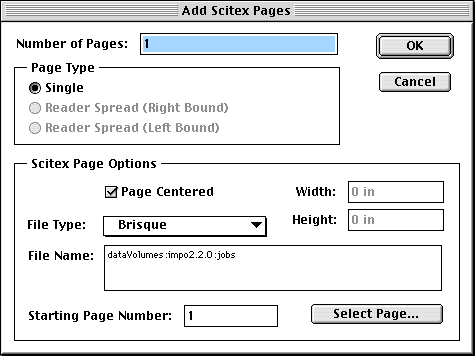
A Browser has also been added to the Add CreoScitex Page dialog .
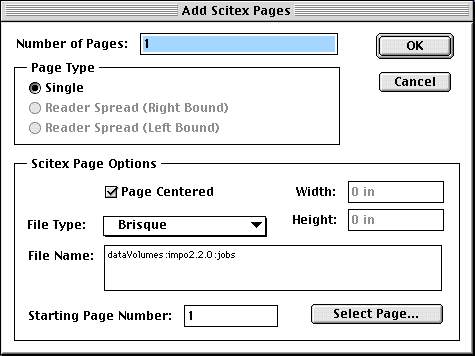
You will notice that the default path appears in the File Name field.
You may use the Browser to enter in the name of CreoScitex jobs that exist within the default path, or on other volumes.
Mount the volumes you wish to browse, using the chooser (including the default path).
Click Select Page to open the Browser dialog.
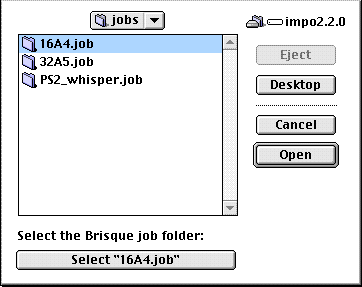
The Browser will display the default path, as defined in the Job Information dialog or the previously chosen path.
Select the CreoScitex job and click the Select button. The Browser will close, and you will return to the Add CreoScitex Pages dialog.
Note:
Do not select an actual page from within the job, this is not supported.
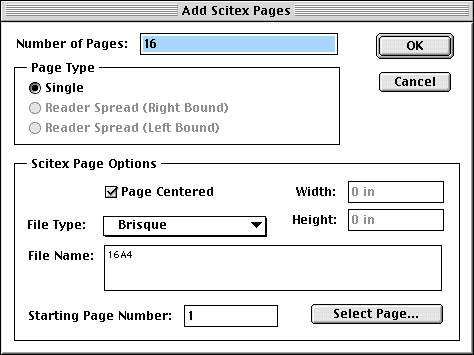
When the location of a page is the same as defined in the default path, Preps strips out the string.
Note:
If you wish to enter the name of the pages manually, delete the location string, and type in the name of the CreoScitex job.
When browsing for jobs on other Brisques or servers, the entire path will be added to the name of the job.