

Home | Contact Us | Submit Troubleshooting Info | Search | Help
Output | Software Solutions | Proofing | Color, Screening and Calibration | Scanning | Digital Photography | Consumables | POS
Home | Contact Us | Submit Troubleshooting Info | Search | Help
Output | Software Solutions | Proofing | Color, Screening and Calibration | Scanning | Digital Photography | Consumables | POS
Installation
Cold Start Installation and Configuration - 43P
NFS Setup
Launching MountPro
Mounting a Remote Station
NFS Setup Using SMIT
Preforming a Reciprocal Mount
Mounting a Brisque Volume on the PS/2
The Network File System (NFS) is a distributed file system that allows the UNIX host (or other NFS clients) to access files, directories and peripherals of another remote station that supports an NFS Brisque as if they were local.
This procedure describes how to use MountPro to mount a volume of another remote station (Brisque or Ripro Server) so that you can access the files through the local file manager.
To launch MountPro:
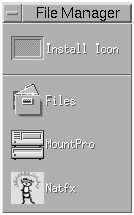
You can mount NFS data volumes (i.e., regular data volumes) from any Brisque or Ripro Server on the network.
If the network has a DNS server, there is no need to define the stations as Host as a prerequisite to mounting a remote station. If you get the `host unknown' message and you are sure that you have typed the name correctly, then go into SMIT and define the remote Brisque as Host.
To mount a remote station:


The Volume and Permission menu buttons become active, and the Volume button automatically displays all of the existing dataVolumes on the selected remote station.
- Alternatively, if the remote station that you want to mount has been defined as a Host via the SMIT application, then you can click List to display the Remote Stations window (which only lists stations that have been defined as Host via the SMIT application). Then from the list, you can select the volume that you want to mount.
Read Only The files from the mounted volume can be read from the local Brisque or copied to the local Brisque. When you select Read Only, you can preview files from the mounted volume, but you cannot perform any other operation (i.e., RIP, etc.) on these files unless you copy them from the mounted dataVolume to a dataVolume on the local Brisque.
Read/Write The files from the mounted volume can be read from and written to. When you mount a volume with Read/Write capabilities, you can perform all operations on the files contained in the volume, and you also can write to the mounted volume.
If you work regularly with the selected volume and you want it to be automatically mounted every time you boot the Brisque, select the Automatic Mount on System Startup option.
To unmount a remote data volume:
This procedure describes the NFS setup using SMIT to mount volumes of remote users such as other UNIX, Windows NT or Novell.
To mount a Brisque or Ripro Server volume, refer to Mounting a Remote Station.
To set up NFS using SMIT:

When you are mounting a volume, you must confirm that the volume has been exported by its host station. If the volume has been exported, other stations on the network have permission to mount the volume and to define read only and read/write permissions.
Mounting a Brisque Volume on the PS/2
To mount a Brisque volume on the PS/2:
If you choose Page, the folder on the Brisque appears as a Job on the PS/2, and you can create Pages in which to copy or RIP into. You must have the jobs folder as part of your path on the Brisque (e.g., /dataVolumes/brisque1.1.0/jobs)
If you choose File, you will not be able to create pages on the mount, and you will only be able to RIP or copy files to this folder.

