

Home | Contact Us | Submit Troubleshooting Info | Search | Help
Output | Software Solutions | Proofing | Color, Screening and Calibration | Scanning | Digital Photography | Consumables | POS
Home | Contact Us | Submit Troubleshooting Info | Search | Help
Output | Software Solutions | Proofing | Color, Screening and Calibration | Scanning | Digital Photography | Consumables | POS
This document is intended to provide more in-depth information regarding NFS mounts on the Brisque.
The topics covered include:
Mount types (hard or soft)
Number of times to attempt a mount
Interrupting the mount process
Brisque application issues
MountPro vs. Smit
Changing the MountPro NFS Settings
Booting in single-user (stand alone) mode
NFS options
NFS related commands
There are two NFS mount types - hard and soft. Soft mounts should always be used the Brisque.
The advantage of a soft mount is that if an NFS server connection fails, after a specified number of attempts ("NUMBER of times to attempt a mount"), the NFS client will give up on the mount and return a software error. This will allow the application to continue.
The default value for the number of retries is 1000. The Brisque will continue to "work" after it has tried to mount the server 1000 times. To reduce this number (and the amount of time the Brisque is "frozen") you must use Smit (or edit /etc/filesystems) and reduce this value for the option "retry" (see below).
A hard mount is designed for use over a reliable link (i.e. a connection to an NFS server where the network connection and the server will be permanently up). When a hard NFS mount to a server fails (i.e. the server or network connection goes down) the client will retry an infinite number of times (i.e. forever).
If the option "intr" (allow interrupts) is set to "Yes", pressing the keyboard interrupt (default "Control-C") can terminate the mount operation. However, this interrupt cannot be used until you have logged in. This presents a problem – if a hard mount fails during the boot, you will never get as far as a login prompt and a terminal session so you will not be able to interrupt the mount. In this case the Brisque will sit there forever or until the NFS server becomes available again. For this reason it is recommended that you use only soft mounts on the Brisque.
Hard mounts on the Brisque will cause un-interruptible application "freezes". See interrupting the mount process – for a detailed explanation.
Whenever the Brisque (File Manager or Browser) attempts to access an NFS filesystem whose server has gone down, it will retry the connection according to the value of the option "retry" in the filesystem’s stanza. As mentioned earlier, if this option is not explicitly set, the default value is 1000. So, if there are five NFS filesystems from a RiproServer mounted on the Brisque and the RiproServer disappeared, the Brisque will try to re-mount each filesystem 1000 times. Consequently, the current window will "freeze" for the length of time this takes (probably about 10 minutes).
Note:
The value of "retry" appears to have no effect on the length of time the Brisque will try to connect for at boot time.
The value of "retry" can be set using either Smit, the mknfsmnt or chnfsmount commands or manual editing of filesystem stanzas in /etc/filesystems.
To set the number of retries to 5:
To do the same using smit (select either "Add a File System for Mounting" or "Change/Show Attributes of an NFS File System". Change the value of the "NUMBER of times to attempt mount" field (shown in bold).
Add a File System for Mounting
Type or select values in entry fields.
Press Enter AFTER making all desired changes.
| [TOP] | [Entry Fields] | |
| PATHNAME of mount point | [/dataVolumes/Mark1.2.0] | |
| PATHNAME of Remote Directory | [/dataVolumes/Mark1.2.0] | |
| HOST where remote directory resides | [Mark1] | |
| Mount type NAME | [nfs] | |
| Use SECURE mount option? | no | + |
| MOUNT now, add entry to /etc/filesystems or both? | both | + |
| /etc/filesystems entry will mount the directory on system RESTART. |
yes | + |
| MODE for this NFS file system | read-write | + |
| ATTEMPT mount in foreground or background? | foreground | + |
| NUMBER of times to attempt mount | [5] | # |
| Buffer SIZE for read | [] | # |
| Buffer SIZE for writes | [] | # |
| [MORE...20] | ||
| F1=Help | F2=Refresh | F3=Cancel | F4=List |
| Esc+5=Reset | Esc+6=Command | Esc+7=Edit | Esc+8=Image |
| Esc+9=Shell | Esc+0=Exit | Enter=Do |
Edit /etc/filesystems, add the following string onto the end of the option line (remember to put a comma after the previous option):
retry=5
Type one of the following commands to either make or modify an NFS mount respectively:
mknfsmnt -f /dataVolumes/NT_APR -d /c/apr -h NT1 -t rw -S -r 5 -A
chnfsmnt -f /dataVolumes/NT_APR -d /c/apr -h NT1 -r 5
The first command will mount "c:\apr" from an NT server called "NT1" on /dataVolumes/NT_APR. The options for this mount are:
-t rw - read-write
-S - soft mount
-A - auto mount on startup
-r 5 - 5 retries
The second command modifies the mount of "c:\apr" from NT1 so that "retry" = 5 (-r 5).
When NFS mounts are performed using MountPro, the option "Automatic Mount on System Startup" must be checked (otherwise no stanza is created).
Once the mount is completed, either run smit, edit /etc/filesystems or use the chnfsmnt command to set "retry" to 5
The NFS mount option "intr" will determine whether or not an NFS mount can be interrupted from the keyboard. Unfortunately, it is not possible to interrupt a soft mount; only hard mounts can be interrupted.
The default interrupt character is Control-C but it is not possible to use this during the initial boot phase (when automatic mounts are performed). In cases where auto-mounts are failing at boot time, there are only 3 solutions:
Additionally, the interrupt character (Control-C) will have no effect within CreoScitex applications (the interrupt character is an attribute of stdin – i.e. the terminal). For example, it is not possible to interrupt a mount in the following circumstances.
Therefore, the only time an interruptible hard mount is of any practical use is when running the mount command from a UNIX prompt. If the mount fails, pressing Control-C will abort the mount and return the user to a UNIX prompt.
The main application problems caused by NFS on the Brisque occur when a connection to an NFS mount goes down.
For example, if Brisque1 has mounted the filesystems Brisque2.1.0 and Brisque2.2.0 from Brisque2 and Brisque2 is subsequently shutdown or loses its network connection, the two main problem areas will be:
Whenever a new instance of FileManager is opened, the default directory will be /dataVolumes/. This will cause the operating system to "examine" the attributes of all directories in /dataVolumes/ (usually all JFS and NFS filesystem mount points). The same situation will occur when the user double clicks on the "dataVolumes" folder in the icon path.
Whenever the FileManager’s current directory is /dataVolumes/ and an NFS filesystem is unavailable, the NFS client will attempt to remount it and the status "Reading…" will be displayed in the FileManager’s status bar.
In most Brisque applications that utilize the Browser service (shown), the default location is set to /dataVolumes/. This will also cause the NFS client to attempt a remount of the NFS filesystems on servers that are down.
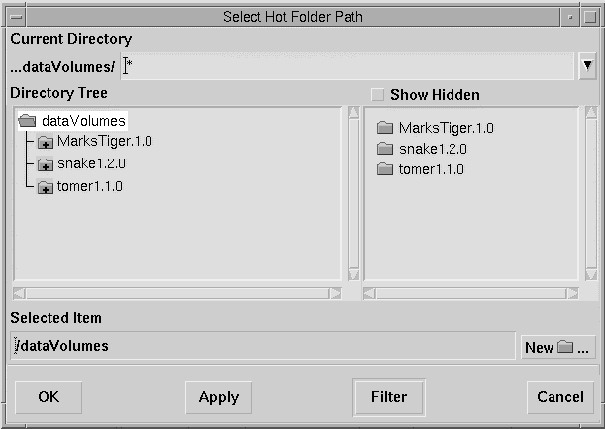
When NFS connections are lost and /dataVolumes is accessed, the FileManager will display "Reading…" and the Browser will display a blank window until one of the following conditions is met:
To reduce this "freeze" duration, the "retry" value should be changed to a low number (e.g. 3) for a LAN connection. (If an NFS server is on the other side of a very slow connection (e.g. WAN link) a larger number will be required otherwise the filesystem will erroneously be shown disconnected.)
There are some significant differences between smit and MountPro
These requirements, practically, limit MountPro to CreoScitex stations.
The NFS mount created by MountPro is identical to a mount (with the same options) created using "smit".
MountPro makes NFS mounting of other stations very easy. Unfortunately, the default NFS mount settings make the feature unusable in many multi-Brisque customer sites where the Brisques are constantly restarted.
Warning |
This is an unsupported feature and R&D will not provide any help for such modifications. For this reason, please adhere to the following restrictions: |
MountPro uses the file /scitex/version/config/sciMountPref.ans to determine which options to use with themknfsmnt command. By modifying this file (correctly) it is possible to enter your own settings for NFS mounts (even when no stanza is created). Before modifying this file make a backup:
cp sciMountPref.ans sciMountpref.ans.orig
The file default file contents are shown below:
#Scitex
#AnswerFile v1
#File Creator: DialogResourceManager
! DM BEGIN
!
! Default values for the mount command used by libSciMount.
! (The parameters are used by the '/usr/etc/mknfsmnt' command.
! To add/change the flag see the 'mknfsmnt' info.)
!
.*SciMountDefaultFlags.value: -S -f
.*SciMountAutoRestartMountFlags.value: -B -A
.*SciMountNoAutoRestartMountFlags.value: -N
! DM END
There are three lines of interest here. These are the three lines preceding "! DM END"
|
Attributes used for all |
|
Attributes used when "Automatic Mount on System Startup" is checked. (i.e. when a stanza is created) |
|
Attributes used when "Automatic Mount on System Startup" is unchecked. (i.e. when no stanza is created) |
To modify the default options change the first line (SciMountDefaultFlags). Make sure that you enter new options before "-f" otherwise the mount will fail.
To set the default number of retries to 3, enter "-r 3" between "-S" and "-f":
.*SciMountDefaultFlags.value: -S -r 3 -f
This will generate the following mknfsmnt command:
mknfsmnt -m nfs -t rw -N -S -r 3 -f /dataVolumes/B2.1.0 -d /dataVolumes/B2.1.0 -h B2
It should be clear from the above command that if any options are entered after "-f" the command will fail because the remote path must immediately follow the "-f" switch (e.g. -f /dataVolumes/br2.1.0)
Remember, use this at your discretion and be very selective about where and when it is used.
When the Brisque will not boot due to problems with NFS auto-mounts and the last resort is to remove the auto-mount, the Brisque needs to be booted in stand-alone mode. To do this you will need the AIX CD-ROM. The procedure described below is for AIX v4.2.1
Below is the full syntax of the mknfsmnt command, which shows all available options and defaults for AIX v4.2.1. (Not all of these are available in smit, e.g. NFS version, Transport protocol, etc.)
/usr/sbin/mknfsmnt -f PathName -d RemoteDirectory -h RemoteHost
[-t {rw|ro}] [-m MountTypeName] [-w {fg|bg}] [-X|-x] [-S|-H] [-Y|-y]
[-Z|-z] [-e|-E] [-a|-A] [-s|-n] [-I|-B|-N] [-r TimesToRetry]
[-b ReadBufferSize] [-c WriteBufferSize] [-o TimeOut] [-P PortNumber]
[-u AcRegMin] [-U AcRegMax] [-v AcDirMin] [-V AcDirMax] [-T AcTimeOut]
[-p NumBiods] [-K {any|2|3}] [-k {any|tcp|udp}]
The mknfsmnt command constructs an entry that will be appended to the /etc/filesystems file, thus making a file system available for mounting. If the mount is to be permanent, this entry will remain. If the mount is temporary, the flags will be used directly for the mount command. If the mount is soft, the system returns an error if the server does not respond. If the mount is hard, the client continues trying until the server responds. The hard mount is the default.
| -f | PathName | Specifies the mount point for the remote directory. | |
| -d | RemoteDirectory | Specifies the directory that is mounted on the path name specified. | |
| -h | RemoteHost | Specifies the NFS server that is exporting the directory. | |
| -t | Type | Specifies that the directory is either read-write or read-only. | |
| rw | Mounts the directory read-write. This type is the default for the system. | ||
| ro | Mounts the directory read-only. | ||
| -m | MountTypeName | Specifies the type of file system to mount. File system types are
specified in the /etc/filesystems file with the type variables. When the mount -t MountTypeName command is issued, all of the currently unmounted file systems with a type equal to the MountTypeName are mounted. |
|
| -w | Location | Indicates where the mount should be attempted. The Location
variable can have one of the following values: |
|
| fg | Attempts the mount in the foreground. This is the default value. | ||
| bg | Attempts the mount in the background. If background is specified
and the attempt to mount the directory fails, the mount will be retried in the background. |
||
| -x | Specifies that the server does not support long device
numbers. Use this flag when mounting from an NFS server that does not correctly handle device numbers that are 32 bits long. This situation occurs when running an AIX 3.2 diskless client from a third-party server that supports only device numbers that are 16 bits long. |
||
| -X | Specifies that the server does support long device numbers. This is the default. | ||
| -y | Indicates that the execution of suid and sgid programs is not
allowed in this file system. |
||
| -Y | Indicates that the execution of suid and sgid programs are
allowed in this file system. This is the default. |
||
| -z | Indicates that device access through this mount is not
allowed; that is, the device cannot be opened on this mount point. |
||
| -Z | Indicates that device access through this mount is allowed. This is the default. | ||
| -S | Creates a soft mount, which means the system returns an error if the server does not respond. |
||
| -H | Creates a hard mount, which causes the client to continue
retrying until the server responds. This is the default. |
||
| -e | Prevents keyboard interrupts on hard mounts. This is the default. | ||
| -E | Allows keyboard interrupts on hard mounts. | ||
| -a | The /etc/filesystems entry for this file system will specify
that it should not be automatically mounted at system restart. This is the default. |
||
| -A | The /etc/filesystems entry for this file system will specify
that it should be automatically mounted at system restart. |
||
| -s | Instructs the mount to use a more secure protocol. | ||
| -n | Instructs the mount not to use a more secure protocol. This flag is the default. | ||
| -I | Causes an entry to be added to the /etc/filesystems file. The directory is not mounted. |
||
| -B | Adds an entry to the /etc/filesystems file and attempts to
mount the file system. This flag is the default. |
||
| -N | Mounts the directory with the options specified but does not
modify the/etc/filesystems file. |
||
| -r | TimesToRetry | Indicates the number of times to retry a mount. The default is 1000. | |
| -b | ReadBufferSize | Indicates the size of the read buffer in bytes specified by
the ReadBufferSize variable. |
|
| -c | WriteBufferSize | Indicates the size of the write buffer in bytes specified by
the WriteBufferSize variable. |
|
| -o | TimeOut | Indicates the length of the NFS timeout in tenths of a second
as specified by the TimeOut variable. |
|
| -P | PortNumber | Indicates the Internet Protocol port number for the server. | |
| -u | AcRegMin | Holds cached attributes for at least the number of seconds
specified by the AcRegMin variable after file modification. |
|
| -U | AcRegMax | Holds cached attributes for no more than the number of
seconds specified by the AcRegMax variable after file modification. |
|
| -v | AcDirMin | Holds cached attributes for at least the number of seconds
specified by the AcDirMin variable after directory update. |
|
| -V | AcDirMax | Holds cached attributes for no more than the number of
seconds specified by the AcDirMax variable after directory update. |
|
| -T | AcTimeOut | Sets minimum and maximum times allowed for regular files and
directories to the number of seconds specified by the Actimeo variable. If this flag is specified, the other cached attribute times are overridden. |
|
| -p | NumBiods | Specifies the number of biod daemons that are allowed to work
on a particular file system. The biod daemons handle client requests and the default number of daemons is 6 (six). |
|
| -k | Specifies the transport protocol used for the mount. This
flag only applies to AIX Version 4.2.1 or later. Options are: |
||
| any | Uses the mount command to select the protocol to use. | ||
| tcp | Specifies the TCP protocol. | ||
| udp | Specifies the UDP protocol. | ||
| -K | Specifies the NFS version used for this NFS mount. This flag
only applies to AIX Version 4.2.1 or later. Options are: |
||
| any | Uses the mount command to determine the correct match, first attempting
the highest NFS version available. |
||
| 2 | Specifies NFS Version 2. | ||
| 3 | Specifies NFS Version 3. | ||
To add the mount of a remote directory, enter:
mknfsmnt -f /dataVolumes/ripro1.1.0 -d /dataVolumes/ripro1.1.0 -h ripro1
In this example, the mknfsmnt command mounts the remote directory /dataVolumes/ripro1.1.0 that resides on ripro1 on the local /dataVolumes/ripro1.1.0 directory
/etc/filesystems Lists the remote file systems to be mounted during the system restart.
The chnfsmnt command, mount command, rmnfsmnt command.
How to Mount a NFS File System Explicitly in AIX Version 4.3 System Management Guide: Communications and Networks.
Network File System (NFS) Overview for System Management in AIX Version 4.3 System Management Guide: Communications and Networks.
Below are a list of commands related to NFS configuration.
| chnfs | Starts a specified number of biod and nfsd daemons. |
| mknfs | Configures the system to run NFS and starts NFS daemons. |
| nfso | Configures NFS network options. |
| automount | Mounts an NFS file system automatically. |
| chnfsexp | Changes the attributes of an NFS-exported directory. |
| chnfsmnt | Changes the attributes of an NFS-mounted directory. |
| exportfs | Exports and unexports directories to NFS clients. |
| lsnfsexp | Displays the characteristics of directories that are exported with NFS. |
| lsnfsmnt | Displays the characteristics of mounted NFS systems. |
| mknfsexp | Exports a directory using NFS. |
| mknfsmnt | Mounts a directory using NFS. |
| rmnfs | Stops the NFS daemons. |
| rmnfsexp | Removes NFS-exported directories from a server's list of exports. |
| rmnfsmnt | Removes NFS-mounted file systems from a client's list of mounts. |