There are two methods of setting up the
TCP/IP connection between the Brisque and the Lotem:
Recommended
Connect the Brisque directly to the Lotem controller using the special network cross cable
(Cat# 199A02132) supplied with the Lotem.
Alternative
Connect both the Brisque and the Lotem to the site network infrastructure.
Setting Up TCP/IP
Connectivity Using a Cross Cable (Recommended)
This option
can be used with the Brisque 43P-140, or when there are two network interfaces installed
in the 43P-150.
The direct link solution involves
connecting the Brisque directly to the Lotem PC Controller using the special network cross
cable (Cat#199A02132) supplied with the Lotem, this cable cannot be used for network
connection.
This section describes how to set up the
TCP/IP connectivity via a direct link and includes the following procedures:
Connecting the Brisque to the PC Controller
for 43P-140 model (Tiger I):
Connect the twisted pair network cable from the Brisque 10BaseT built-in network
port [4] (refer to Component Diagrams in Hardware Installation)
to the network interface in the E-Box, located on the right side of the Lotem.
The PC
controller and the Brisque must have individual IP addresses.
Connecting the Brisque to the PC Controller
for 43P-150 model (Tiger II):
If the extra Ethernet board is already
installed on the Brisque there is no need to perform steps 1-5 in the procedure
decribed below.
To install an additional Ethernet board,
proceed as follows:
Shutdown the Brisque with the appropriate shutdown
procedure.
Disconnect the power cord.
Power off all peripheral devices.
Remove expansion slot cover from slot #2 [16] refer to Component
Diagrams in Hardware
Installation, install the Ethernet board and ensure that it
is firmly in place.
Lock the board in place with the screw from the slot cover.
Connect the cross cable from Ethernet board in slot #2 [16] (refer
to Component Diagrams in Hardware
Installation) to the network interface in the E-Box, located on the
right side of the Lotem.
Defining the IP Address on the
Lotem PC Controller
To define the IP address on the Lotem PC Controller:
The Lotem PC Controller should already be
booted up with the Windows 95 startup screen displayed.
Power on the Lotem.
In Windows NT, select Start -> Settings-> Control
Panel. The Control Panel window opens.
Double-click the Network icon to open the Network
(viewing mode) window.
Select the Configuration taband then
double-click TCP/IP Protocol to open the TCP/IP Properties window.
Type in the IP Address (e.g. 192.9.100.2) and the Subnet
(e.g. 255.255.255.0)for the Lotem PC Controller and then click OK
twice.
Launch the application by double-clicking the Lotem
application icon.
Verify that the system executes the startup sequence.
Defining the IP Address on
the Brisque for models 43P-140/150
To define the IP address on the Brisque:
At the Brisque command prompt, type smit tcpip.
From the SMIT TCP/IP menu, select Further Configuration
-> Network Interfaces -> Network Interface Selection -> Change/Show
Characteristics of Network Interface to open the Available Network Interfaces window.
For the 43P-140 select en0 and then press Enter;
For the 43P-150 select en1 and then press Enter.
In the Internal Address field type in the IP address of the
interface board (e.g. 192.9.100.1).
In the Network Mask field type in the address of the Subnet
Mask
(e.g. 255.255.255.0).
Toggle the Current Status field to Up and then press Enter;
an OK status now appears
Press [F10] to exit SMIT.
Setting Up
TCP/IP Connectivity via the Network (Alternative)
TCP/IP connectivity via the network involves
connecting both the Brisque and the Lotem to the site network infrastructure, and consists
of the following procedures:
To connect the Brisque to the Lotem PC
Controller:
For the Brisque 43P-140 (Tiger I), verify that the Brisque is connected
to the network via the Fast Ethernet board in Slot #2 [16] (refer to
Figure 1-4, Brisque Rear Components in Hardware Installation.)
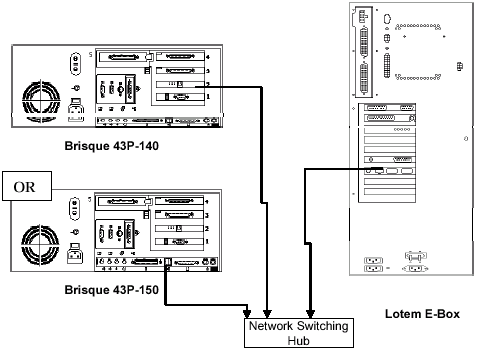
Connect the Lotem PC Controller E. Box network port through the communications network
switching hub, (refer to Figure - Brisque/Lotem Network
Connections.)
-OR-
For the Brisque 43P-150 (Tiger II), verify that the Brisque
is connected to the network via the Ethernet Port [4] (refer to Figure
1-4, Brisque Rear Components in Hardware
Installation).
Connect the Lotem PC Controller E. Box network port through the communications network
switching hub, (refer to the following figure.)
Brisque/Lotem Network Connections
Defining the IP Address on
the Lotem PC Controller
To define the IP address on the Lotem PC Controller:
The Lotem PC Controller should already be
booted up with the Windows 95 startup screen displayed. The system administrator should
provide the IP address and the subnet mask.
Power on the Lotem.
In Windows NT, select Start -> Settings -> Control
Panel. The Control Panel window opens.
Double-click the Network icon to open the Network
(viewing mode) window.
Select the Configuration taband then
double-click TCP/IP Protocol to open the TCP/IP Properties window.
Type in the IP Address and the Subnet Mask for
the Lotem PC Controller and then click OK twice.
Launch the application by double-clicking the Lotem
application icon.
Verify that the system executes the startup sequence.
To define the IP address on
the Brisque for models 43-P 140/150
Refer to Setting up TCP/IP Communication,
page 3-7 in Software (Cold Start) Installation.
Verifying the
TCP/IP Connection
To verify the TCP/IP connection for both
Connection methods:
From the Launch Pad, open the Services
subpanel.
Double-click the Terminal icon.
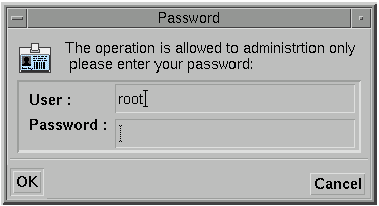
The Password dialog appears.
Type root in the User field and your password
in the Password field (default ripro) and then press Enter.
At the command prompt, type ping <Lotem PC Controller
IP Address> and check for good connectivity.
To stop the ping operation, at the command prompt type <CTRL
C>.
Defining
the IP Address of the Lotem PC Controller on the Brisque SciSMIT
This procedure should be used for both
Recommended and Alternative methods of connectivity
Power on the Brisque.
At the Console login, type cdesci and press Enter
twice.
On the Launch Pad, double-click the SciSmit
icon to open the password dialog.
Type root in the User field and your password
in the Password field (default ripro) and then press Enter.
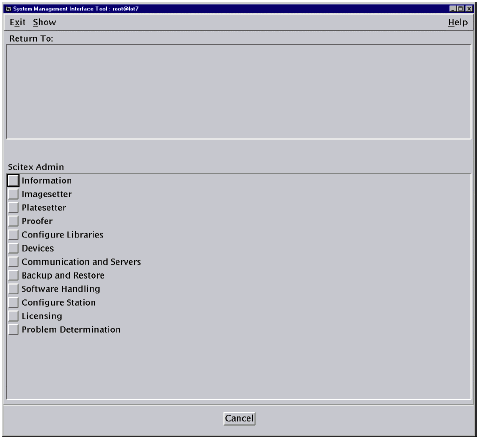
The SciSMIT main menu appears.
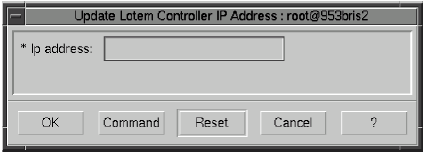
Select Platesetter -> Update Lotem Controller IP
Address to open the Update Lotem Controller IP Address window.
Type in the same IP address that you typed in for the Lotem
PC Controller and then click OK.
Select Exit to exit SciSmit.
Verifying
the Connection Between the Brisque and the Lotem
To verify the connection between the Brisque
and the Lotem:
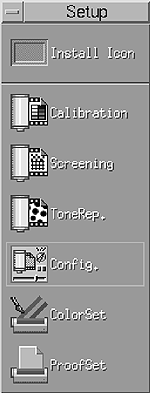
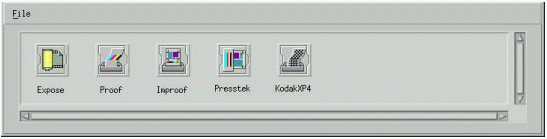
From the Launch Pad, open the Setup subpanel.
Double-click the Config icon to open the Config
window.
The Lotem application should be up and
running.
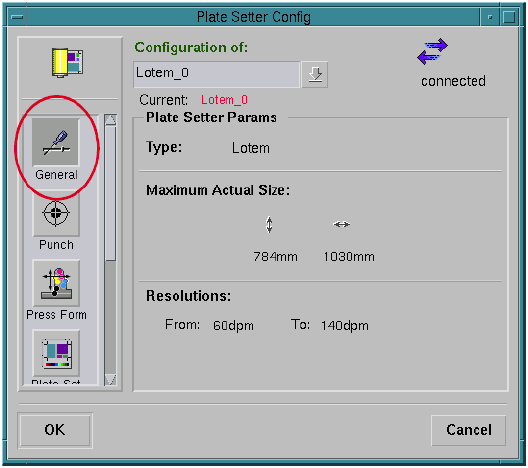
Click the Expose icon to open the PlateSetter
Config window.
In the top right-hand corner, a connected status
appears with two arrows, indicating connectivity between the Brisque and the Lotem.
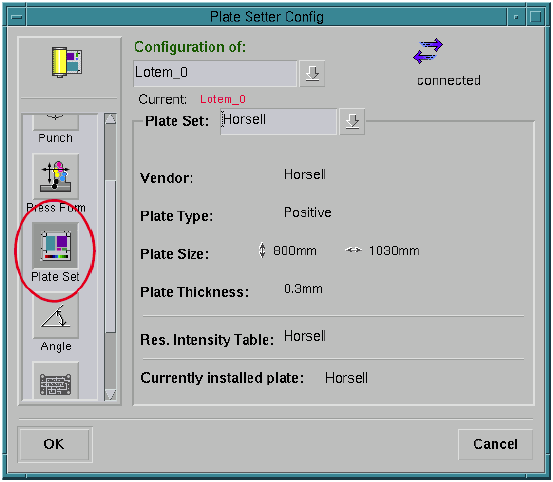
Clickthe Plate Set icon to display the
parameters.
Verify that parameters are the same as the parameters
entered in the PC Controller Plate Definition.
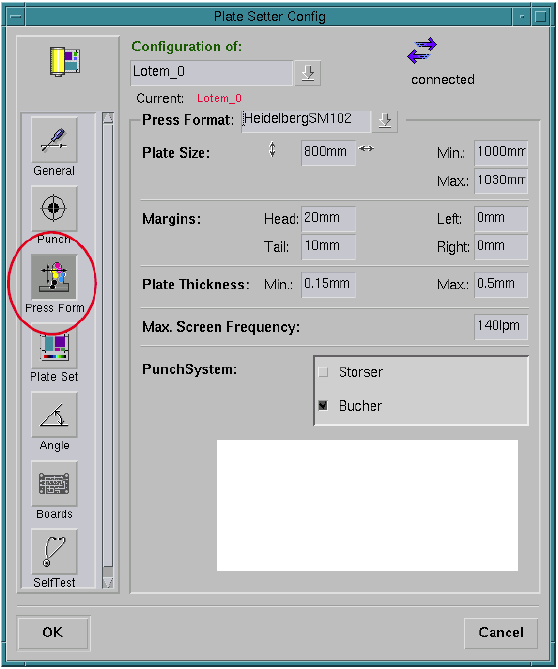
Click the Press Form icon.
The Plate Setter Config window now appears as
follows:
Click the New button to define your plate format (if
this has not been defined on the Brisque).
Enter the parameters of the plate size that were entered for
the PC Controller.