Home | Contact Us | Submit Troubleshooting Info | Search | Help


    Output | Software Solutions | Proofing | Color, Screening and Calibration | Scanning | Digital Photography | Consumables | POS


Installing the Rotation Board

This section describes how to install the rotation board, which consists of the following procedures:

Installing the Rotation Board

During rotation board installation, no extra software or license needs to be installed.

To install the rotation board:

  1. Connect the connecting bracket to the component side of the rotation board
  2. (refer to the Rotation Board Installation Guide, Cat# 399Z51965A).

  3. Shut down the system using the appropriate shutdown commands.
  4. Disconnect the power cord.
  5. Power off all peripheral devices.
  6. Remove the computer cover (refer to the 25 F/5User Guide, Chapter 5 Installing Options, Removing both the Front and Side Covers, page 5-10—5- 14).
  7. To remove the side cover and I/O Planner cover, refer also to25 F/5User Guide, Chapter 5 Installing Options, Removing both the Front and Side Covers, page 5-15—5-16
  8. Remove the expansion slot cover from Slot #8 (refer to Figure 1-5. F-50 Rear View.)
  9. Install the rotation board into Slot #8 and ensure that the board is firmly fitted into the slot.
  10. Replace the computer cover.
  11. Power on all peripheral devices.
  12. Power on the Brisque.

Verifying the Rotation Board Installation

To verify the rotation board installation:

  1. At the Console login, type cdesci.
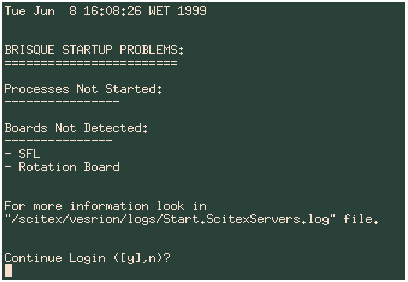
  2. The Brisque Startup Problems window appears.
    blck2.gif (3065 bytes)

  3. Ensure that the rotation board does not appear in the Boards Not Detected list.

If the rotation board appears in the Boards Not Detected list, contact your local service center.

Enabling the Rotation Board Operation

To enable the rotation board operation:
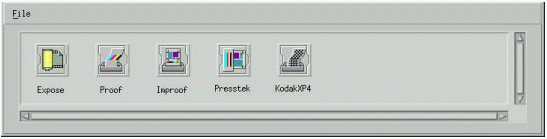
  1. From the Launch Pad, open the Setup sub-panel.
  2. Double-click the Config icon to open the Config window.
  3. config.gif (22533 bytes)

  4. Click the Expose icon to open the Output Device Configuration window.

When you click the Expose icon, the Brisque automatically detects which plotter is connected and displays the appropriate window.

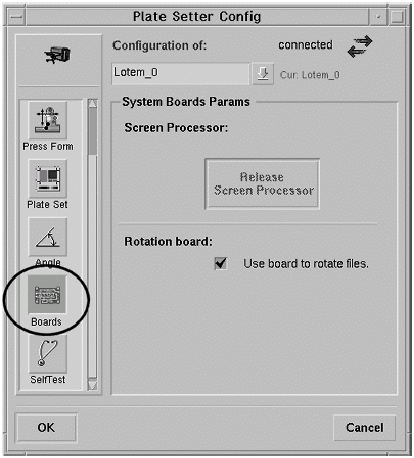
  1. To display the system boards parameters, select the Boards icon.
  2. (Optional) Select the Use board to rotate files checkbox.

setter.gif (27863 bytes)

When the Use board to rotate files checkbox is not selected, the files will be rotated by the Brisque software. This option is more time consuming but does not affect output quality.
  1. Click OK to complete the operation.

    Copyright © 2005 Creo Inc. All rights reserved. Confidential. Back to top.