Background
|
|
This procedure describes how to export job status information to a log
file, which you can read using Microsoft Excel. You generate the log via
the Brisque Queue Manager dialog box, which enables you to decide which
data the log displays, and how it is arranged.
|
Procedure
|
|
To export job status information to a log file:
- From the Brisque Launch Pad, open the Management Tools
panel, and double-click the Queue icon.
The Queue Manager dialog box displaying, showing the jobs that are currently
being processed.
- Click the Expand button in the upper-right corner
of the Queue Manager window, or press the SPACEBAR.
The expanded Queue Manager dialog box appears.
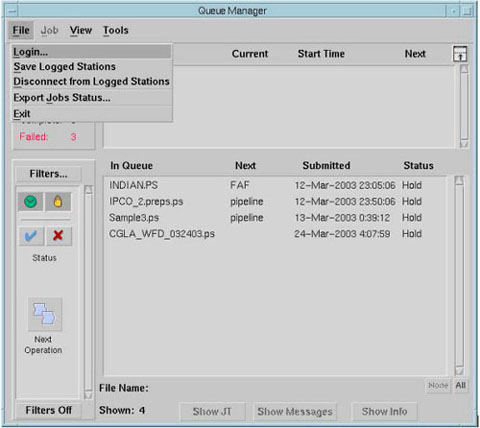
- From the File menu, select Export Jobs Status.
The Export Job Status dialog box appears.

- Select a date range through which to generate the log, and specify
the name and location by which to save the log:
| Item |
Description |
| All Jobs from |
Exports all Excel files created between from and to dates. By
default, one month prior to the current date is set.
Set—to define the number of days through
which to generate the log (maximum period is 30 days). |
| Path |
Path of destination log file, which can be typed, or defined
using the Selection dialog box. |
| Selection |
Click to chose where you will save your file. |
| Log File Name |
Type the name of the log file. |
| Setup |
Click to define which parameters will be generated in the Excel
spread sheet (see step 5). |
| Export |
Click to create the log file. |
- Click Setup.
The Export Job Status: Setup dialog box appears.

- Select the check boxes for options that you wish to generate in the
log file. Press Set after selecting check boxes in
each one of the four groups of parameters/operations.
Tip: You may want to clear the Specific Job Parameters
check boxes, because the majority of this information is not usually
entered when jobs are processed. If you leave these check boxes selected,
the log file will display empty fields, fields, which you will probably
chose to delete manually.
- Click OK.
The Export Job Status dialog box appears once-again.
- Click Export.
If you did not select a destination for the log file, choose the desired
location now.
A tab-separated log file is created in the format XXNAME.log.
- Open the log file in Microsoft Excel and resize the cells to fit the
generated data. Re-sort the data as desired.
- Save the file as an Excel workbook.
|

