|
Product
|
|
- Lotem® 400
- Lotem 400 (small)
- Lotem 400 Xpose
- Lotem 400 w/MCU
- Lotem 200K
- Lotem 400 Quantum
|
|
Procedure
|
|
- In Lotem Controller, open the top door.
- Turn off the air pressure.
- Shut down Lotem Controller and turn off the platesetter.
- Disconnect the main power supply.
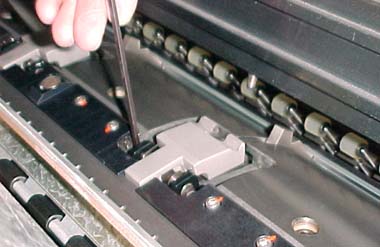
- Alternately loosen slightly each of the two screws that secure each
head gripper, and then loosen each screw a bit more, until you can remove
the head gripper.
Important: Removing one screw without loosening
the other at the same rate can cause the head gripper to get stuck in
place. This is also true when re-installing the head grippers.
- Position each slotted head gripper squarely and evenly on the drum.
- Put Loctite® 242 on the two screws that you removed
in step 5, and then secure each head gripper by tightening the screws
alternately, as described above.
- Connect the main power supply.
- Turn on the platesetter and start Lotem Controller.
- Turn on the air pressure.
|
|
Test
|
|
- Select IO_OBJECTS > Loading System > Loading System Setup and
record the value of the Load head gripper location (mm) parameter.
- In Lotem Controller, select Utilities > Hardware > Drum System,
and then double-click Drum Motor. The Drum Motor dialog box appears.
- Manually activate the load grippers manually, and verify the following:
- The gripper activates the head gripper
- In the Drum Motor dialog box, the Position parameter value
is exactly the same as the value you recorded in step 10.
|
|
See also
|
|
FCO 512-01264
|
|
Technical contact(s)
|
|
Content owner: Mario Amir
See the Escalation page for escalation
contacts.
|
Date submitted
|
|
12 Nov 2003
|

