Home | Contact Us | Submit Troubleshooting Info | Search | Help


    Output | Software Solutions | Proofing | Color, Screening and Calibration | Scanning | Digital Photography | Consumables | POS


Lotem 800 Installation Guide
Data Configuration Setting

Previous Page  ToC  Next Page

TCP/IP Connectivity

TCP/IP Connectivity via the Network (Recommended)
TCP/IP Connectivity-Direct Link (Alternative)
Verifying Connectivity

There are two ways to set up the TCP/IP connection between the Brisque and the Lotem:

Recommended (long term solution)
Connect both the Brisque and the Lotem to the site network infrastructure.

Alternatively (interim solution)
Connect the Brisque directly to the Lotem PC Controller using the special network cross cable (Cat#199A02132) supplied with the Lotem.


TCP/IP Connectivity via the Network (Recommended)
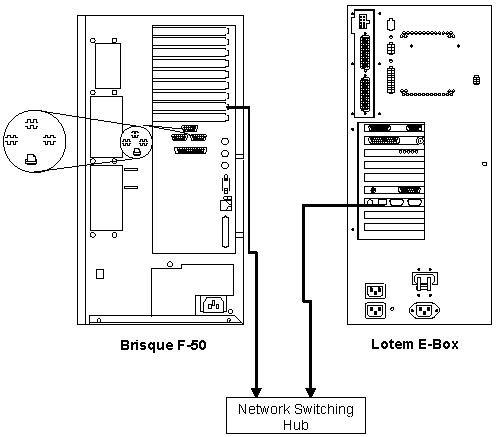
net_con.gif (8576 bytes)
Figure 4-2: Brisque/Lotem Network Connections

Define IP address on Lotem PC Controller

  1. Power on the Lotem; the PC controller should already be booted and at the Win95 startup window.
  2. Select Start from the Task Bar and then execute the sequence Settings hets1.gif (830 bytes) Control Panel hets1.gif (830 bytes) Network hets1.gif (830 bytes) TCP/IP and type in the IP address for the PC controller.
  3. Double click the Lotem application icon to load the application.
  4. Verify that the system executes the start-up sequence.

Define IP address on the Brisque

  1. Power on the Brisque and at the Console Login type cdescsi and press Enter (x2).
  2. From the Launch Pad double click SciSmit, type in your User Name and Password.
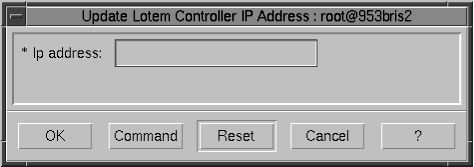
  3. From the SciSmit main menu select PlateSetter hets1.gif (830 bytes) Update Lotem Controller IP Address.
  4. bi1.gif (5852 bytes)

  5. Type in the same IP address as filled in on the PC Controller, and press OK.
  6. Exit SciSmit.
  7. To configure the Network IP address refer to "Define IP address on Lotem PC Controller".
  8. Ping the PC controller IP Address to verify connectivity.


TCP/IP Connectivity-Direct Link (Alternative)

  1. Connect the twisted pair network cable from the Brisque (refer to Figure 4-3: Brisque to Lotem Direct Link) to the E-Box, located on the right side of the Lotem 800.

Note: The PC controller and the Brisque must have individual IP addresses.
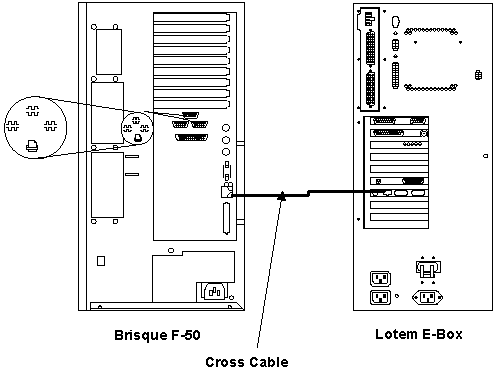
dir_link.gif (7581 bytes)
Figure 4-3: Brisque to Lotem Direct Link

Define IP address on Lotem PC Controller

  1. Power on the Lotem, the PC controller should already be booted and at the Win95 startup window.
  2. Select Start from the Task Bar and then execute the sequence Settings hets1.gif (830 bytes) Control Panel hets1.gif (830 bytes) Network hets1.gif (830 bytes) TCP/IP and type in the IP address for the controller.
  3. Double click the Lotem application icon to load the application.
  4. Verify that the system executes the start-up sequence.

Define IP address on the Brisque

  1. Power on the Brisque and at the Console Login type cdescsi and press Enter (x2).
  2. From the Launch Pad double click SciSmit, type in your User Name and Password.
  3. From the SciSmit main menu select PlateSetter hets1.gif (830 bytes) Update Lotem Controller IP Address.
  4. bi1.gif (5852 bytes)

  5. Type in the IP address as filled in on the PC controller, and click OK.
  6. Exit SciSmit.
  7. From the Launch Pad double click smit, type in your user name and password.
  8. From the SMIT menu execute the sequence Communication hets1.gif (830 bytes) TCP/IP hets1.gif (830 bytes) Minimum Configuration. The Available Network Interfaces window opens.
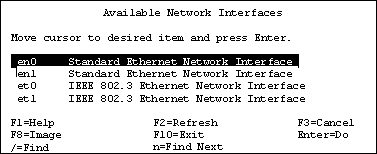
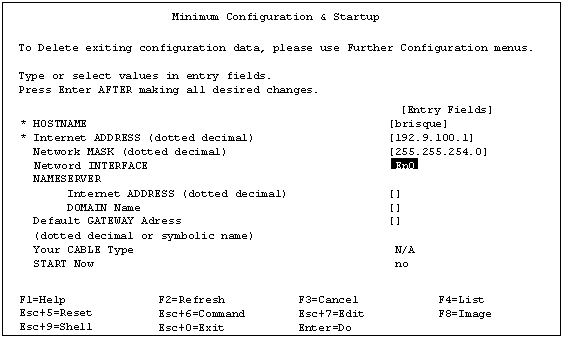
  9. Select En0 and press Enter. The Minimum Configuration & Startup window appears.
  10. 4con_4.gif (6148 bytes)

  11. In the Internet Address field, type in the Brisque IP address For hostname, enter the actual name - Brisque here is an example only.
  12. Press Enter and exit SMIT.

Note: Open a terminal and ping the IP Address of the PC Controller to verify connectivity.


Verifying Connectivity

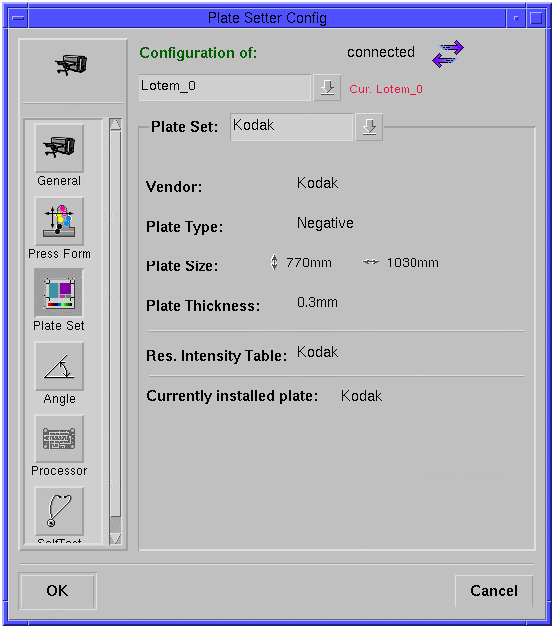
  1. From the SciSmit sub panel execute Config hets1.gif (830 bytes) Expose, to verify that the cable connections have been correctly installed and that the Lotem application is running on the PC Controller.
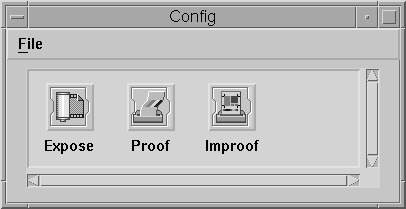
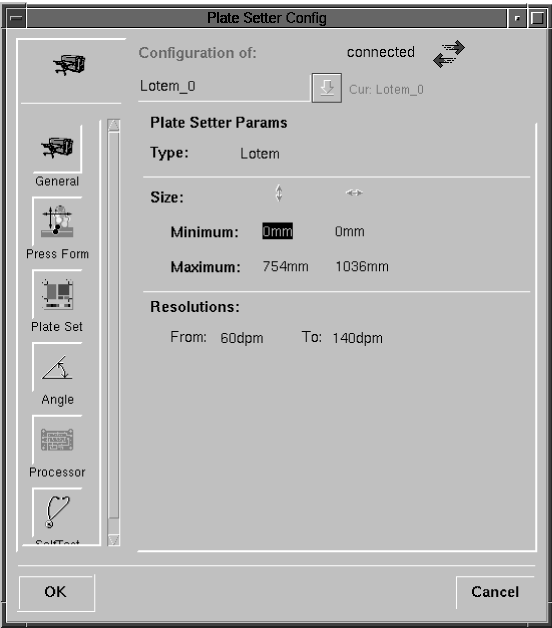
  2. config.gif (6037 bytes)

  3. At the top right hand corner, connected appears with two arrows, indicating connectivity between the Brisque and the Lotem.
  4. bi12.gif (19161 bytes)

  5. Click Plate Set to verify that the same parameters appear here as entered in the PC Controller Plate Definition.
  6. 4con_5.gif (20688 bytes)

  7. Select Press Format hets1.gif (830 bytes) New to define your plate format (if this has not been defined on the Brisque).
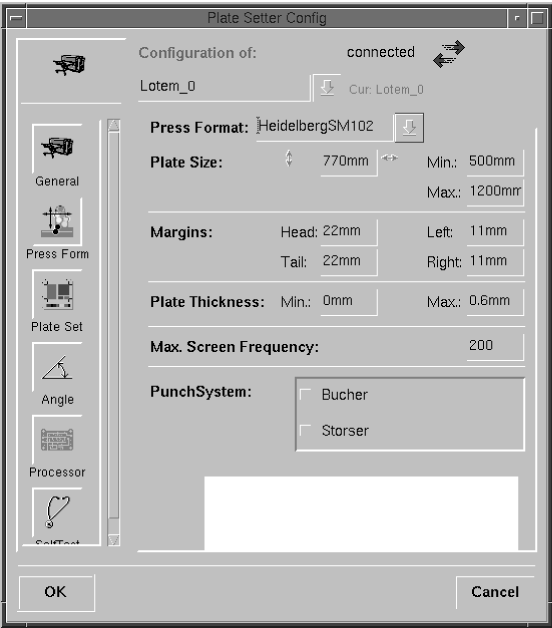
  8. bi124.gif (24601 bytes)

  9. Copy the same parameters entered already on the PC Controller. Select Save and then press OK.
  10. Click OK.

Copyright (c)1998 Scitex Corporation Ltd. All rights reserved. Certain names, logos, designs, titles, words or phrases on this page may constitute trademarks, servicemarks, or tradenames of CreoScitex Corporation Ltd. or other entities which may be registered in certain jurisdictions.


Top of Page  Previous Page  ToC  Next Page


    Copyright © 2005 Creo Inc. All rights reserved. Confidential. Back to top.