|
Product |
|
- Lotem™ 800
- Lotem Quantum
- Lotem Quantum Spectrum
|
Operating system |
|
Lotem 800 Family - Plate Leader New
|
|
Background |
|
Scratches appear on the leading edge of the
plate on some Lotem 800 machines. |
|
Requirements |
|
| Part name |
Qty |
P/N |
| Large Roller Assy |
28 |
291F9C349 |
| Small Roller Assy |
15 |
291F9C352 |
| E-ring Extra for Shaft D 3mm |
10 |
363K03000 |
| Soc. Hd. Cap 10-32*1/2 Stst |
2 |
380A06320 |
| Flat Washer Stst #10 |
7 |
382713000 |
| Soc. Hd. Cap 10-24*1/2 Stst |
5 |
380A07061 |
| Spring L/W Stst #10 |
7 |
382D14000 |
| Rsc Box 230*185*95 Single Wall |
1 |
391A3L789 |
|
|
Procedure |
|
-
From the GUI, open the front door of the Lotem.
-
Open the side doors.
-
Shut down the Lotem.
-
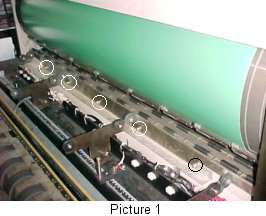
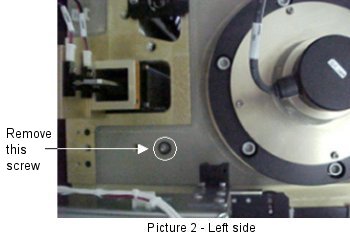
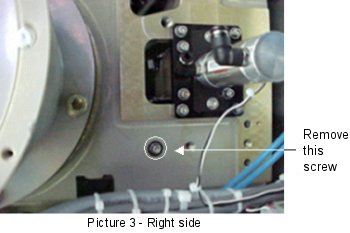
Remove the plate leader by first removing the five 10-24x1/2" screws
from the front of the Lotem, as shown in picture 1, below, and
then remove the 10-32x1/2" screw
from the left and right sides of the Lotem, as shown in pictures 2 and
3.
-
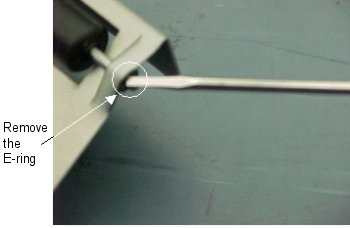
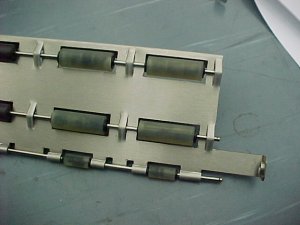
Remove the E-ring from one side of the plate leader shaft and then
pull the shaft through to the other side.
Note: Save the "old rollers" in the
machine's accessories kit.
-
Slide the soft rollers gently onto the shaft until all the rollers are
securely in place.
-
Reinsert the shaft and secure it with the E-ring.
-
Reinstall the plate leader (with the soft rollers) back into the
Lotem by
rescrewing the five screws (part number 380A07061) back
into the front of the machine, and then rescrewing the 10-32*1/2"
screws back into the left and right sides of the machine.
Note: Use Loctite® 242 to secure the screws
in place.
|
|
Test |
|
Perform the following tests to ensure the
machine is working properly:
-
Start up the Lotem PC.
-
Run several loading sequences to check for scratches.
-
Run several customer jobs to ensure the machine is working properly
without scratching the leading edge of the plate.
|
|
Technical contact(s) |
|
Moshe
Arviv
See the Escalation page
for escalation contacts.
|
Date submitted |
|
09 Dec 2002 |

