Applies to |
|
- Lotem® 800 II
- Lotem Quantum
- Lotem 800 Omron® interlocks
|
Priority: Next
failure
Release date: 24 Jun 2004
|
Component |
|
Unload tray assembly
Note: The unloading tray has two
part numbers, depending on whether or not packing is included:
- Unloading tray excluding packing: part number 507F3E972
- Unloading tray including packing: part number 514-00034A
|
Problem |
|
The ‘plate on unload’ detector is not sensitive enough and can cause plates
to double load.
The problem arises during the unloading process when a slightly buckled
plate is in the platesetter. The detector's range is too limited to recognise
the buckle and consequently the status of the detector suddenly changes
from ‘on’ to ‘off’. The platesetter interprets the status
change (off) and assumes that the plate was released. The drum then rotates
in the opposite direction, hauls the half unloaded plate back into the
platesetter, and then tries to load a new plate.
|
Solution |
|
Replace the ‘plate on unload’
detector with an enhanced detector (part number 504S1L783A). |
Time needed to
implement |
|
1 hour |
Parts needed |
|
| Part name |
Quantity |
Part number |
| Mini cable tie 140 mm |
15 |
203A10030 |
| Unload sensor bracket (spect) |
1 |
290A7B354 |
| SOC HD CAP STST 4-40*5/16" |
1 |
380A01032 |
SOC HD CAP STST 4-40*5/8"
|
1 |
380A01080
|
Phil FLT HD STST 4-40*5/8"
|
1 |
380G01080
|
Hex nut STST#4-40*1/16"
|
1 |
381A01000
|
Flat washer STST #4
|
3 |
382A05001
|
Spring L/W ST ST #4
|
3 |
382D05000
|
GTO tray det. cable type II
|
1 |
504L3E892
|
Paper detector wiring, L=0.1M
|
1 |
504S1L783A |
Enhanced unload tray detector (ECO IL03604)
|
1 |
719-00150A |
|
Procedure |
|
The following procedure consists of four sections:
Removing the unloading tray
- Close the air supply leading to the platesetter.
- In Lotem Controller, open the rear door of the platesetter and then
manually remove the upper cover.
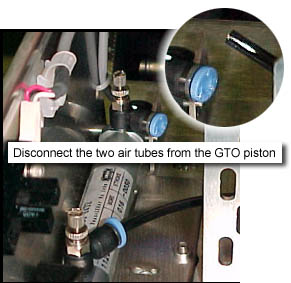
- Disconnect the two air tubes leading to the GTO
piston:
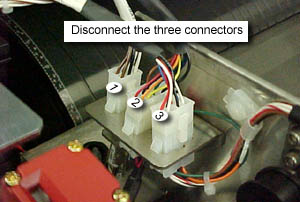
- Disconnect the three unloading tray connectors,
located on the right hand side of the platesetter:
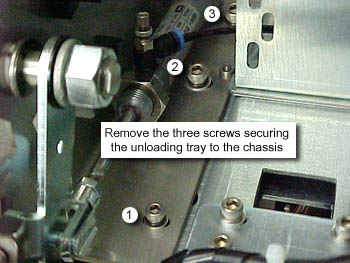
- On each side of the unloading tray there are three
screws securing the tray to the chassis. Remove all six screws:
- Remove the unloading tray and place it upside down on a work table.
Dismantling the GTO tray detector cable
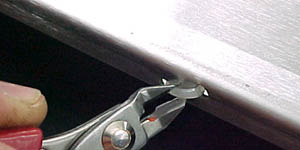
- Using a pair of cutters, cut the cable ties running along the length
of the tray:
- Release the two plastic clamps located on the side of the tray:
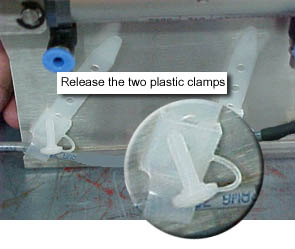
- Disconnect the GTO arm detector cable (part number 504L3E842)
from the GTO unload arm home position (HP) detector:
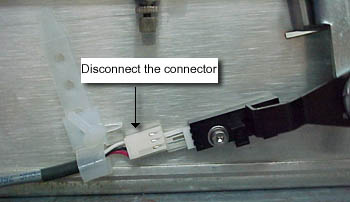
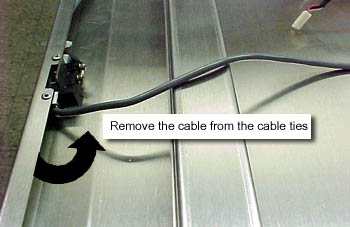
- Release the GTO arm detector cable from the plastic clamps and cable
ties:
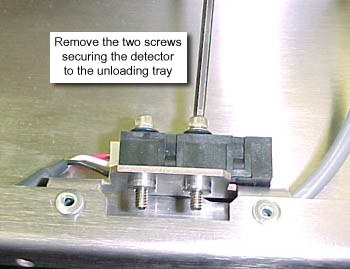
- Using a 4" hex key, remove the two screws securing the unload
detector to the unloading tray:
- Disconnect the unload detector connector:
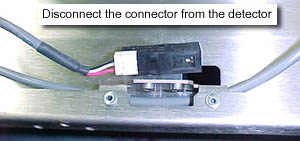
- Pull the cable toward the direction of the grommet:
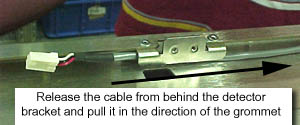
- Remove the detector cable from its housing:
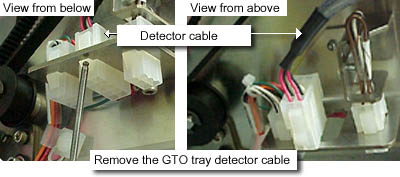
- Pull the cable through the hole on the unloading tray:
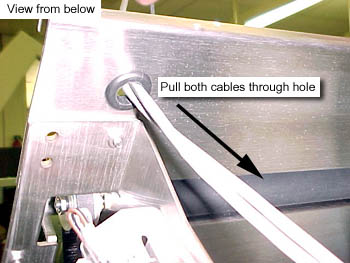
- Remove the grommet from the hole:
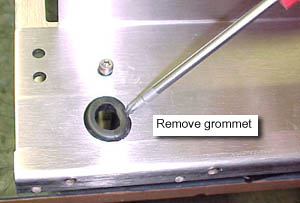
Installing the new GTO tray detector cable
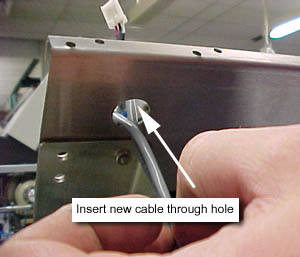
- Thread the ends of the new detector cables (part number 504L3892)
through the hole on the unloading tray:
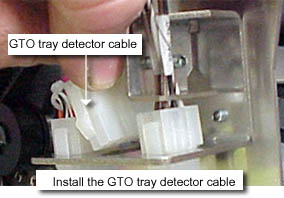
- Insert the single end of the cable (part number 504L3892) into
its housing:
- Slide the grommet over the unload detector connector:
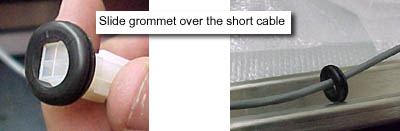
- Slide the grommet over the GTO arm detector connector:
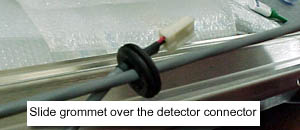
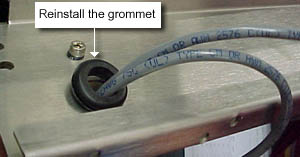
- Reinstall the grommet:
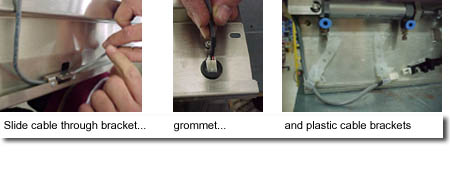
- Thread the GTO arm cable behind the detector bracket, through the
grommet (near the GTO piston) and through the plastic clamps (on the
side of the unloading tray):
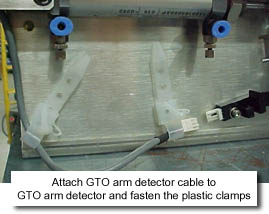
- Connect the cable to the GTO arm HP detector and then fasten the plastic
clamps:
- Insert cable ties (part number 203A10030) through the cable tie
holes located along the length of the unloading tray:
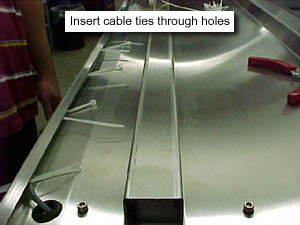
- Use the cable ties to secure the cable to the unloading tray. Trim
the ends of the cable ties.
- Align the holes of the new detector bracket and the new enhanced plate
on the unload detector (part number 504S1L783A):
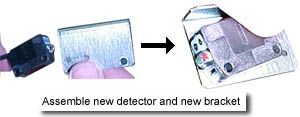
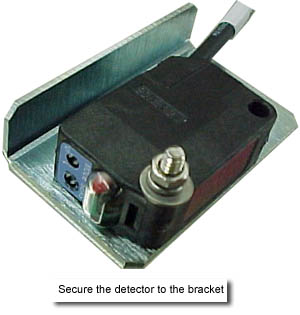
- Insert a sunken head screw, coated with Locktite® 242,
through the aligned holes of the detector and the bracket. Make sure
the head of the screw is on the side of the bracket.
Place a flat washer and a lock washer on the end of the screw and then
tighten the nut:
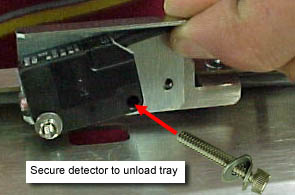
- Place a flat washer and a lock washer on a 4#40 5/8" screw
coated with Locktite 242.
- Secure the detector and bracket to the unload tray by aligning their
appropriate holes together. Insert the 4#40 5/8" screw through
the holes (detector, bracket and unload tray), making sure that the
head of the screw is on the side of the detector. Ensure that the screw
is tightly closed:
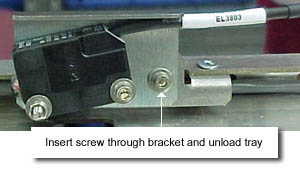
- Place a flat washer and a lock washer on a 4#40 5/16" screw
coated with Locktite 242.
- Insert the screw through the aligned holes of the bracket and the
unload tray, making sure that the head of the screw is on the side of
the bracket. Ensure that the screw is tightly closed:
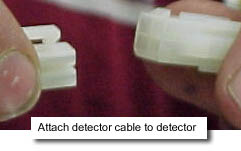
- Attach the unload detector to the new cable:
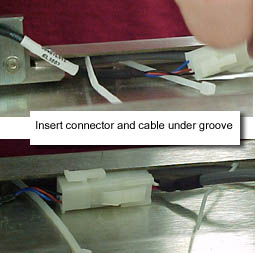
- Push the connectors and cables under the groove on the unloading tray:
- Use the cable ties to secure the cable to the unloading tray. Cut
the ends of the cable ties.
- Place the unloading tray back onto the platesetter.
- Secure the unloading tray to the platesetter by inserting the six
screws that were removed in step 5.
- Reconnect the three connectors that were detached in step
4.
- Reconnect the two air tubes to the GTO piston. Make sure the correct
tube is inserted into the correct hole.
- Reopen the air supply. If the GTO arm is not raised, swap over the
air tubes.
- Reinstall the upper rear panel and close the rear door.
Adjusting the sensitivity of the unload detector
In Lotem Controller, adjust
the sensitivity of the unload detector.
|
When done |
|
Load and unload several plates of
varying sizes and thickness. Make sure the process runs smoothly and ensure
that no errors occur. |
Logistics |
|
Approved quantities:
| CSC |
Quantity |
| CAM: |
10
|
| CEU: |
170
|
| CAP: |
4
|
| CJP: |
50
|
| CMA: |
/
|
| Other: |
/
|
| No Limit: |
/
|
Schedule supplies for first lots:
|
Schedule
|
CSC |
| CAM |
CAP |
CJP |
CEU |
| April |
10 |
4 |
25 |
70 |
| May |
/ |
/ |
25 |
50 |
| June |
/ |
/ |
/ |
50 |
Inventory: N/A
Lead time: For extra demand, allow a lead time of 1.5
months. However, 10 units can be manufactured, if they are urgently needed
within a short lead time.
|
Material disposition |
|
- Dispose of the old GTO unload arm HP detector.
- Dispose of the old GTO tray detector cable (p/n 504L3E842).
|
|
Document number |
|
719-00150A Rev. A |
Technical
contact(s) |
|
Itai
Peperovich
Product Support Manager: Yaron Soffer
Approval Date: 24 Jun 04 |
Date submitted |
|
24 Jun 2004 |

