Solution
|
|
Notes:
- When the device is working with a reduced number of beams, the number
of active beams is automatically reduced. Therefor, after each step
in this procedure, you must reset the number of diodes to 23 (or 48).
- Throughout this procedure, after any software or hardware change,
expose to test whether the change resolved the problem.
- Clean the light detector.
- Check that the light detector is functioning properly:
- In the Hardware tree, select Expose System >
Laser System and right-click Laser Group.
- In the Laser Group dialog box, change the number of working beams
in the registry back to 24 (or 48):
- First Expose laser active - 0
- Last Expose laser active - 23 (or 47)
- In the hardware tree, select Others and right-click Lotem
ThermoFlex.
- In the Properties dialog box, change the following parameters:
- Default first laser number - 0
- Default last laser number - 23 (or 47)
- Check the carriage position value for light calibration.
If the beams are not positioned over the light detector, some beams
(usually the side beams) may be out of calibration range.
- In the Hardware tree, select Expose System
> Laser System, and right-click Laser Group.
- In the Laser Group dialog box, change the light detector
position parameter value by increments of 1 mm (to
a maximum of ±3 mm) and try to calibrate.
Verify that beams 0 and 23 (or 47) are even.
- In the Hardware tree, select Expose System >
Laser System, right-click Light Detector, and check that
the High and Low Dac Factor parameter values match the
value on the light detector sticker.
Note: The maximum factor is 6.06 (or 3.5 for V-speed).
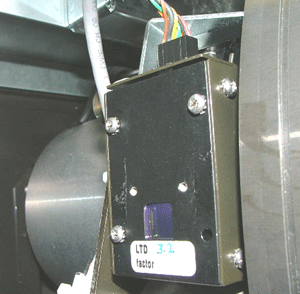
- Verify that the intensity value does not exceed 600 mV.
- Clean the optic lens.
Warning: Before replacing boards, make sure to
wear an antistatic strap.
- Check LDDs:
- Perform laser calibration using the same value at which the problem
occurs, and check which diode is weak.
- Swap the suspected defective LDD with the nearest functioning
one and calibrate again.
- If the calibration is successful, replace the LDD board.
Note: Disconnect the two pin connectors (red and black wires)
before replacing the defective LDD board
- Check whether diodes are weak or dead:
- Swap the power to the diode by swapping the two pins connectors
(red and black wires).
- Swap the suspected defective diode power cable with the nearest
functioning diode power cable, and calibrate light.
- If the problem persists in the suspected defective diode, replace
the diode.
- If the problem shifts with the cable to the functioning diode,
continue with step 8.
- Remove the DDB board, clean the connectors, and return the DDB board
to its place. If the problem persists, replace the DDB board.
|

