Solution
|
|
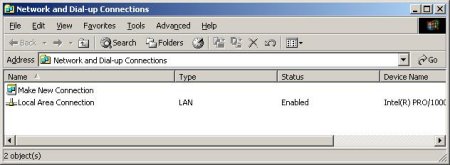
- From the Windows® desktop, select Start > Settings >
Network and Dial-up Connections.
The Network and Dial-up Connections window appears.
- From the File menu, select New Connection.
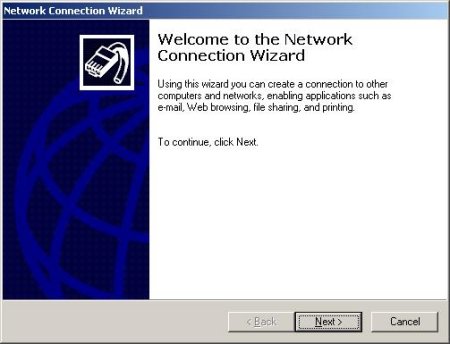
The Network Connection Wizard appears.
- Click Next.
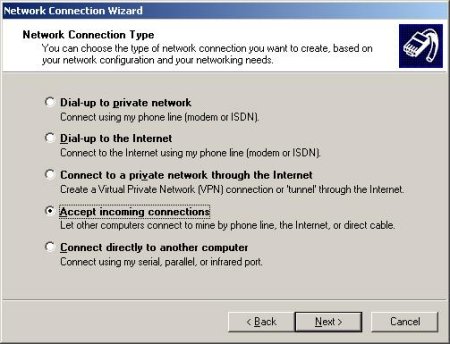
The Network Connection Type dialog box appears.
- Select Accept incoming connections and click Next.
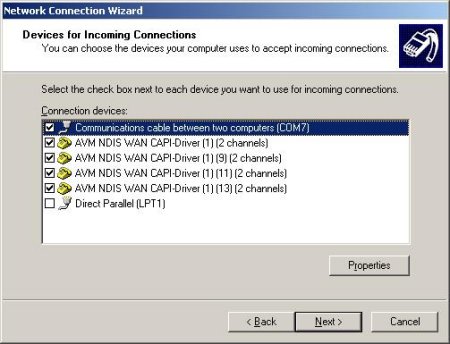
The Devices for Incoming Connections dialog box appears.
- Select all the connection devices except Direct Parallel (LPT1),
and click Next.
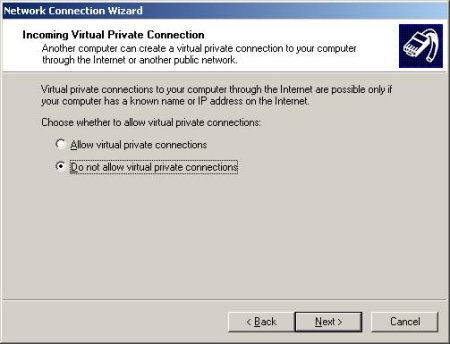
The Incoming Virtual Private Connection dialog box appears.
- Select Do not allow virtual private connections and click Next.
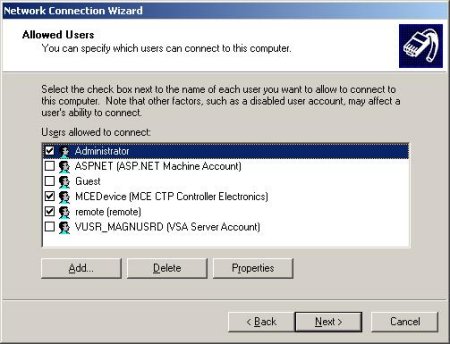
The Allowed Users dialog box appears.
- Select the Administrator, MCEDevice (MCE CTP Controller
Electronics), and remote (remote) check boxes and click Next.
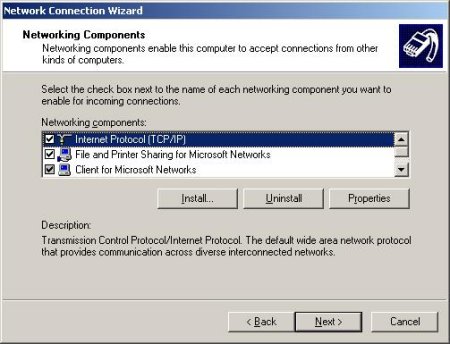
The Networking Components dialog box appears.
- Verify that all networking components are selected, and then right-click
Internet Protocol (TCP/IP) and select Properties.
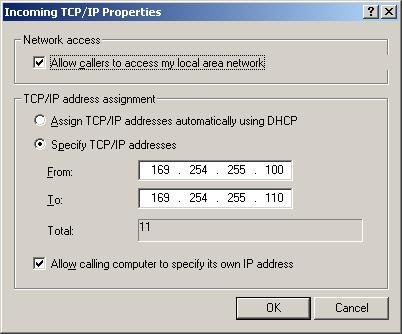
The Incoming TCP/IP Properties dialog box appears.
- Perform the following actions:
- Select the Allow callers to access my local area network
check box.
- Select Specify TCP/IP adresses.
- In the From box, type
169.254.255.100.
- In the To box, type
169.254.255.110.
- Select the Allow calling computer to specify its own IP address
check box.
- Click OK.
- In the Networking Components dialog box, click Next.
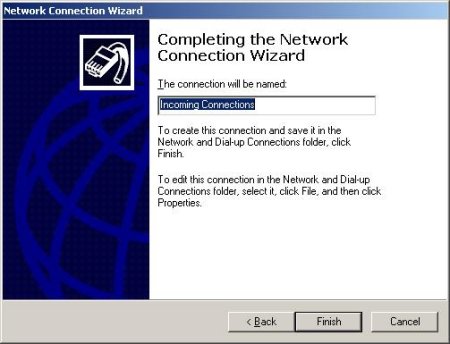
The Completing the Network Connection Wizard dialog box appears.
- Click Finish to complete the network connection.
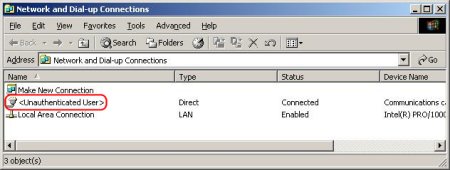
- To check the connection, open the Network and Dial-up Connections
window and verify that <Unauthenicated User> appears.
|