| |
Enable the NIC2
- Turn on the Prinergy render workstation.
- Enter the Prinergy BIOS.
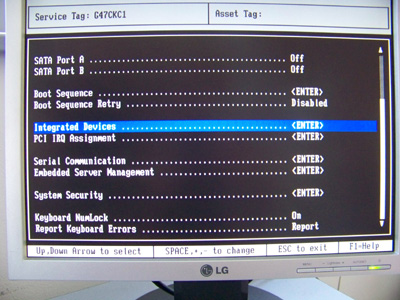
- Select Intergrated Devices to access the intergrated
device options:
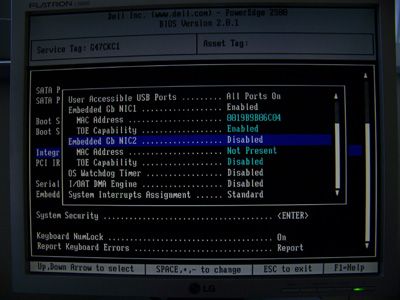
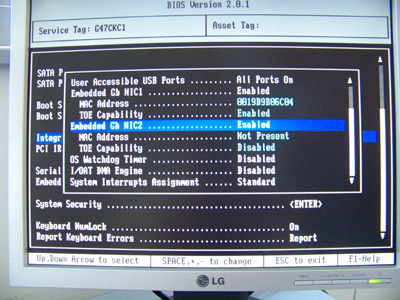
- Select Embedded Gb NIC2 and change its status from
Disabled to Enabled:
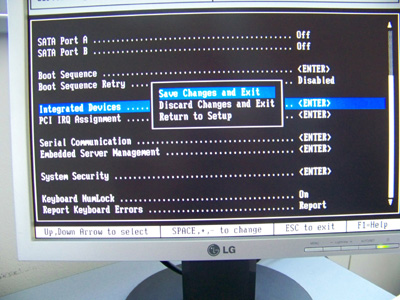
- Save the changes and exit the BIOS:
- Restart the Prinergy render workstation.
Connect and configure the Prinergy render workstation to the
Magnus 800 Controller computer
- The Magnus 800 Controller computer has two GBE sockets. Connect one
end of the PTP network cable to the GBE socket located on the left side
of the Magnus 800 Controller computer.
- Connect the other end of the PTP network cable to the available network
socket on the Prinergy render station.
Optional: To view the PSDRM IP address, do the following:
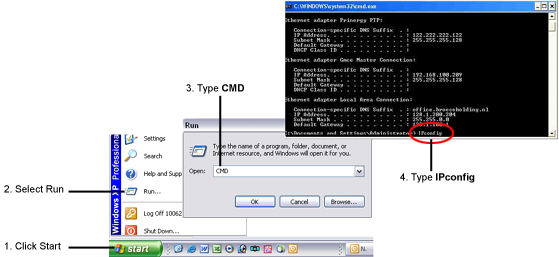
- Insert the Magnus 800 Controller software CD into
the Magnus 800 Controller computer’s CD-ROM drive, and follow the
installation wizard.
Important: During the
software installation, make sure the PSRM IP address (122.222.222.122)
is displayed.
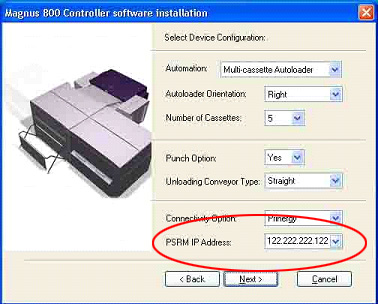
- On the Prinergy render workstation, perform a new configuration and
select the correct IP address for the PSRM 122.222.222.122.
Configure the Local Area Connection Properties
- Open the Network Connections dialog box.
- In the Newtork Connections dialog box, right-click the NIC connection,
and select Properties.
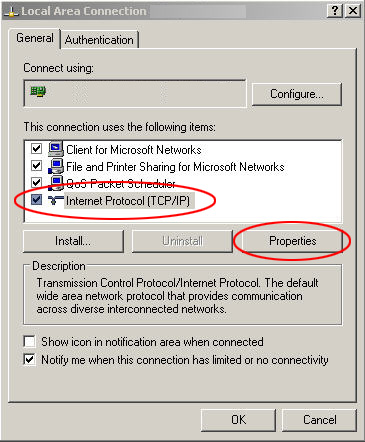
- In the Local Area Connection dialog box, select Internet Protocol
(TCP/IP) and click Properties:
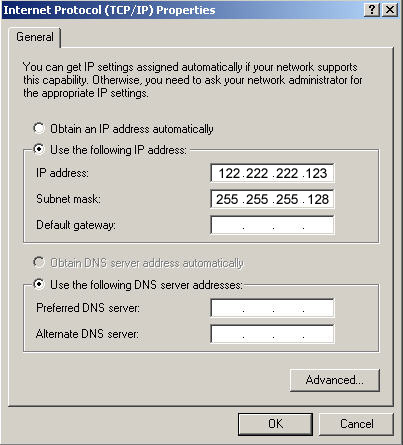
- In the Internet Protocol (TCP/IP) dialog box, check the Use
the following IP address box; enter the IP address and subnet
mask information as follows, and click OK:
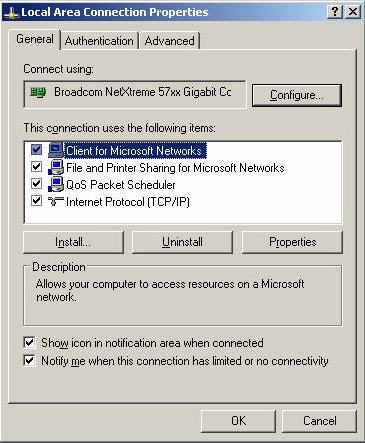
- Access the Local Area Connection dialog box for the NIC connection.
- Select Client for Microsoft Networks and click Configure.
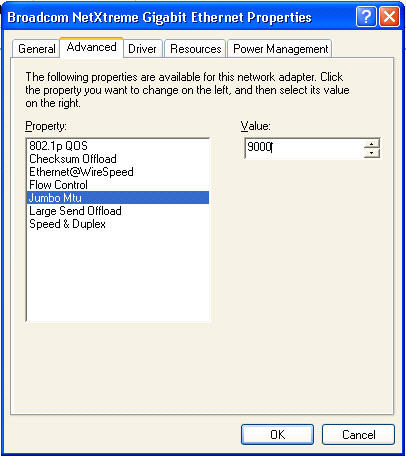
- Click the Advanced tab and do the following:
- Select Jumbo Mtu.
- Enter 9000 in the Value.
- Click OK.
|

