Home | Contact Us | Submit Troubleshooting Info | Search | Help


    Output | Software Solutions | Proofing | Color, Screening and Calibration | Scanning | Digital Photography | Consumables | POS


Cleaning the drum vacuum holes on the Magnus 800 platesetter


Product


Magnus 800 platesetter


Background


The drum vacuum holes invariably fill up with debris and dirt. In order for the vacuum to be effective, it is essential that the holes remain unblocked and dirt-free.
This procedure describes how to clean the drum vacuum holes.


Requirements


Drum Holes kit (part number 690-00127A)


Procedure

 
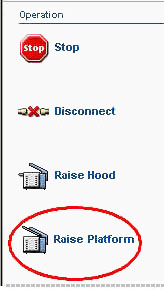
  1. In Magnus Controller, click Raise Platform to raise the loading platform:


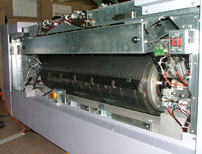
  2. Remove the upper front panel:


  3. Manually rotate the drum until the first set of vacuum holes, immediately after the LEC, is visible.
  4. The Drum Holes kit (part number 690-00127A) contains two
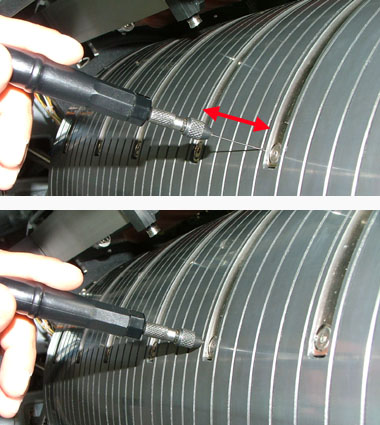
    0.8-mm wire bits, and two 0.8-mm drill bits. Insert one of the 0.8-mm wire bits into the cleaning jig.
  5. Starting from the first set of holes, located immediately after the LEC, systematically insert the cleaning jig into each drum vacuum hole. (Make sure the jig is long enough to reach the bottom of the drum vaccum hole.) Repeatedly prod the vacuum holes until they are dirt free and unblocked.
    Note: For badly blocked holes, replace the wire bit with the 0.8-mm drill bit.


  6. Reinstall the upper front panel.
  7. Manually close the loading platform.

Test

 
  1. In Magnus Controller, make sure the platesetter status indicator appears as Ready.
  2. On the platesetter, make sure the status light is green.
  3. Expose the customer’s largest plate format at 50% tint (plot 50 in Service Shell), and make sure that neither hot spots or attachments appear on the image.

Technical contact(s)
 

Content owner: Itai Peperovich
See the Escalation page for escalation contacts.

Date submitted
 

22 Feb 2005


    Copyright © 2005 Creo Inc. All rights reserved. Confidential. Back to top.