Home | Contact Us | Submit Troubleshooting Info | Search | Help
Output | Software Solutions | Proofing | Color, Screening and Calibration | Scanning | Digital Photography | Consumables | POS
Home | Contact Us | Submit Troubleshooting Info | Search | Help
Output | Software Solutions | Proofing | Color, Screening and Calibration | Scanning | Digital Photography | Consumables | POS
The term lenticular often refers to a printed image that shows depth or motion as the viewing angle changes. The term was coined by the physicist Dr. Joseph Robert Fraler from Dallas, Texas. Generally we use the term to mean the lens effect that creates a convex perspective of multiple images or light sources, but not necessarily a physical printed image.
Lenticular printing is a multi-step process that consists of creating a lenticular
image from at least two existing images, and combining it with a lenticular
lens. You can use this process to create various frames of animation (for
a motion effect), to offset the various layers at different increments (for
a 3D effect), or to show a set of alternate images which may appear to transform
into each other.
To create a lenticular print, the graphic designer selects images that are suitable
lenticular lens material, and the artwork is then prepared to enhance the intended
effect. The various images are then divided into slices, flattened into
individual, different frame files, and then digitally combined into a single
final file in a process called interlacing.
From there the interlaced image can be printed directly to the back of a plastic
lenticular sheet. The lenticular lenses are lined up with each image interlace,
so that light reflected off each strip is reflected in a slightly different
direction, but all strips from the same image are sent in the same direction
(parallel). The end result is that a single eye/camera looking at the print
will see a single whole image, but another eye/camera at different position
will see a different image because of the different angle of view. How different
depends on the lenses used, the number of original images, and how different
the original images were from each other.
During the printing process, the critical registration of the fine slices
of interlaced images must be absolutely correct, otherwise ghosting
and poor imagery might result. The pitch of the lenticular material is measured
and used to determine the required image resolution. When the image resolution
is correctly matched to the pitch of the lenticular material, exactly one
period of the interlaced images is printed under every lens. At any given
viewing angle, each lens focuses on a narrow strip, typically 10 to 20 microns
wide, of the image printed beneath it. The overall visible image is composed
of a set of narrow slices from the corresponding position under every lens,
magnified in width by a factor of 20 to 30. At different viewing angles, the
lenticular material focuses on and magnifies a different set of image slices.
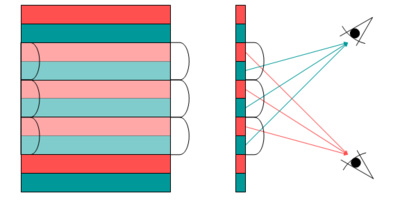 |
This image shows how a lenticular print is made. In this example, a green image and a red image are split, and each is visible only from a specific angle. |
The first step in design for lenticular printing is to choose an effect.
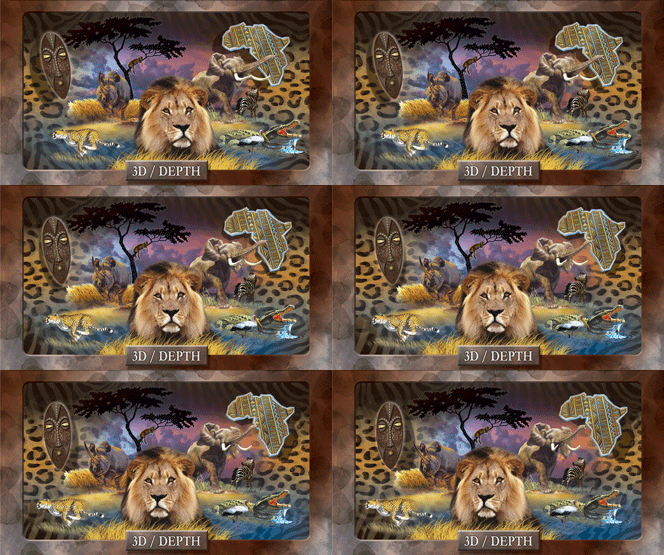
The illusion of depth and distance between elements from the foreground to
the background.
The fast transition between distinct elements.
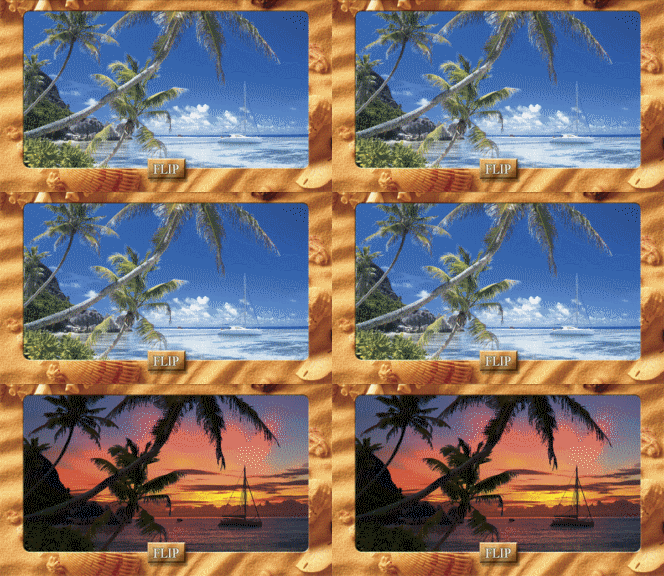
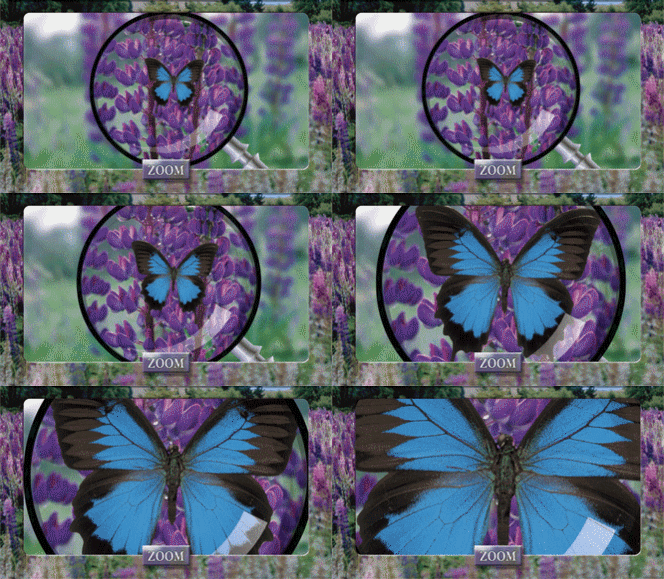
Image moves front and back and changes in size from larger to smaller.
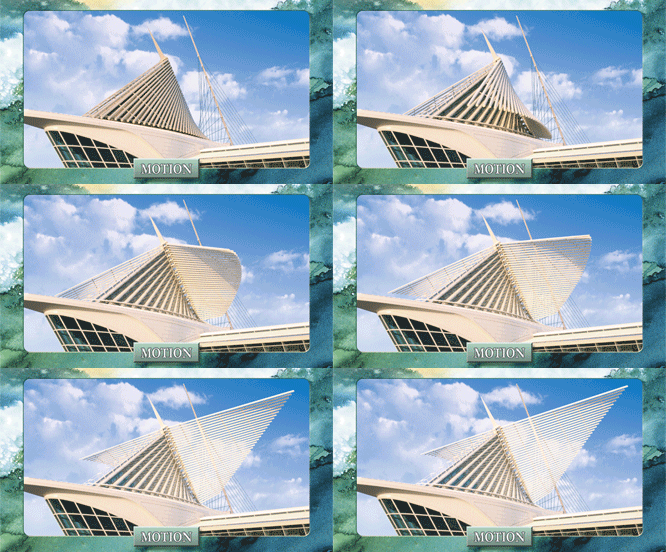
The recreation of a moving effect from video or a series of stills.
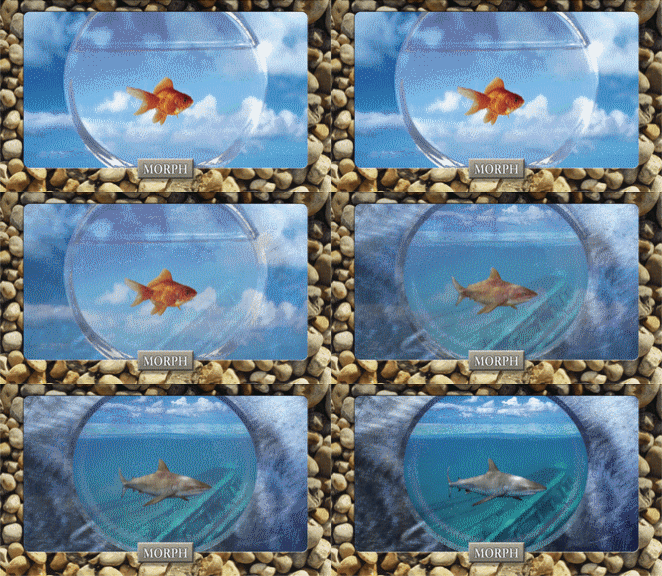
A fluid transition between elements, normally of the the similar size and shape.
Follow the design guidelines below for creating art best suited for lenticular animation effects.
| Do... | Consider two major factors: colour choice and image placement. |
| Use bright, light imagery to produce the best 3D effect results. Psychologically, cooler colors tend to recede and warmer colours tend to project. Elements that overlap slightly with good depth cues will enhance the illusion of depth. | |
| Use logos and typography near the aim-point where they will appear the sharpest and most readable. | |
| Use soft, less-detailed images for the best effect on the background and foreground layers instead of using overly complex images which will only decrease the 3D effect. | |
| Do not... | Use backgrounds with solid horizontal stripes if possible, as this cannot create a depth reference for the observer. |
| View sample | |
| Do... | The key to flip effects is simplicity. More than two frames can be used, but fewer frames is preferred for a clearer, more effective message. |
| Do not... | Use white as a background colour as it is more likely to cause ghosting. Try to avoid using really dark colors as a background as this will obscure the animation. |
| Have type overlapping. It is not recommend to have typography flip to more typography. | |
| Use a very small type with flip effects. Avoid using smaller type styles in lenticular prints as the lenticular screen will reduce readability. | |
| View sample | |
| Do... | Consider two major factors: color choice and image placement in producing the zoom effect. |
| Use bright, strong imagery to produce the best zoom effect results. | |
| Use a separate layer on your design for the zoom effect if you have more than one lenticular effect in your design. The zoom effect may be used for icons, logos or type. | |
| Do not... | Use white or really light colored backgrounds. Light colored backgrounds can be used, but are best avoided as they are more likely to cause ghosting. |
| Do... | Run lines horizontally otherwise images will become fuzzy. With vertical animation you may see more than one image at the same time. |
| Consider the viewer’s distance from the image as the focal length is important for viewing the lenticular image. You must know how far away the image is going to be viewed before interleaving is started. | |
| Start with video films or equivalent to get the next frame movement for animations. Computer generated art is also good. | |
| Do not... | Try to make the animation overly complex or else the design becomes too busy and will not produce an effective lenticular animation. |
| Have movement that goes from one side of the card to the other. Not
all sequences are candidates for animation. |
|
| Use full motion animation for point of purchase (POP). Lenticular POP displays have to use vertical lenticules (single lenticular lens), which means full animation is not appropriate for lenticular POP material. Limited motion is okay for POP, and in most cases, the animation should be sized as if for a handheld piece. | |
| Use really small type with the motion effect as the lenticular screen will reduce readability. | |
| View sample | |
| Do... | Use a minimum of three frames for a morph effect. The morph effect starts with one image and slowly transforms into another image. You need the images for the start, the end, and the frames between. |
| Include elements similar in shape and color in your design, as this will create a clean morph from start to end for a perfect morph effect. | |
| Do not... | Use really small type, as the lenticular screen will reduce readability. Ghosting can also occur if you have animating elements in your design that are not close enough to each other. |
| Files |
|
| Backgrounds | Include elements similar in shape and color in your design, as this
will create a clean morph from start to end for a perfect morph effect. View sample |
| Text |
|
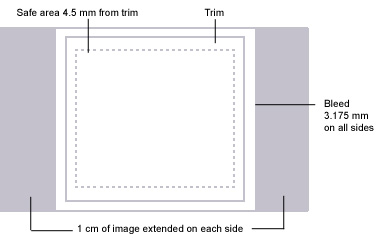
| Trim and bleed |
|
 Choose the correct lenticular lens sheet
Lenticular lens sheets come in many shapes, sizes, types, and designs. Choosing the correct lenticular lens sheet for your application is critical in creating impressive lenticular images. There are several questions you should ask yourself to determine which lenticular lens sheet is best for your application.
Determine the visual pitch of the lenticular lens
A pitch test is nothing more than a calibration tool. It calibrates the printer, media and lenticular lens sheet used for a particular image. Pitch-testing the lenticular lens to the proofing device will determine the proofing pitch. Each device can, and will, have a slight variance. Therefore, it is critical to proof your work on the same printer that you performed the proofing pitch test.
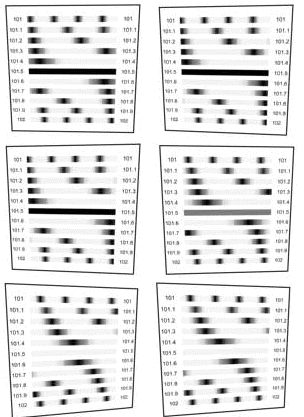
It is important that the pitch test is performed at the predetermined planned viewing distance. For example, if the 101.5 bar appears to sweep slightly to the left as you move to the right, and the 101.4 bar appears to sweep slightly to the right, you can make the determination that the pitch is in between the two. You can fine tune pitch to within 1/1000 of an inch. The pitch test form is graduated in 1/100 of an inch. If you are working with a press pitch in 1/1000 of an inch, the resizing formula remains the same. Greater pitch accuracy equates to a better final printed product.
Related links: