

Home | Contact Us | Submit Troubleshooting Info | Search | Help
Output | Software Solutions | Proofing | Color, Screening and Calibration | Scanning | Digital Photography | Consumables | POS
Home | Contact Us | Submit Troubleshooting Info | Search | Help
Output | Software Solutions | Proofing | Color, Screening and Calibration | Scanning | Digital Photography | Consumables | POS
Before installing the skins and guard rail:
 Check that the AC power is OFF.
Install the guard rail.
- Open the p-door and raise the table.
- Remove the two front panels from the Trendsetter VLF.
- Slide the lower support panels under the front bottom edge of the machine until the vertical stops butt up against the machine. (When the front panels are replaced, their pressure will hold the plate firmly in place.)
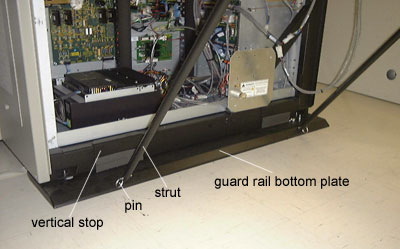
Lower support panel in position
- With a helper, hold each guard rail assembly in place
- Insert the bottom supports.
- Fasten the top support.
- Connect the two cables from the righthand guard rail assembly to the receptacle on the top surface of the Trendsetter VLF.
- Install the cover bracket and the cover plate over the cables.
- Align the sliding gate with the rail.
To adjust the gate-rail height:
- Rotate the bottom support rods until the sliding gate and rail are aligned.
- Insert the four retaining pins.
- Tighten all fasteners.
- Lower the table.
- Close the p-door.
- Close the sliding gate.
Drawing: Installed rail assembly
Install all the Trendsetter VLF outer panels.