Home | Contact Us | Submit Troubleshooting Info | Search | Help
Output | Software Solutions | Proofing | Color, Screening and Calibration | Scanning | Digital Photography | Consumables | POS
Home | Contact Us | Submit Troubleshooting Info | Search | Help
Output | Software Solutions | Proofing | Color, Screening and Calibration | Scanning | Digital Photography | Consumables | POS
Ripro Backup (Legato) TIC - Installation Guide
Previous Page | ToC | Next Page
Customize Setup
Sliding Backup
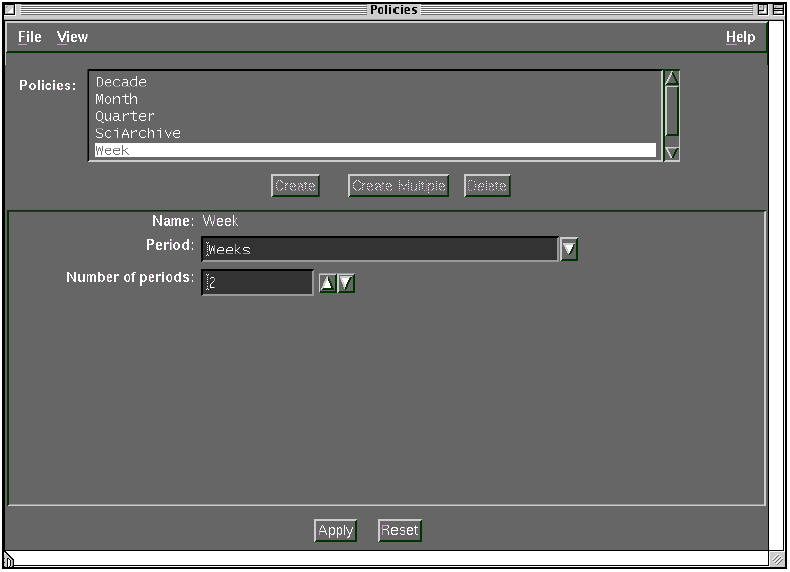
To create a browse/retention policy:
The Policies dialog window now appears.
Creating a Sliding Backup Schedule
A sliding backup schedule enables you to perform a part of the full backup and the incremental backup every day. This schedule is implemented in those instances where there is no available time to perform a complete weekly backup in one day (e.g. the plant works every day including weekends).
Creating a sliding backup schedule means:
Creating Clients for a Sliding Schedule
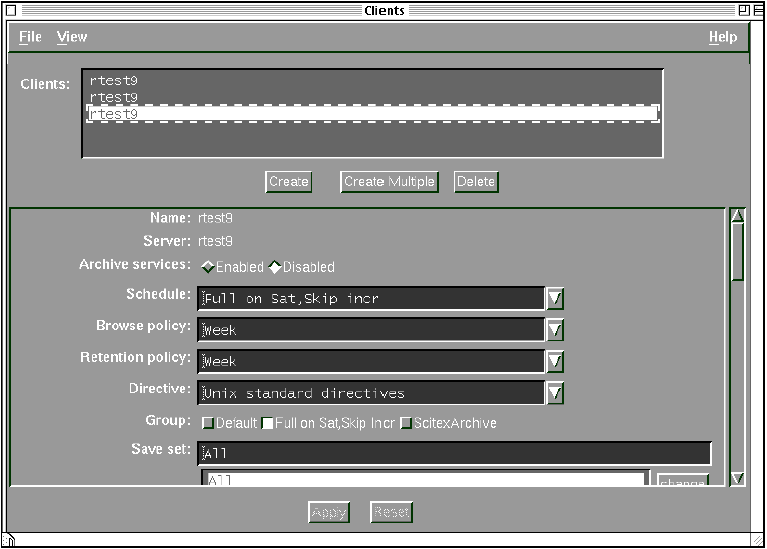
To Create Clients for a Sliding Schedule:
The Clients dialog window is now displayed.
This must be selected for each new schedule.
For a sliding schedule, there should be 7 schedules, each representing a weekly backup for a specific day, e.g., Full on Sunday, Full on Monday etc.
At the Browse policy text field, a list of policies can be similarly displayed.
The recommended setting is 2 weeks.
At the Retention policy text field, a list of policies can be similarly displayed.
The recommended setting is 2 weeks, it cannot be less than the Browse policy setting.
At the Directive text field, a list of policies can be similarly displayed.
The recommended policy is Unix standard directives.
Note: Do not use the Unix with Compression Directives option due to hardware compression, which is default.
For each day client, a list of all dataVolumes to be backed up should be shown (like in df command) and then divided up into 7 sets (each set representing a 1/7 of a weekly full backup plus the incremental backup).
For Daily Incremental, a /dataVolumes/* should be selected.
Creating Groups for Different Full and Incremental Start Time
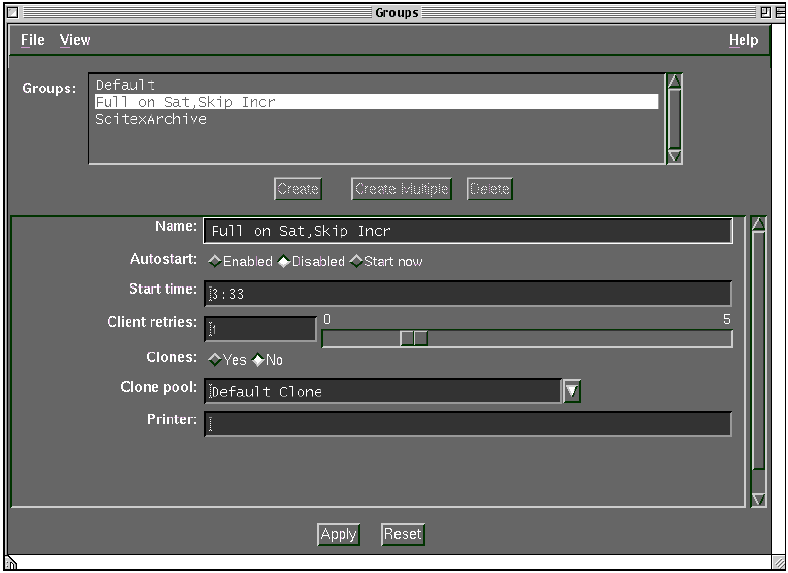
To create a group for each schedule and to adjust the start time accordingly:
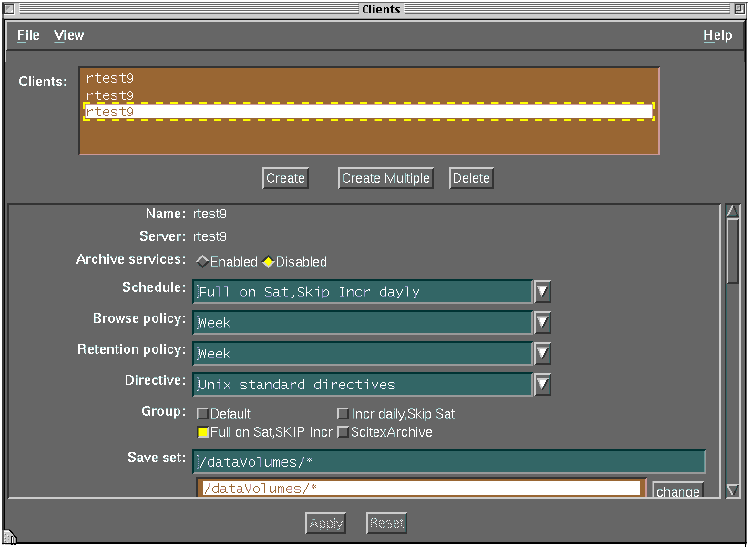
Setup Clients for Different Full and Incremental Start Time
Note: Do not use the Unix with Compression Directives option due to hardware compression, which is default.
At the Browse policy text field, a list of policies can be similarly displayed.
The recommended setting is 2 weeks.At the Retention policy text field, a list of policies can be similarly displayed.The recommended setting is a 2-week period; it cannot be less than the Browse policy setting.
At the Directive text field, a list of policies can be similarly displayed.The recommended policy is Unix standard directives.
Select Apply when all settings are complete.
This procedure must be repeated until all the schedules have been set to cover a complete week.