Installing a Kodak XP4
Before configuring the KokakXP4, ensure
that the following requirements are met:
- TCP/IP is configured and running on the Brisque.
- TCP/IP is configured and running on the KodakXP4 NT server.
- The KodakXP4 application is open and running on the NT
server.
- The TSP board is installed on the Brisque (refer to Connecting an Imagesetter Using the TSP Board
in Installing an Imagesetter).
- The software version on the Brisque is 3.x or higher.
Verifying the IP
Address on the NT Server
To verify the IP address on the NT
server:
- In Windows NT, select Start -> Settings -> Control
Panel, as follows:
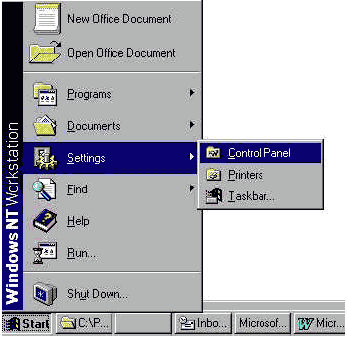
The Control Panel window appears.
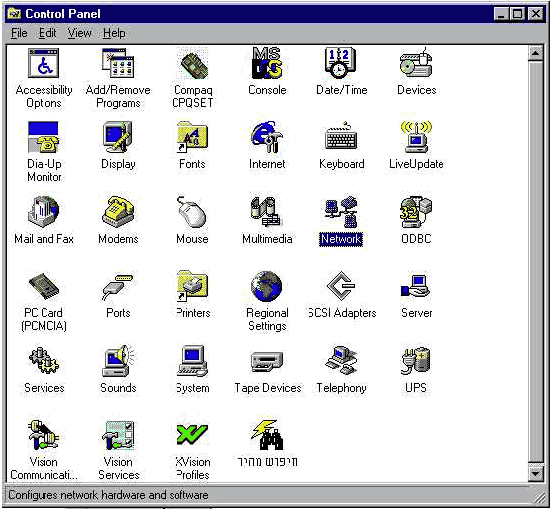
- Double-click the Network icon to open the Network
(viewing mode) window.
- Select the Protocols tab and
then double-click on TCP/IP Protocol to open the TCP/IP Properties window.
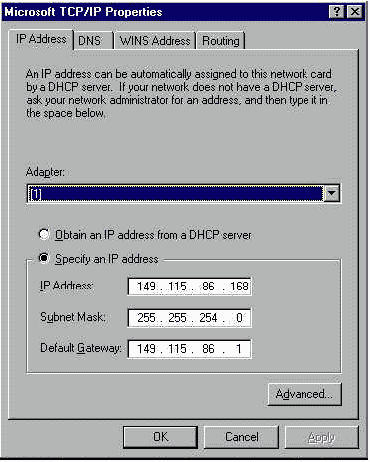
- From the IP Address tab, write
down the IP Address for future reference.
- Click Cancel twice to exit from the network settings.
Configuring the
KodakXP4 on the Brisque
To configure the KodakXP4 on the Brisque:
- From the Launch Pad, open the Setup subpanel.
- Double-click the Config icon to open the Config
dialog.
- Double-click the KodakXP4 icon to open the KodakXP4
Configuration window.
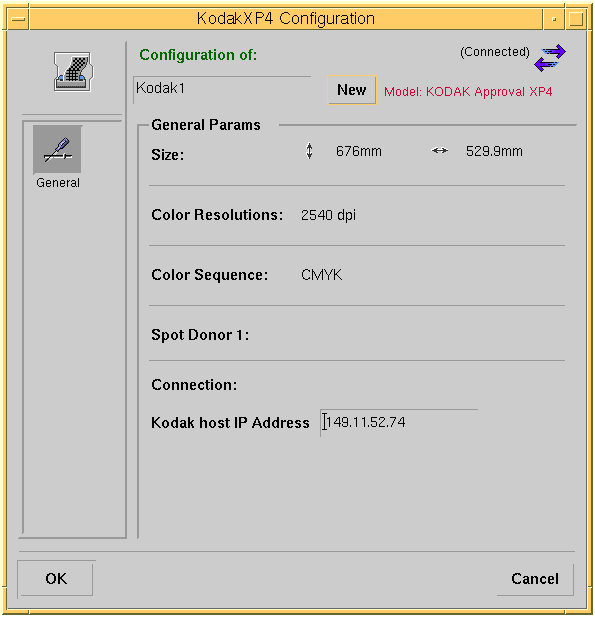
- Click the New button to open
the Name Your Proofer dialog.
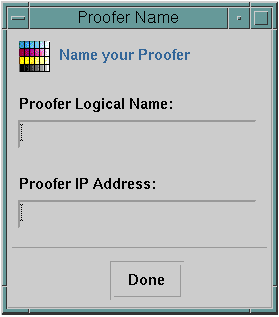
- Type in a logical name for the proofer
and the IP address of the KodakXP4 and then click Done.
- Click OK in the KodakXP4 Configuration window
to complete the operation.

