When entering the configuration through SciSmit on
the Brisque or through Station configuration on the IFM, use capital letters throughout.
Example-station name BRSK1 not brsk1. Subnet is LAN not lan.
On the Kodak IFM in the Remote Logical Names form, do
not configure any other device apart from D0 for the Brisque station. All files
that are transferred from the Brisque to the Approval pass through the Jobs folder
on brisquename.1.0 even if the file being proofed resides in a folder located on brisquename.2.0.
On the Kodak IFM in the Remote Logical Names form, the
Logical name cannot be the same as the Station name.
The Brisque station name is BRSK1 and the Logical name is BRISQUE1.
Do not use periods (.), underscores (_) or
dashes (-) in the Logical name.
Local
Station
Power up the Brisque, refer to Powering Up the Brisque.
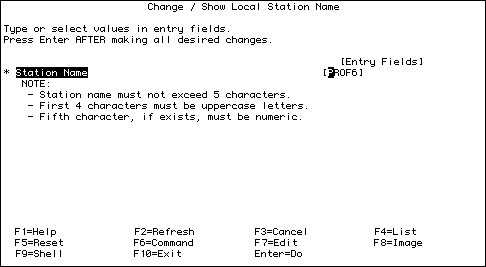
To configure the local station on SciNet, execute the
following sequence from the SciSmit menu:
Communication & Servers-> SciNet-> SciNet
Configuration-> Local Station-> Change/Show Local Station Name and press Enter.
The Change/Show Local Station Name window opens with
the name of the local station appearing as the default.
Press Enter to accept the local station name.
Press [F3] until you return to SciNet
Configuration.
Remote
Station
From SciNet Configuration menu execute sequence Remote
Station->Add a Station and press Enter.
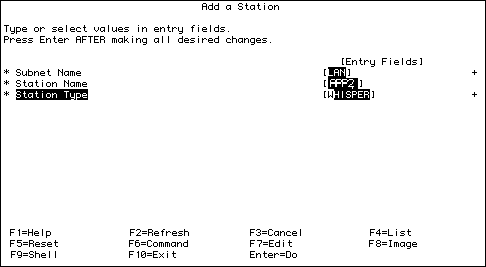
The Add a Station window opens.
At the subnet field press [F4] to display a list of
subnets, select LAN and press Enter to return to the Add a Station
window.
For Station name, type in the logical name of the
Kodak_rip proofer, in this case APP2.
For Station Type press [F4] to display a list
of station types, select Whisper and press Enter.
Press Enter to accept all the changes.
The Command Status window displays OK for a successful operation.
Press [F3] until you return to the main SciSmit
menu.
Configuring
Kodak Approval Proofer
Select Proofer from the main SciSmit menu and
press Enter.
Select Add/ChangeKodak Configuration and
press Enter.
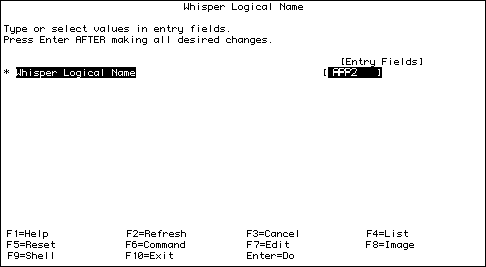
The Whisper Logical Name window opens, with Whisper Logical Name
highlighted.
Type in the brackets the logical name of the Whisper (APP2)
to which you are connecting and press Enter.
Press Enter in response to the Are You Sure?
pop-up window.
The Command Status window shows OK for a successful operation.
Configuration of Brisque
Station on the Whisper
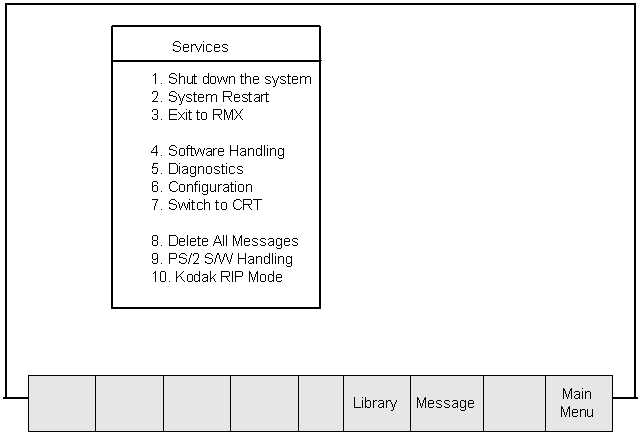
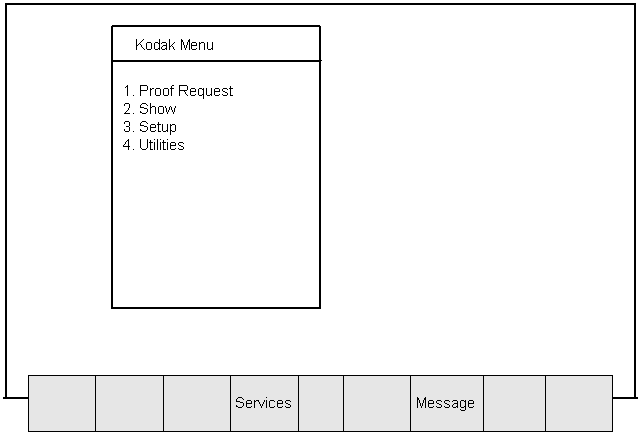
On the Whisper open the Kodak Menu form, press
[F4] Services.
From the next menu form select I/O mode and press [F4]
Services.
From the Services menu use the directional arrow
keys to select Configuration.
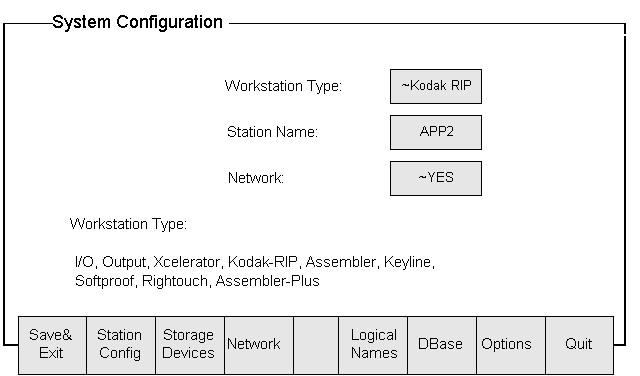
Verify that the System Configuration form shows
parameters similar to those displayed below.
Fill in the Station Name and ensure Network is
toggled to Yes.
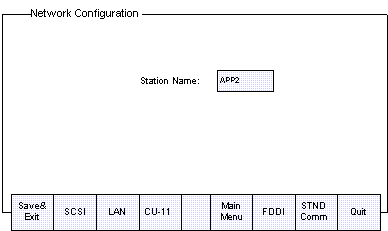
Press [F4] Network to reach the Network Configuration
form; verify that Station Name is correct.
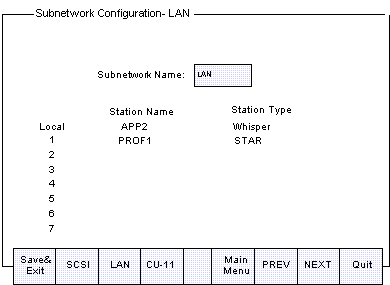
Press [F3] LAN in order to configure the Subnetwork.
The Subnetwork Name must be LAN
For Station Name fill in the name for the Brisque
station and for Station Type select Star.
Press [F5] Main Menu to return to the System
Configuration form.
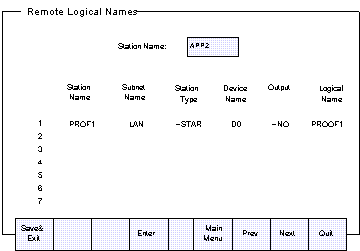
Press [F5] Logical Names and then [F2] Remote
Logical Names.
On this form fill in the details of the remote station (i.e. Brisque).
Station Name
Name of Brisque Station
Subnet Name
LAN
Station Type
STAR (is used for Brisque)
Device Name
Disk on Brisque station where
dataVolumes are located
Output
NO
Logical Name
as previously defined.
When all parameters entered press [F1] to Save&Exit and
return to Kodak Menu.
Verify PTOP Connectivity
Open a terminal from the Brisque application, type scinet_ping
and see if you can ping the Kodak station.
Within the Jobs folder on brisquename.1.0
create a folder-test.j. Create another folder within test.j-call it test.p.
Place a CT in test.p and see if you can locate this
CT from the Kodak station using either the browser in I/O mode or using Proof
Request from the Kodak application.
Copyright (c)1998 Scitex Corporation Ltd.
All rights reserved. Certain names, logos, designs, titles, words or phrases
on this page may constitute trademarks, servicemarks, or tradenames of CreoScitex
Corporation Ltd. or other entities which may be registered in certain jurisdictions.



 keys to select Configuration.