

Home | Contact Us | Submit Troubleshooting Info | Search | Help
Output | Software Solutions | Proofing | Color, Screening and Calibration | Scanning | Digital Photography | Consumables | POS
Home | Contact Us | Submit Troubleshooting Info | Search | Help
Output | Software Solutions | Proofing | Color, Screening and Calibration | Scanning | Digital Photography | Consumables | POS
Installation (F50)
Cold Start Installation
Brisque and Network Configuration
Configuring Checklist
If you performed a Cold Start installation without upgrading from an earlier version to a later version, perform the procedure described in Section 3.5 Configuring the Brisque After a Cold Start Installation I
 |
Important: You can restore configuration files from a DataVolume only if you have first save the configuration files to DataVolume, as described in Saving the configuration Files to a DataVolum |
› If you performed a Cold Start installation that included upgrading from an earlier version to a later version, the configuration files cannot be restored and must be configured manually, as described in Section 3.6 Configuring the Brisque After a Cold Start Installation II.
Configuring the Brisque After a Cold Start Installation
(Without Upgrading from an Earlier Version to
a Later Version)
This section describes how to configure the Brisque after performing a Cold
Start installation (without upgrading from an earlier version to a later
version), that consists of the following procedures:
› Restoring the Configuration Files from a DataVolume After a Cold Start Installation
› Setting Up the Modem
› Rebooting the Brisque
› Restoring the Fonts library
› Update time and date
Restoring Configuration Files from DataVolume After Cold Start
|
Important: Do not perform this procedure if you performed a Cold Start installation form an earlier version to a later version. |
To restore the Configuration files from a dataVolume :
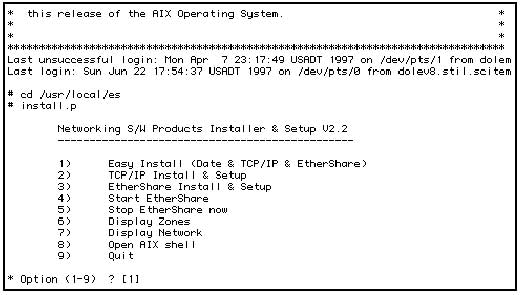
2. Type 9 and then press Enter to exit from the window.
3. At the command prompt, type scismit and then press Enter.
4. From the SciSmit main menu, select Backup and Restore - Save and Restore Configuration to dataVolume.
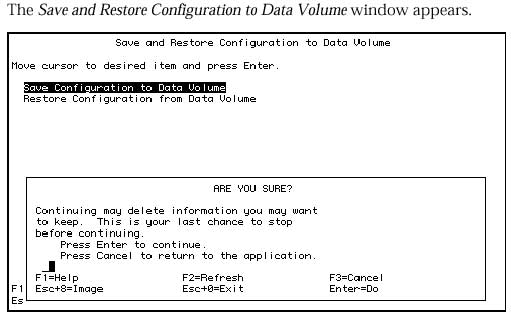
Update Time and Date
› Refer to section Configuring the Date/Time
Setting Up the Modem
› After you have restored the configuration files, you must set up the modem on the Brisque, as described in Setting Up Remote Support and Control via a Modem.
Rebooting the Brisque
To Reboot the brisque
Restoring Fonts Library
› Refer to section 3.9 Restoring the Fonts Library.
Configuring the Brisque After a Cold Start Installation ll
(With an Upgrade from an Earlier Version to a Later Version) During configuration of the Brisque after a Cold Start installation that includes an upgrade from an earlier version to a later version, you need to restore the password diskette first and then set up the network.
|
If you preformed a
Cold Start installation without upgrading EtherShare Version 2.2 to
version 2.5, perform the Easy install method described in this section.(
In this case the EhterShare license is imported from the password backup
diskette).
If you performed a Cold Start installation and setting Up EtherShare 2.5 |
This section describes how to configure the Brisque after a Cold Start installation (with an upgrade from an earlier version to a later version), which consists of the following procedures:
› Restoring Passwords from the Password Backup Diskette
› Networking Installation and Setup Using the Easy Install Method
Restoring Password from the Password Backup Diskette
To restore password from the password Backup Diskette:
|
This operation restores
the CreoScitex password, the Helios activation key, and the NatFx and TransferPro
(DIT) licenses (password).
For all Cold Start operation or when configuring the Brisque for the first time, the passwords must be restored (enabled) |
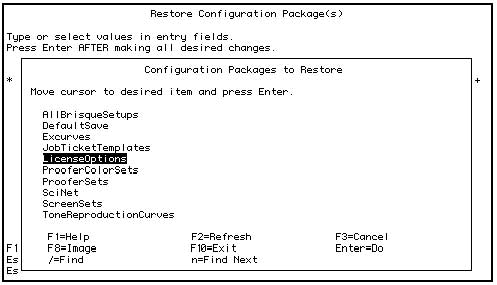
Networking Installation and Setup, the Easy Install Method
This section describes how to manually set up the network using the Easy Install method and contains the following procedures:
› Accessing the Installer Menu
› Configuring the Date/Time
› Configuring TCP/IP
The Networking S/W Products Installer & Setup window appears.
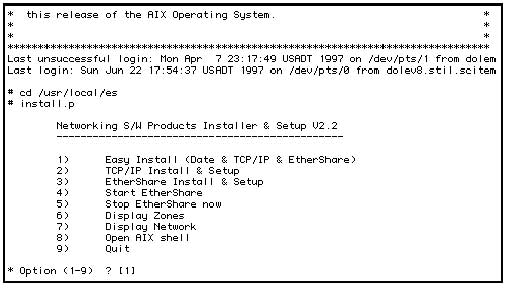
3. Type 1 to select the Easy Install (Date & TCP/IP & EtherShare) option and then press Enter.
4. Complete the remaining procedures in this section.
2. Type 1 to select the Easy Install (Date & TCP/IP & EtherShare) option and then press Enter.
3. At the Current Date/Time option, type y and then press Enter.
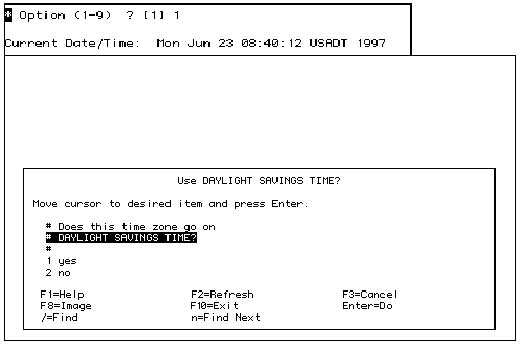
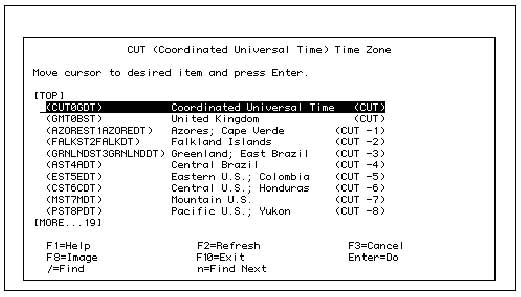
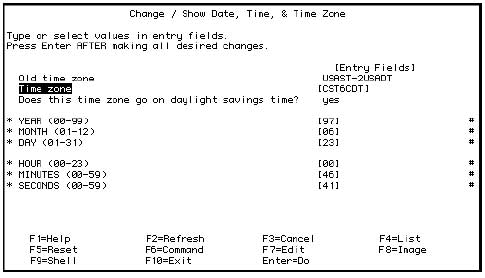
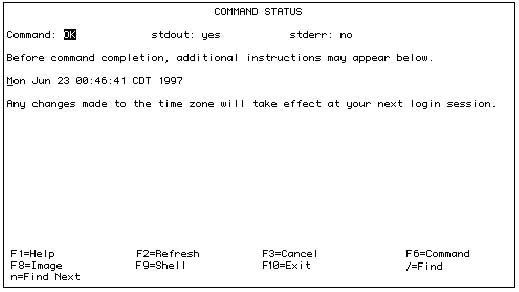
7. Press [F3] to return to the Installer menu.
Configuring TCP/IP
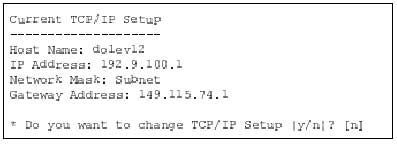
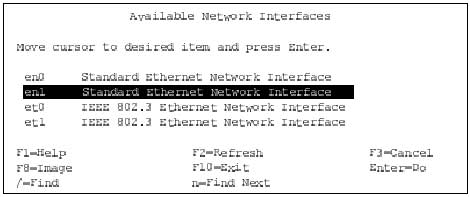
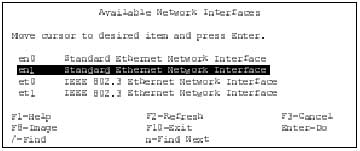
4. From the Available Network Interfaces window select en1 and then press Enter.
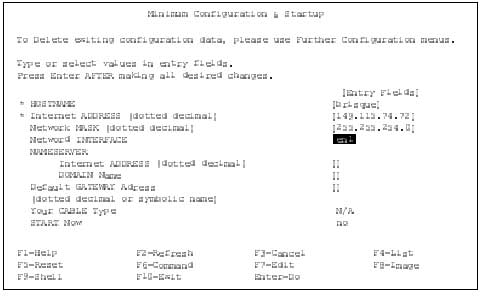
The Minimum Configuration & Startup window appears
|
Refer to Appendix A, CreoScitex IP Address Structure Recommendation, if you are using CreoScitex Network IP numbering |
The Command Status window appears, displaying an OK status for a successful operation.
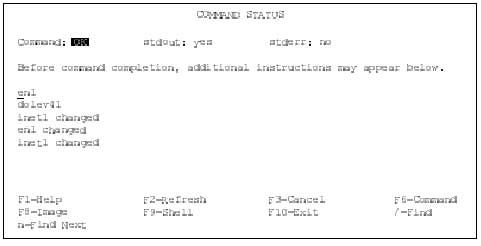
6. Press [F3] to return to the Installer menu.
Configuration EthereShare
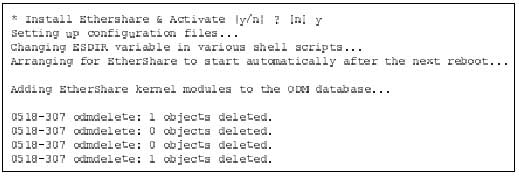
The operation executes and then returns to the Easy Install menu sequence.
Setting Up TCP/IP Communication
|
1. The Brisque
model comes with two communication ports-en0 and en1. You
must configure the en1 port for network configuration (en0 can be
used for Lotem connectivity)
2.If there are other UNIX systems on-site, the Network Administrator will issue the appropriate IP address. 3. Remove any existing local IP address, refer to Removing a Host |
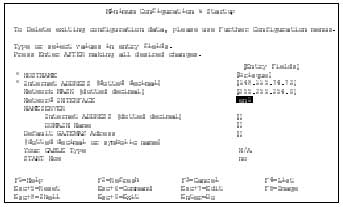
The Minimum Configuration & Startup window appears.
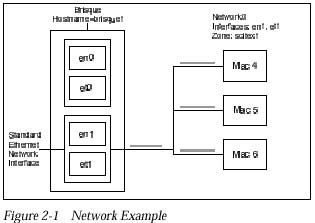
From the network example, the hostname appears as brisque1, this name was decided during the Station Configuration.
|
For sites where a configured
TCP/IP network already exists (with or without routers), the site Network
administrator should provide the following network address parameters for
each Brisque interface: IP Address, Network Mask, and Default
Gateway Address.
Refer to section Appendix A, CreoScitex IP Address Structure Conventions, if you are using CreoScitex Network IP numbering. |
4. Determine the configuration values as follows:
| HOSTNAME | The local Hostname is set at the
default name (brisque1) at the production line. To change the Hostname refer to SciSmit->Configure Station->Change Station Name. Note: Do not change the station name from this window |
| Internet ADDRESS | Determine the Internet Address of the local station. |
| Network MASK | An empty Network Mask field indicates that the default Network Mask is being used. The Brisque default IP Addresses belong to Class C, whose default address is 255.255.255.0. |
| Network INTERFACE | This displays the interface being configured, for example, en1. |
| Your CABLE Type | This is automatically sensed and displays N/A as the default. Toggle this option with the TAB key to select the site’s cable type. |
| START Now | Toggle this option with the TAB key to change from no to yes. |
Configuring TCP/IP for a Remote Station (Hosts Table)
This section describes how to configure TCP/IP for a remote station, which consists of the following procedures:
› Accessing the Hosts Table
› Adding a Host
› Validating the Hostname List
› Removing a Host
|
To enable proper communication, you must add
the hostname and IP address of all remote stations.
|
Accessing the Hoses Table
› At the command prompt, type smit hosts and then press Enter to reach the Hosts Table window directly.
Adding the host
|
By default, the network CreoScitex IP address
is written to the hostname list.
If the IP address of your station (configuration in the TCP/IP menu) is different than the CreoScitex IP default address, then two listing for the same station will appear in the hostname list. Remove any incorrect hostnames and IP address from the list, as described in Removing a Host. |
To validate the hostname
1. From the Hosts Table window, select the List All Hosts option and then press Enter.
2. Check that the list is valid. At least the first two entries should be included:
| 127.0.0.1 | local host (Loopback) |
| Your Internet Address | Your Hostname |
| Remote Internet | Address Remote Hostname |
3. Press [F3] to return to the Hosts Table window.
Verifing TCP/IP Installation