Applies to
|
|
Lotem™ 800 Family
FCO Kit number: 510F28844
Machine S/N:
Estimated implementation time: 2 hours
Logistics: See Action
required.
|
Type of change: Conditional
Reason: To curtail repeated problems with
pressure marks that are caused by the unload rollers.
Description: Replaces the standard unload roller
assembly with an unload roller assembly that includes a single
roller. |
Procedure
|
|
This procedure includes the following steps:
- Removing the currently installed unload
roller assembly
- Assembling the single-roller unload
roller assembly
- Installing the unload roller assembly
- Testing unload roller function
Removing and disassembling the
currently installed unload roller assembly
- Release the cassette and remove it from the machine.
- Open the front door, right side door, left side door, and
the rear door.
- From the PC Controller, close the Lotem application.
- Shut down the machine and disconnect it from the main power
supply.
- Close the air supply valve on the wall air pressure unit.
- From the front of the machine, remove
the unload roller piston.
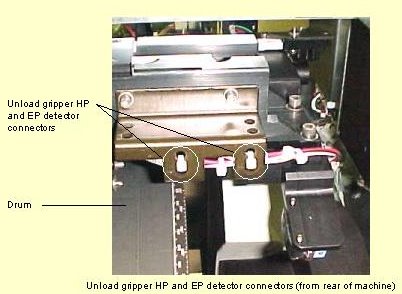
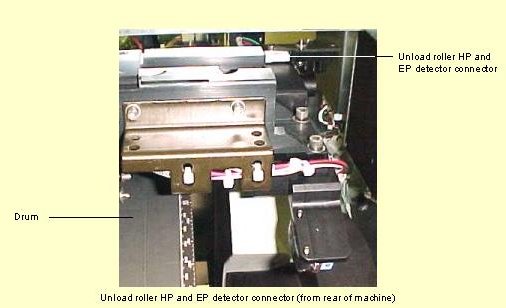
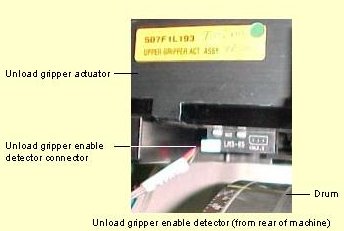
- From the rear of the machine, disconnect the following:
Note: Cut and remove plastic ties, as
required.
- , one each on
the right and left of the unload roller base.
- .
- .
- Detach the blue air tubes from the .
- From the front of the machine, remove the eight screws (four
on each side) that secure the unload roller assembly base to
the Optomec.
Note: The unload gripper/roller
assembly is mounted on pins.
- From the rear of the machine, carefully lift the unload
gripper/roller assembly off of the mounting pins and remove
it from the machine.
- Remove
the unload gripper actuator from the base.
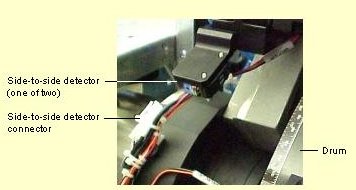
- Turn the base over and remove the two side-to-side detectors
from the base by removing the two small securing screws in
each one.
Note: If FCO 27651 -
Pressure/Vacuum Unit Assembly was implemented on your machine,
make sure the air regulator valve is completely open before
assembling the single-roller unload roller assembly.
Assembling the single-roller
unload roller assembly
Note: The roller is not attached to the roller
assembly when shipped. When unpacking the assembly, leave the
protective paper on the roller until installation is complete.
- On the side of the piston arm, release the locking screw and
remove the lock pin from the underside of the roller bracket
pin (shown below), and then lift the roller bracket pin out of the
bracket.
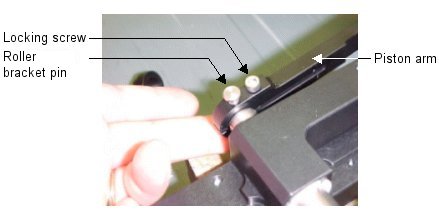
- Remove the piston arm from the assembly.
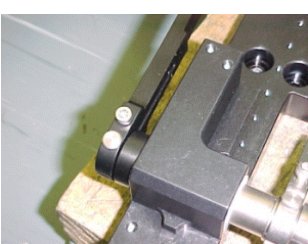
- Insert the upper roller bushing on the shaft (as shown below)
and attach it to the base of the assembly.
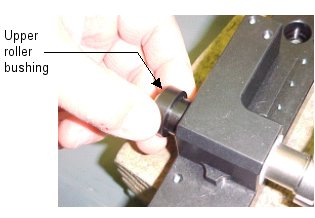
- Replace the piston arm, insert the securing pin and tighten
the locking screw (as shown in the picture below).
- Attach the roller to the assembly base, as follows:
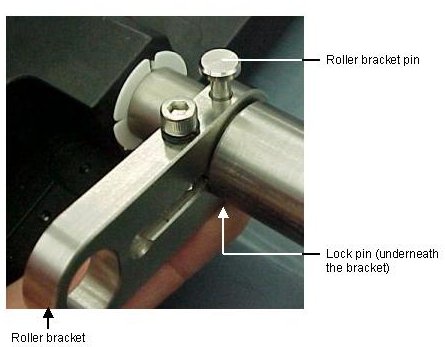
- On one side of the assembly base, remove the lock
pin from the underside of the roller bracket pin
(shown below), and lift the roller bracket
pin out of the bracket.
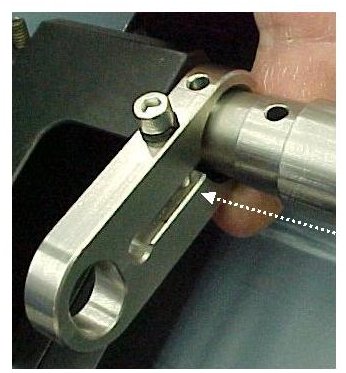
- Push the bracket toward the
outside of the assembly base, as shown below.
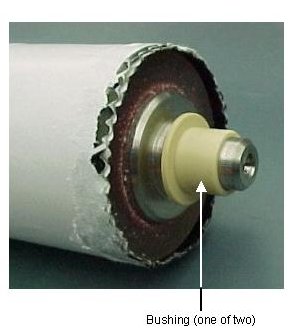
- Locate the two bushings and place one on each end of
the roller as shown below.
- On the other side of the assembly base, place one
end of the roller into the roller hole in the roller
bracket.
- Push the bracket you moved in step 5b toward the center of the assembly until the
roller is held firmly by both brackets.
- Replace the roller bracket pin and secure it in
place using the lock pin
you previously removed.
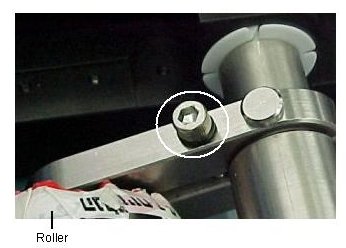
- Remove the Allan® screw from one of the
roller brackets (shown below), apply Loctite®
242 to the screw and place it back into the bracket.
Firmly tighten the screw. Repeat on the other side.
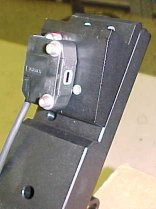
- Secure the two side-to-side detectors you previously removed
to the underside of the new assembly base, as shown below
(one of two).
Note: Be sure to apply Loctite® to each
screw.
- Turn the assembly over and place the gripper assembly on the
new, single-roller assembly. Verify that:
- The actuator is positioned properly on the new assembly—the
unload gripper piston should be on the same side of the
new assembly as the unload roller piston.
- The actuator is properly seated on the pins on both
sides of the new assembly.
- Secure the actuator to the assembly using the five screws
previously removed.
Note: Be sure to apply Loctite® to
each screw.
Installing the unload roller
assembly
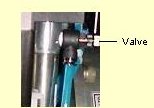
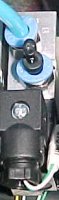
- From the right, side door, locate the unload roller air
valve (solenoid) in the manifold. If it does not
have two air-tube nipples as shown below, replace
the valve with the one included in the FCO kit.
Note: Connect the blue air tube to the
valve as shown below.
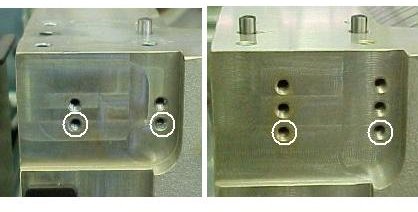
- From the front of the machine, install the new unload roller
piston by securing it to the two lowest securing holes on
the Optomec, as shown in the pictures below (use the screws
previously removed).
Notes: The Optomec may have only two
piston securing holes. If it does, secure the piston to
these two holes (the same holes from which the piston was
removed in step 6 in Removing
and dissembling the currently installed unload roller
assembly). Be sure to apply Loctite® to each of the
screws.
- From the rear of the machine, place the new unload roller
assembly on the Optomec and secure it in place using the
eight screws previously removed.
Notes: Make sure that the roller arm
fits properly inside the piston. Be sure to apply Loctite® to
each screw.
- From the front of the machine, connect the piston to the new
assembly using the pin previously removed.
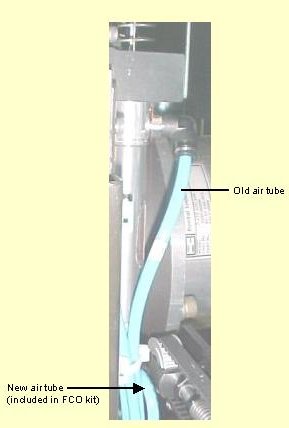
- Connect the blue air tube that is included in the FCO kit,
to the new air tube nipple on the unload roller air valve,
as shown below.
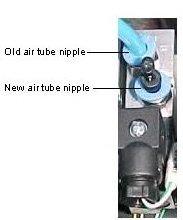
- Connect the two blue air tubes that are attached to the
unload roller air valve to the (connect the old blue tube to the upper
nipple, and the new tube to the lower nipple.
- From the rear of the machine, reconnect the following
connectors:
Note: Be sure to secure all wires with
plastic ties so that they will not touch any moving parts
during machine operation.
- Reattach the blue air tubes to the .
Note: Attach the tube labeled
"in" to the innermost nipple, and the tube labeled
"out" to the outermost nipple.
- Remove the protective wrapping from the new roller, and
clean the roller with a lint-free cloth.
- Open the wall air pressure unit valve. Be sure that the air
pressure level is between 6 and 8 bar.
Testing unload roller function
- From the right side of the machine, manually activate and
deactivate the unload roller air valve by pushing the red
button on the valve. Verify that:
- There is no air leakage from either end of the blue
air tubes connected to the .
- The roller is not pressed forcefully on the drum
(while the roller is on the drum, gently lift it to
verify that it only rests on the drum by virtue of
its own weight).
- Verify
that the HP detector is functioning properly. If it is
not, adjust it as required.
- Manually turn the drum and position the tail gripper slots
underneath the unload gripper pins.
- From the right side of the machine, manually activate and
deactivate the unload gripper air valve by pressing the red
button on the valve. Verify that:
- There is no air leakage from the blue air tubes
connected to the unload gripper piston.
- The unload gripper functions properly.
Note: In the event the old type vibration sensors
assembly is installed on your machine, you must readjust the vibration sensors
due to the extra weight
of the one piece roller.
- Close all doors and start up the Lotem.
- Verify side-to-side function, and adjust, as required.
- Load, expose and process several plates of different sizes.
Verify that there are no pressure marks, and that all is
working properly.
|


 Unload
roller piston with air tubes attached