

Home | Contact Us | Submit Troubleshooting Info | Search | Help
Output | Software Solutions | Proofing | Color, Screening and Calibration | Scanning | Digital Photography | Consumables | POS
Home | Contact Us | Submit Troubleshooting Info | Search | Help
Output | Software Solutions | Proofing | Color, Screening and Calibration | Scanning | Digital Photography | Consumables | POS
| Lotem 800 Installation Guide Hardware Installation |
Final leveling means that the platesetter is situated on a uniform horizontal plane at all four corners, and where the height of the platesetter is adjusted to enable smooth loading of the Cassette into the Cassette entrance of the platesetter. The final platesetter height is set according to the height of the Loading cassette trolley with the Cassette placed on it.
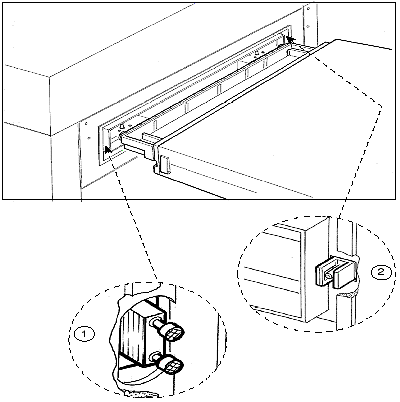
Figure 2-4: Inserting cassette into platesetter
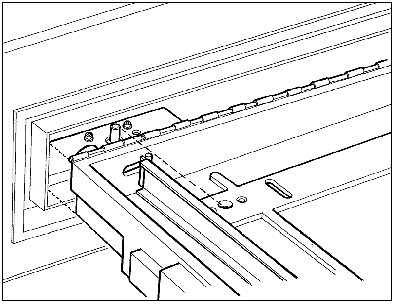
Figure 2-5: Aligning cassette
Note: If the customer will be working with two cassettes, you need to check that both cassettes can be properly inserted.
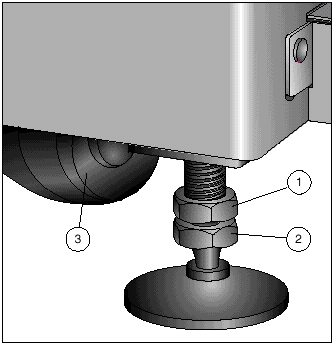
1 - locking nut
2 - adjusting nut
3 - platesetter wheel (make sure all 4 wheels do not touch the floor)
Figure 2-6: Adjusting leg height
Copyright (c)1998 Scitex Corporation Ltd. All rights reserved. Certain names, logos, designs, titles, words or phrases on this page may constitute trademarks, servicemarks, or tradenames of CreoScitex Corporation Ltd. or other entities which may be registered in certain jurisdictions.