

Home | Contact Us | Submit Troubleshooting Info | Search | Help
Output | Software Solutions | Proofing | Color, Screening and Calibration | Scanning | Digital Photography | Consumables | POS
Home | Contact Us | Submit Troubleshooting Info | Search | Help
Output | Software Solutions | Proofing | Color, Screening and Calibration | Scanning | Digital Photography | Consumables | POS
| Lotem 800 Installation Guide Hardware Installation |
Connecting Main Power Cable
For customers with 110 VAC line power:
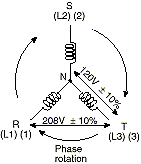
See the phase rotation diagram below.
For customers with 220 VAC line power (a step-down transformer is required):
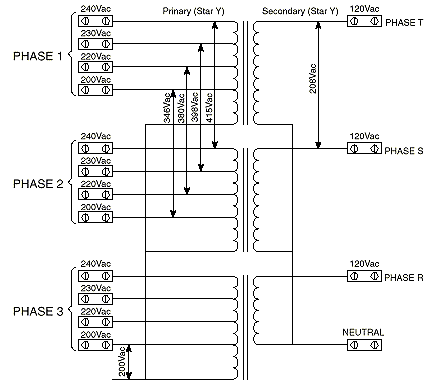
Figure 2-10: Transformer wiring
The following shows a schematic of the platesetter - transformer connection.
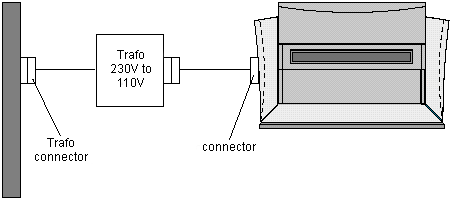
Figure 2-11: Platesetter - transformer connection
Copyright (c)1998 Scitex Corporation Ltd. All rights reserved. Certain names, logos, designs, titles, words or phrases on this page may constitute trademarks, servicemarks, or tradenames of CreoScitex Corporation Ltd. or other entities which may be registered in certain jurisdictions.