| |
Prerequisites
- Expose a customer’s reference plate.
- Use the Lotem
backup and restore utility to save the platesetter registry section
and database.
- Write down the TCP/IP number.
- Open the platesetter’s right side door.
- Quit the Lotem Controller software and the Service Shell client.
- Shut down the platesetter from the main power supply.
Replacing the boards, cables, and COM
- To gain access to the E-box, remove the screws securing it to the
mainframe and slightly rotate the E-box.
- Disconnect all the cables connected to the E-box, and then disconnect
the following boards and adapters from the E-box:
- CPU
- Communications card
- HASP dongle adapter
- COM adapter
- USB adapter
Important: Return all boards
to stock.
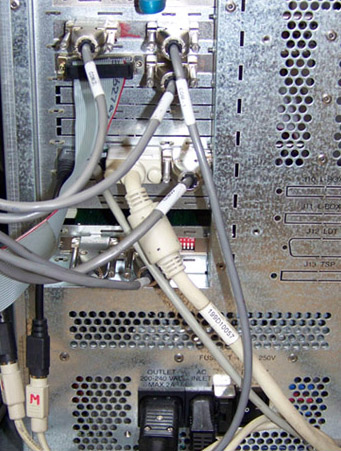
- Carefully extract the hard disk tray.
- Replace the existing CD-ROM with the DVD-RW supplied in this kit,
and then slide back the hard disk tray.
- Connect the USB adapter, COM adapter, and HASP adapter (all of which
are provided in this kit) to the CPU:
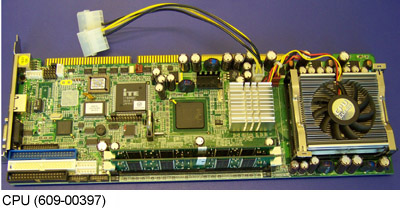
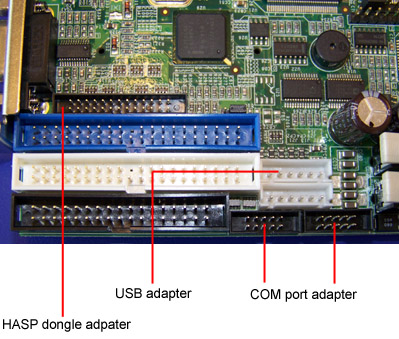
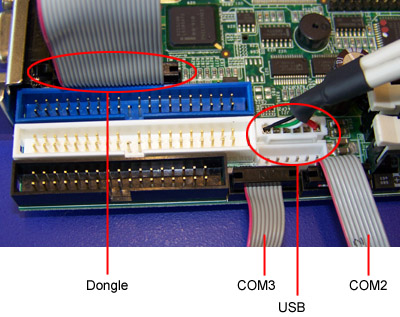
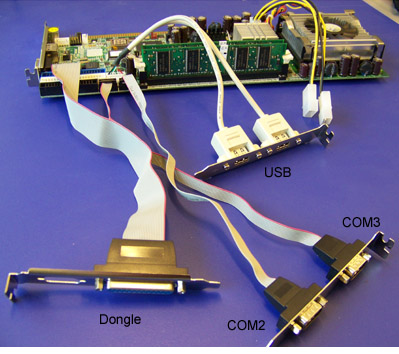
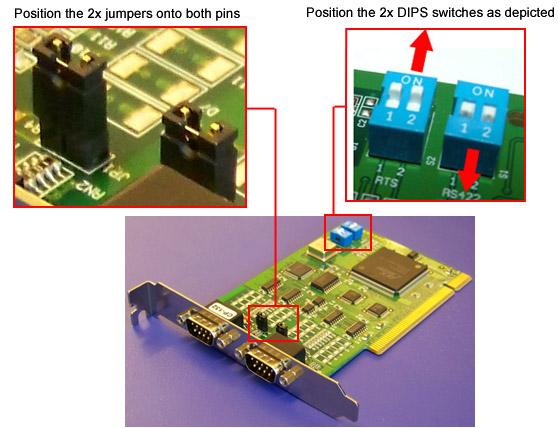
- Prepare the RS422 board (609-00523).
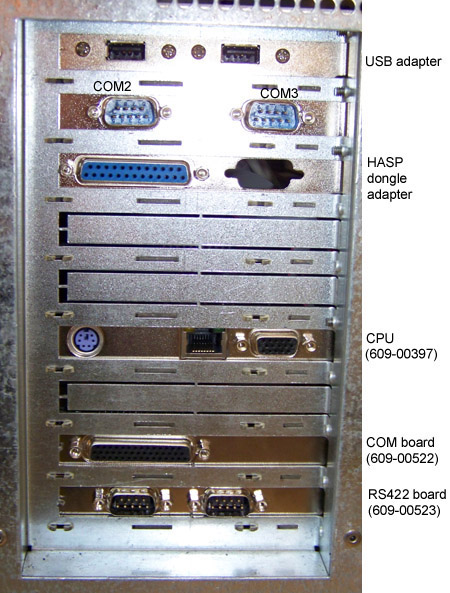
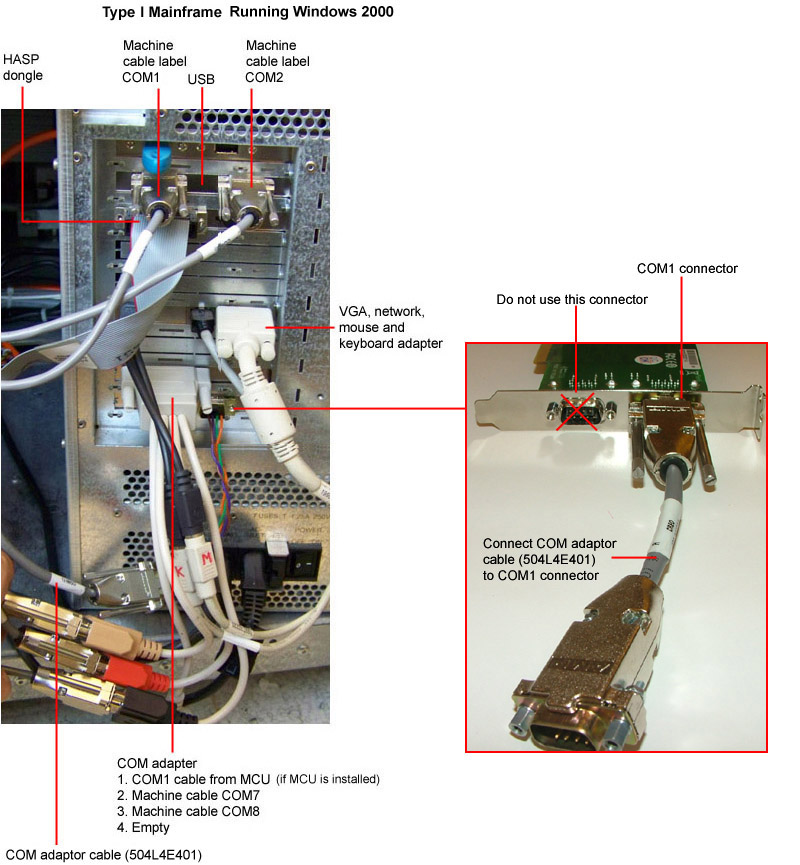
- Install the boards and adapters as depicted below:
- Connect the E-box cables according the type of mainframe shown below:
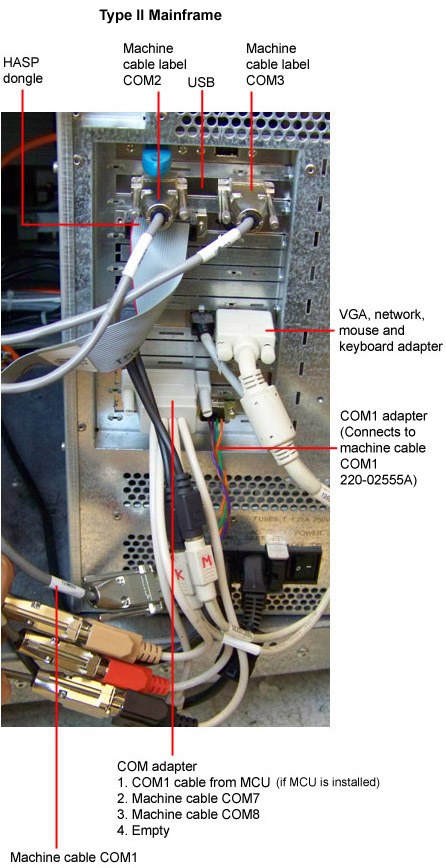
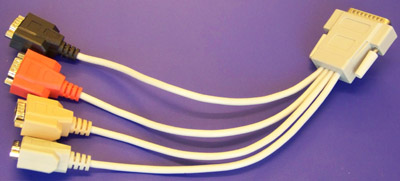
The COM adapter has four connections, labeled 1, 2, 3, and 4:
Installing the software
- Insert the BIOS diskette (651-00662A) into the diskette
drive and start the platesetter.
- In the DOS window, type 1.bat and
press enter on your keyboard. The default
BIOS setting uploads automatically.
Note: When the A:/
prompt appears on the monitor remove the BIOS diskette
from the diskette drive.
- Insert the Microsoft® Windows®
2000 image DVD - version 2.01 (651-00940A) into the DVD drive.
- Restart the platesetter by pressing Ctrl+Alt+Del
- Make sure the choice is set to 1, and press enter.
The image is automatically loaded.
- When the DVD has successfully loaded, remove it from the DVD drive.
- Press Ctrl+Alt+Del on your keyboard
to restart the platesetter system. Wait a few moments for Windows 2000
to load. According to the devices detected, Windows 2000 may have to
perform an additional auto-restart.
- Reset the TCP/IP address by doing the following:
- From the Start menu, select Settings
> Control Panel.
- Double-click Network and Dial-up Connections.
- Double-click Local Area Connections.
- Click Properties.
- Double-click Internet Protocol (TCP/IP).
Or
Select Internet Protocol (TCP/IP) and click Properties
button.
- Click Use the following IP address and enter
the desired
TCP/IP address.
- Click OK, and then click OK
again to exit the dialog box.
- Restore the registry and database backed up in the prerequisites section.
- Install the Lotem 800 II controller software version 3.82.12.
- Start the Lotem Controller software.
|

