|
Product |
|
Magnus 800 platesetter
|
|
Background |
|
This procedure describes how to remove and replace
the plate holders.
The four plate holders secure the plate to be punched. The plate holders
are divided into two pairs:
- One outer pair for large plates.
- One inner pair for small (GTO) plates.
Note: If the customer
does not use GTO plates, then there is a possibility that only one outer
pair of plate holders will be present on the platesetter.
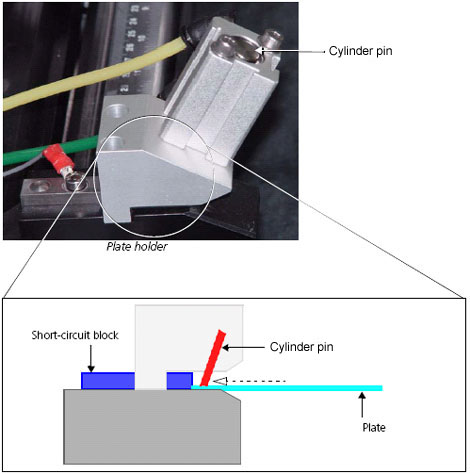
Only two plate holders secure the plate at any one time.
- The plate is fed into a pair of plate holders.
- When the plate simultaneously touches both short-circuit blocks, a
closed circuit is created.
- The closed circuit activates the compressed air.
- The compressed air pushes the cylinder, at an angle, onto the plate
and secures it in place.
|
|
Procedure |
|
Removing the plate holders
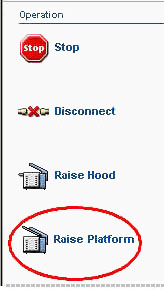
- In Magnus Controller click Raise Platform
to raise the platesetter loading platform:
- Turn off the air supply leading to the platesetter.
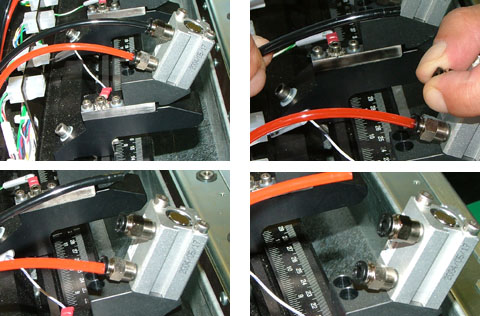
- Remove the two air tubes from the defective plate holder.
Important: Make a note
of which color air tubes connect to which air holes. Generally, the
orange or red air tubes connect to the lower air hole and retract the
cylinder, whereas the black air tubes connect to the upper air hole
and extend the cylinder.
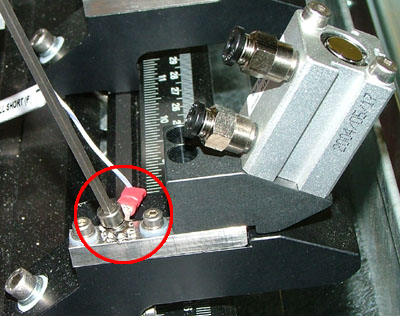
- Use a 3-mm hex key to disconnect the short wire from the short-circuit
block. Be careful not to drop the short wire screw and locking washer
into the platesetter:
- Use a pencil to mark the position of the plate holder on the punch
beam.
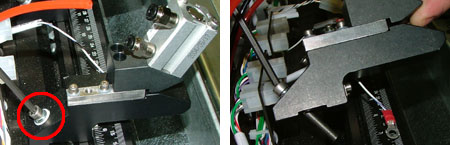
- Use a 5-mm hex key to remove the screw securing the plate holder to
the punch beam:
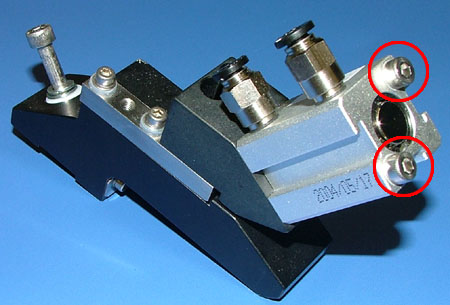
- If required, use a 3-mm hex key to remove the two screws securing
the cylinder to the plate holder:
Installing the plate holders
Important: Unless
otherwise stated, coat all screws in Loctite® 242.
- Position the plate holder on the punch beam according to the pencil
marks (denoting the position of the original plate holder).
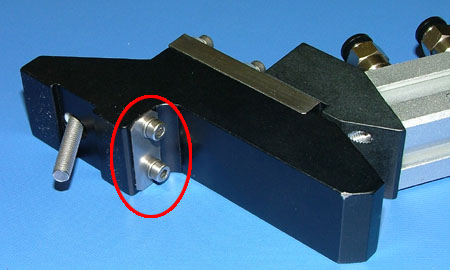
Important: The inner plate
holders differ slightly from the outer plate holders. An inner plate
holder can be identified by the spacers attached to their underside:
Make sure you install the correct type of plate holder onto the correct
space on the punch beam—inner plate holders should be positioned
between the outer plate holders.
- Use a 5-mm hex key to insert the screw that secures the plate holder
to the punch beam.
- Use a 3-mm hex key to secure the short wire to the short-circuit block.
- Reinstall the two air tubes into the plate holder.
Important: Make sure you
connect the correct air tube to the correct air hole. Generally, the
orange or red air tubes connect to the lower air hole and retract the
cylinder, whereas the black air tubes connect to the upper air hole
and extend the cylinder.
- Reopen the air supply leading to the platesetter.
|
|
Test |
|
- In Magnus Controller load and unload several plates of different
size and thickness.
- Make sure the plate holders are correctly holding the plates.
|
|
Technical contact(s) |
|
Content owner: Itai Peperovich
See the Escalation page for escalation contacts. |
Date submitted |
|
11 Jan 2005
|

