Procedure |
|
Before you begin:
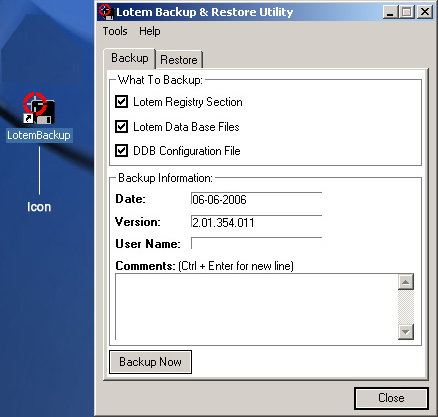
- If the version and updated registry are not available, save the registry
and database settings on a floppy diskette by clicking the LotemBackup
icon on the desktop, as described in Backing Up the Registry and Database.
- Exit any applications.
To set the monitor resolution:
- On the desktop, right-click and select Properties.
- In the Display Properties dialog box, click the Desktop tab.
- In the Background list, select the relevant background with
the correct resolution for your workflow:
- Internal TIFF Front End: Select KodakWallpaperPC1024x768
- Brisque or external TIFF Front End: Select KodakWallpaperPC800x600
- Click Apply, and then click the Settings tab.
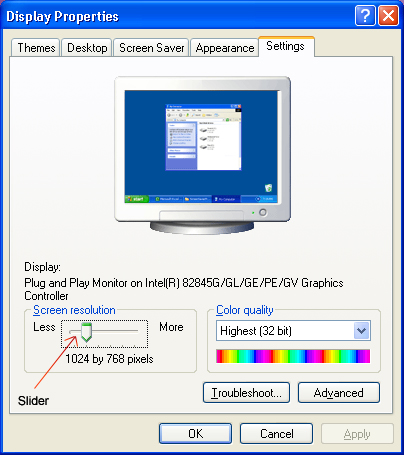
- On the Settings tab, in the Screen Resolution area,
move the slider to the same resolution that you selected in the previous
step, and click OK.
To install ThermoFlex Controller software:
- Insert the version 2.01.354.11 CD in the CD drive.
- On the Welcome screen of the installation wizard, click Next.
- On the User Info screen, click Next.
- On the Machine Type screen, select the relevant name of the device
type and then click Next.
- ThermoFlex Mid II
- ThermoFlex Narrow
Note: If the configuration includes Brisque, change the type
of device name to one of the following, as required:
- ThermoFlex Mid II: Change to LotemFlex4048
- ThermoFlex Narrow: Change to LotemFlex2630
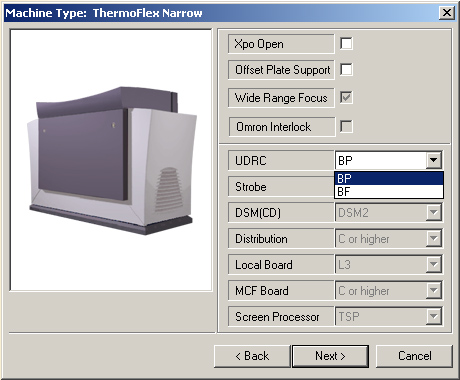
- On the second Machine Type screen, the configuration details of your
device appear.
The following three options are not set automatically. Set them according
to your configuration, and then click Next.
- Xpo Open: To verify that the device configuration workflow
is internal TIFF Front End, confirm that the platesetter E-box includes
a TSP board.
- Offset Plate Support: To verify that the device is offset,
confirm that the platesetter drum has registration pins.
- UDRC: If you have external venting, select BP. If
not, select BF.
Note: If you perform a field upgrade and the registry does not
include the UDRC vacuum sensor (which indicates insufficient vacuum),
in the registry, under Machine, select UDRC Installed
and set the Other parameter to 4.
- On the Start Copying Files screen, the details that you selected appear.
To start copying files, click Next
Attention: Do not click Cancel. Wait for the files to be
copied.
- On the Install Wizard Complete screen, click Next.
Note: Upon startup, it takes two to five minutes for ThermoFlex Controller to
appear.
|

