Home | Contact Us | Submit Troubleshooting Info | Search | Help


    Output | Software Solutions | Proofing | Color, Screening and Calibration | Scanning | Digital Photography | Consumables | POS


Ripro Backup (Legato) TIC - Installation Guide

Previous Page | ToC | Next Page

Working in the Networker Environment
NwRecover

General

To restore (recover) backed up files/directories/dataVolumes:

  1. Access the NwRecover application in the same way as the NWAdmin application was accessed. Refer to Accessing NetWorker in Networker Installation and Configuration.

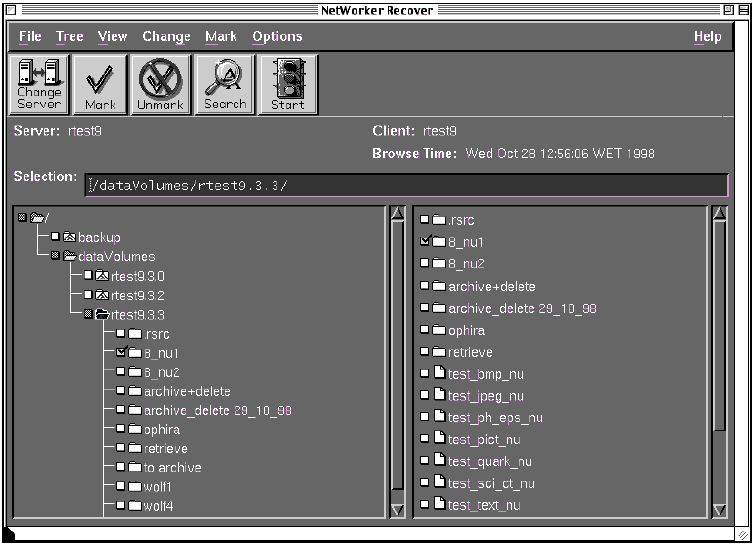
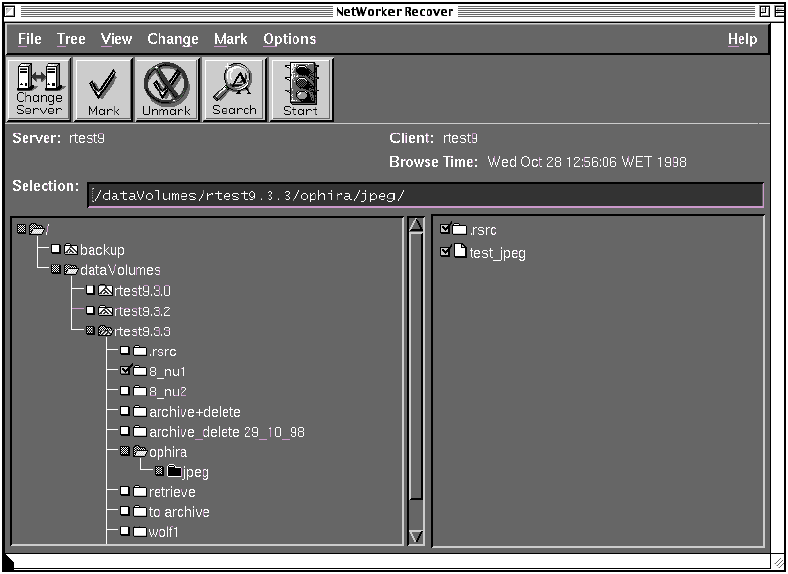
The NwRecover dialog window is now displayed.

  1. Choose the items for recovery, then select the white square and double click to mark it or choose Mark from the menu bar. The Selection text field displays the selected path.

Note: Marking a data volume or directory marks all files below it. This is not recommended due to hidden files such as .rsrc, .def, .rfs. Only folders within main dataVolumes or Jobs folders should be marked.

  1. Select Start to execute the recover process.

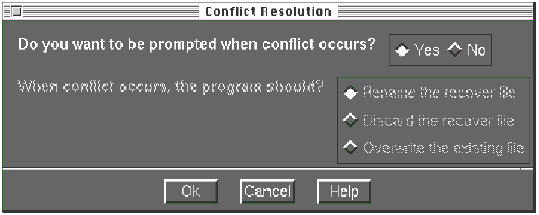
  1. When Start is selected the Conflict Resolution dialog window opens.

  1. Leave the default settings or change them as required and select OK to proceed.

Changing time

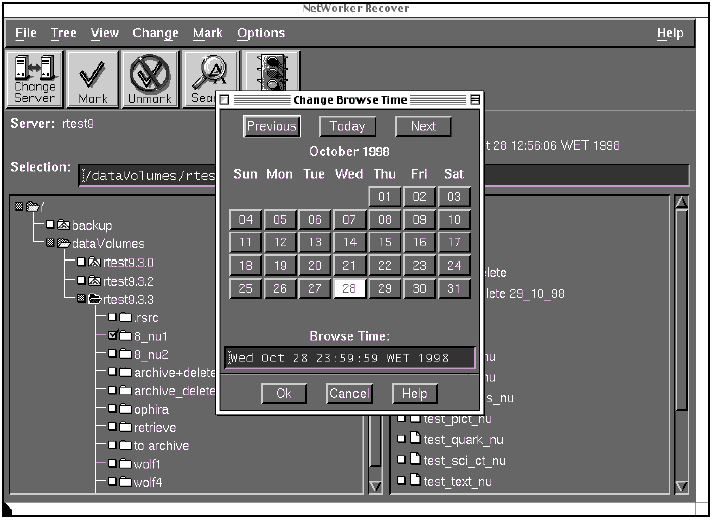
  1. To change the items for recovery to an earlier version, for example, choose Change -> Browse Time from the menu bar.

This will restore a Full True Image resembling the specific time selected.

  1. Select the date required from the calendar and select OK.

Changing Destination

This may be needed if original dataVolumes do not have enough capacity for recovery.

  1. To change the destination for the recovered items, choose Options -> Relocate from the menu bar.
  2. Type in the new destination in the text field and select OK.

Recovering dataVolumes

Note: Recovery of entire dataVolumes level is not recommended.

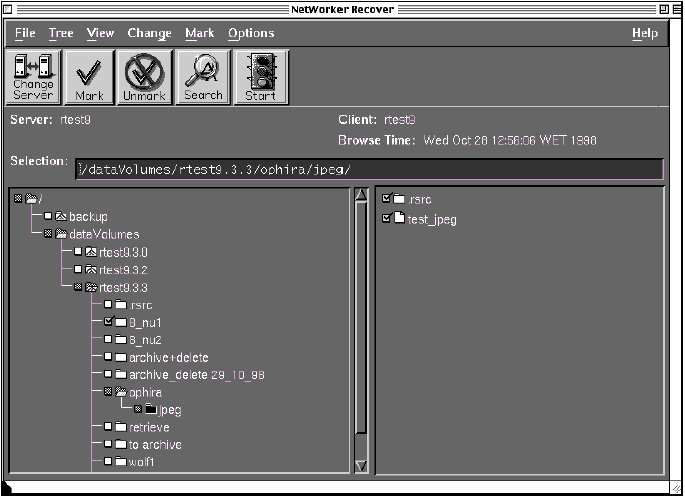
  1. The following icon marks file systems. Select the file system for recovery.

  1. Select Start to execute the recover process.

Recovering Mac Files

Macintosh files can be recovered by recovering both the file and its resource file (.rsrc).

  1. Expand the dataVolume until you reach the level where the specific file is displayed.
  2. Select the file and open the .rsrc directory on the same level.
    Select the file of the same name under the .rsrc directory.

  1. To change the destination for the recovered files, choose Options-> Relocate from the menu bar.
  2. Type in a new temporary destination to a different path or a different data volume in the text field and select OK.
  3. Select Start to execute the recover process.

Recovering Whisper files/pages/jobs

Whisper files can be recovered as complete jobs (.j) or pages (.p), or as individual files (CT, LW).

  1. To recover Whisper jobs, open /dataVolumes/ripro1.1.0/jobs and select those jobs which have .j as a suffix.
  2. To recover Whisper pages, open a job and select pages under the job which have .p as a suffix.
  3. To recover whisper files, open the page and select items that have CT or LW as a suffix.

  1. Select Start to execute the recover process.
When selecting individual files, either CT or LW as defined in the .rfs file and in order to retain the links between the files on a page after recovery, a new page layout must be performed (reset page) on the Whisper.

Previous Page | ToC | Next Page


    Copyright © 2005 Creo Inc. All rights reserved. Confidential. Back to top.