Background
|
|
The objective of the resolution test is to calibrate the optical head
so that the distance between two adjacent laser dots corresponds with
the file resolution. The test is performed for a resolution of 100 dpm,
and is repeated for other resolutions that the customer intends to use.
The resolution test results do not depend on plate type, size or thickness.
Therefore, this test can be performed on any plate that the customer uses.
|
Procedure
|
|
This procedure contains two stages, which
should be repeated for each resolution that the customer uses:
Testing resolution
- Load a test plate.
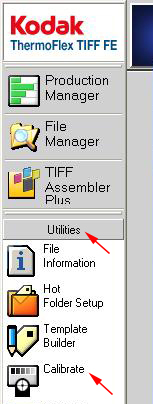
- In TIFF FE, from the Launch Pad, select Utilities > Calibrate.
- In the Calibration Type box, select Resolution.
TIFF FE dialog box:
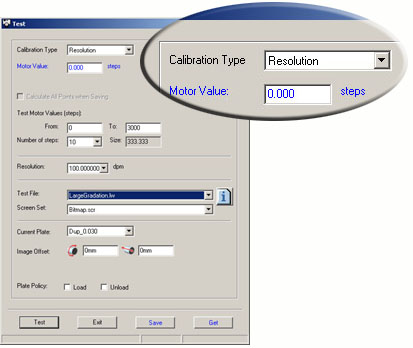
- In the Current Plate list, select the Plate that you
are using.
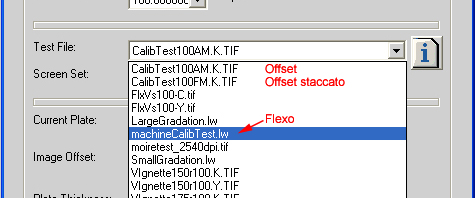
- Select the relevant test file according to the type of plate:
- Flexo—select machineCalibTest.lw
- Offset—select CalibTest100AM.K.TIF
- Offset Staccato—select CalibTest100FM.K.TIF
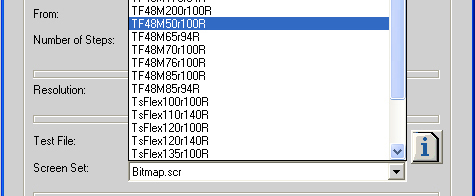
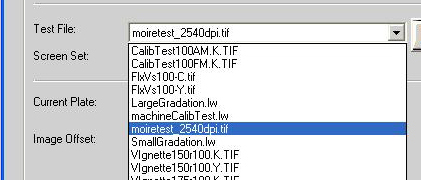
Note: If your plate type is Flexo, you must also select the relevant
screenset. For example:
- Define the Image offset values:
- Horizontal offset—The value around the drum in mm
- Vertical offset—The value along the drum in mm
If you use the same plate for several tests, define different offset
values for each test.
Note: The (0,0) offset coordinate is located at the upper-left
corner of the plate.
- In the Test Resolution list, select the resolution value.
Note: If the customer plans to expose in several different resolutions,
it is recommended to repeat the test for all values in the Test Resolution
list.
Note: The resolution calibration is performed four times, during
which steps 8 and 9 are adjusted each time to fine-tune the resolution,
according to the table in step 8.
- In the Test Motor Values (steps) area, in the From and
To boxes, define the motor values' range according to the table.
Note: The recommended range for the first test is:
- Flexo (lens 1:2)—between 700 and 1200
- Offset (lens 1:3)—between 1400 and 1900
| |
From/To range |
Number
of steps |
| 1st test (coarse) |
Lens 1:2: 700–1200
Lens 1:3: 1400–1900 |
11 |
| 2nd test (coarse) |
results of 1st test ±100 |
11 |
| 3rd test (fine) |
results of 2st test ±50 |
11 |
| 4th test (fine) |
results of 3st test ±20 |
5 |
Optional: To calculate the results for a resolution of 94.488,
add the following value to the results of the 4th test:
- Flexo (lens 1:2)—Add 115
- Offset (lens 1:3)—Add 170
- In the Number of Steps list, type the required number of exposures
according to the table in step 8.
- Click Test. The application performs several exposures according
to the settings.
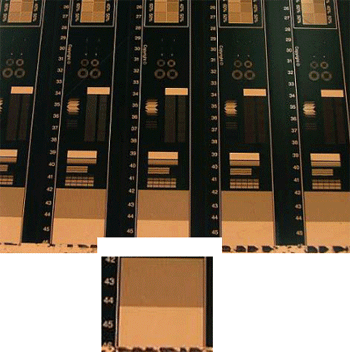
- Visually examine the results. The best coarse resolution (for 1st
and 2nd tests) is the one without artifacts (such as slashes) in the
50% dot area.
- To fine-tune the resolution perform the 3rd and 4th tests using the
values in the table in step 8.
Note: For flexo plates only, during the 3rd and 4th tests, in
the Test File list, select the Moire test file. Note that the
Moire test file is available only for resolutions of 2400 or 2540.
Selecting the correct
resolution
- Visually examine the results and select the value for the results
that have no vertical lines, slashes, or other artifacts.
- For offset plates only, using a microscope, examine
the vertical 2P section of the test file. Look for the solid
(100%) strips that are most identical, with equal widths of 2 pixels.
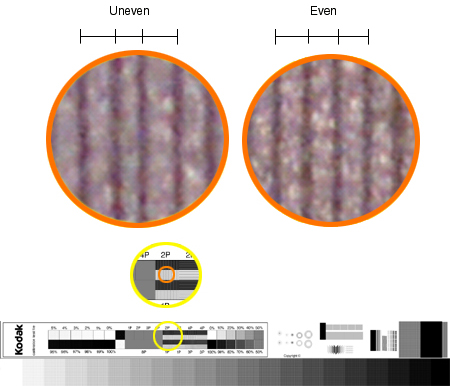
- Differences in line spacing indicate incorrect resolution.
- Even line spacing indicates correct resolution.
- In the ThermoFlex Controller hardware tree, browse to Database
and right-click Res Motor.
- In the Res Motor dialog box, type the value of the stepper motor for
the optimal results of the resolution test.
- Repeat the test for other resolutions that the customer plans to use.
|

