Home | Contact Us | Submit Troubleshooting Info | Search | Help


    Output | Software Solutions | Proofing | Color, Screening and Calibration | Scanning | Digital Photography | Consumables | POS


Upgrading from Magnus 400 II S speed to Magnus 400 II F speed


Product


Kodak® Magnus™ 400 II (LDA) family


Background


This procedure describes how to upgrade a Magnus 400 II platesetter from a Magnus 400 II S-speed, 32-beam configuration to a Magnus 400 F-speed, 36-beam configuration.

The following table describes the head type configurations for use on a Magnus 400 II platesetter.

Head Type Description
Part Number
F type

36 exposing diodes

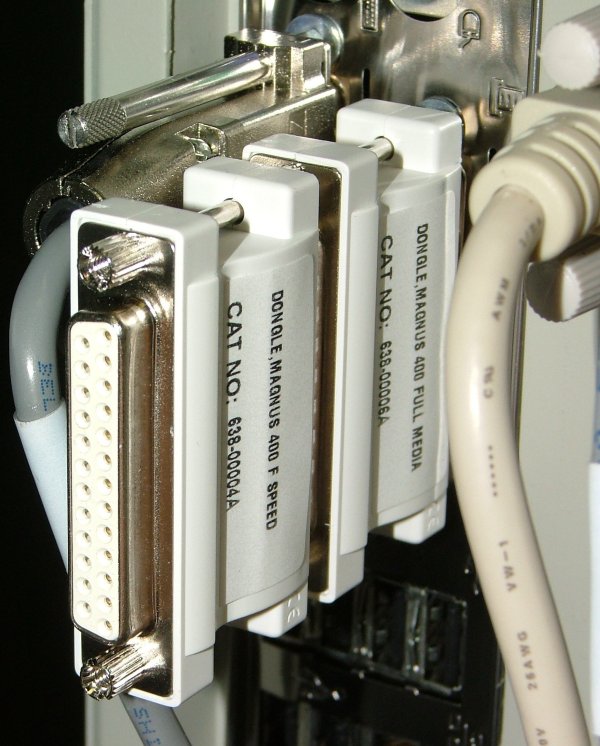
This head will be mounted on a Magnus F type configuration and requires a dongle (part number 638-00004A).

514-00248A
S type

32 exposing diodes

This head will be mounted on a Magnus S type configuration; no dongle is required.

514-00252A
   

Requirements

 
Part Number Description
Quantity
638-00004A
Dongle for Magnus 400 F speed key
1
514-00248A IALDA head type F
36 + pack
1
651-00902A Magnus 400 Controller version 1.05.394 CD
1

Note: Two individuals are required to remove and install the LDA head assembly.


Procedure

 
  1. Save the non-default values.
    1. On the Operations toolbar, select Utilities > Hardware.
    2. In the Hardware window, click Save, and select Non Default Values.
    3. In the Save Non Default Values dialog box, browse to the location where you want to save the non-default values, and click Save.
      Note: When saving the non-default values, include the date in the file name.
  2. Save a list of the spare diodes for reference purposes.
  3. Open the rear door, and turn off the platesetter.
  4. Replace the LDA head.
  5. Insert the Magnus 400 F-speed key dongle.


  6. Turn on the platesetter.
  7. If the Magnus 400 Controller 1.05.394 software is installed on the platesetter, update the registry:
    1. In the Hardware tree, go to Expose System/Laser System. Right-click Laser Group, and select Properties.
    2. In the Properties: Laser Group dialog box, change the value of following parameters, and click Apply.
      • Last Laser: Change from 31 to 41
      • Last Active Laser: Change from 31 to 41
    3. Go to Others. Right-click Magnus400, and select Properties.
    4. In the Properties: Magnus400 dialog box, double-click +MACHINE.
    5. In the Properties: Magnus400\MACHINE dialog box, change the value of the Type parameter from Magnus 400S to Magnus 400F, and click Apply.
    6. Go to Others. Right-click Magnus400, and select Properties.
    7. In the Properties: Magnus400 dialog box, double-click +EXPOSE.
    8. In the Properties: Magnus400\EXPOSE dialog box, change the value of the Default Last Laser Number parameter from 31 to 41, and click Apply.
  8. On the desktop, rename the Magnus 400 S icon to Magnus 400 F.
  9. If version 1.05.394 is not installed, insert the Magnus 400 Controller 1.05.394 CD into the CD-ROM drive and start the software installation.
    Note: For installation instructions, see the Magnus 400 Controller 1.05.394 Release Notes.
  10. Load the non-default values.
  11. Update the spare diode information, accordingly.

Test


Run the following tests:


Technical contact
 

Content owner: Alon Davidor
See the Escalation page for escalation contacts.

Date submitted
 

11 Jun 2008


    Copyright © 2005 Creo Inc. All rights reserved. Confidential. Back to top.